'79 F-150 build-up
Moderator: Club Officers
-
VerticalTRX
- Club President
- Posts: 757
- Joined: Wed Oct 26, 2005 12:51 pm
- Location: Southwest VA
- Contact:
-
VerticalTRX
- Club President
- Posts: 757
- Joined: Wed Oct 26, 2005 12:51 pm
- Location: Southwest VA
- Contact:
GOT THE NEW MOTOR FIRED UP, HELL YEAH!!
So saturday night we pulled the truck out of the shop in preperation for the initial firing and break-in. Since I didn't have the front clip on by this point (nor any of the accessories on the motor), we had to rig every thing up as if we were starting it on an engine stand. Clamped the solinoid to the front coil bucket, ran all the grounds and cab power wire, connected everything to the battery (which was connected to a charger since theres not alt. yet), and lastly had a wire running directly from the battery to the HEI dizzy. The plumbing was similarly rigged, had a garden hose adapter that goes on the water pump intake, and a hose setup that discharges from the t-stat housing.
So by this time its about 9pm, everything seems to be ready to go, water and oiling systems primed, carb primed etc, go to fire it up and it wont start. Backfiring, blue flames out the headers, etc. After fiddling with several things for a while we discover that we have the timing 180* off, lol. One of the most common mistakes when starting a new engine and we completely overlooked it, oh well.
Get that fixed, and the thing fires right off. Ran it for about 30seconds and realized theres a huge spark show coming from inside the bellhousing!! Shut the motor down (which is bad durring break-in), and come to find out that the auto tranny dust shield that I used has a small hump in it thats contacting the flywheel, some short work and its fixed, start it up and its running again.
Runs about 3min more and the damn water hose blows off the pump due to the very high water pressure we have at the shop. Shut everything down real fast, get it fixed in about 30sec and its off running again. By this time were hopping that we don't have to shut it down again or the cam will be junk. Everything ran good for the rest of the 20min break in, now its time to hear this bad boy idle...
Idle it down to about 400rpms (which is about where I want it on the trail) and damn this thing thumps. Its got a tiny bit of a lope but nothing too extreme, should be ideal for crawling. Throttle responce is awsome too, I can't wait to wheel this motor!
After all is done we notice the paint hadn't been burnt of the #5 and 6 header tubes...haha, the damn thing was only running on 6 cylinders...no wonder it sounded like it had a little miss. Not sure what caused it, more than likely they were bad plugs or wires.
We have to get that little ignition problem fixed, add an adjustable vacuum advance and manual advance kit to the dizzy, find the Q-jet we want to run and she'll be ready to go.
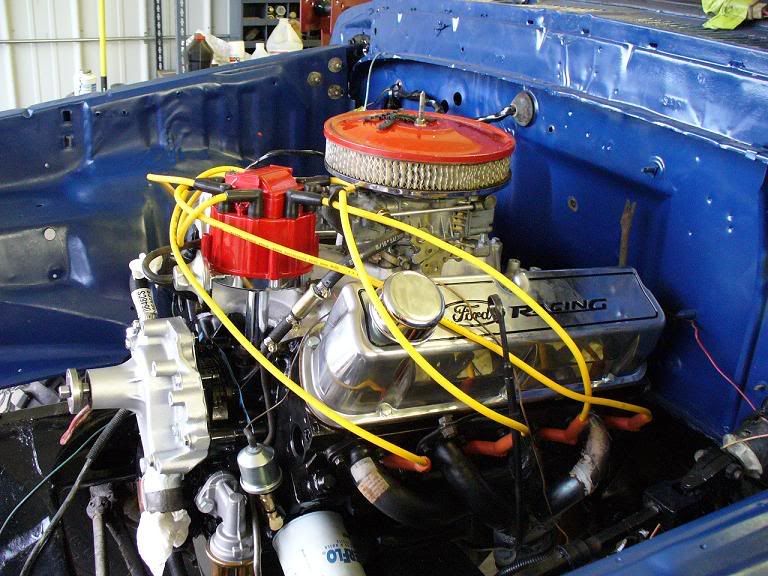
Now on to some pics:
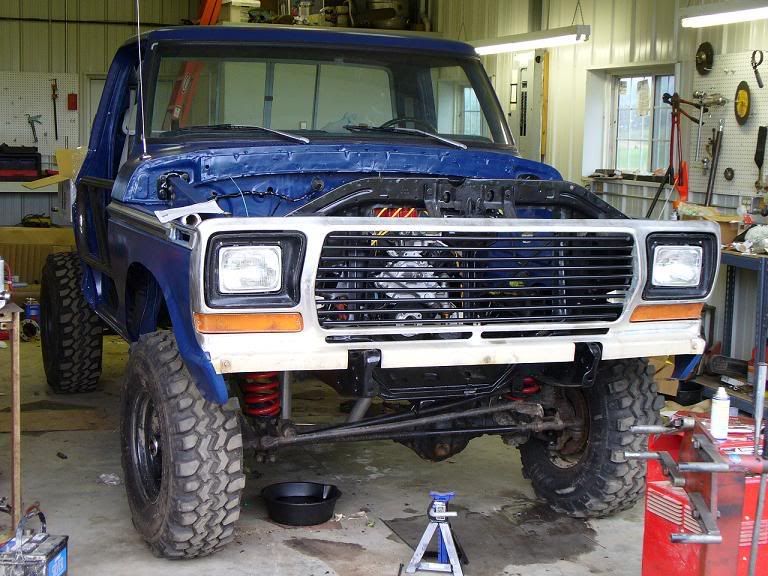
Motor after break-in, (don't laugh at my air cleaner, its temporary)
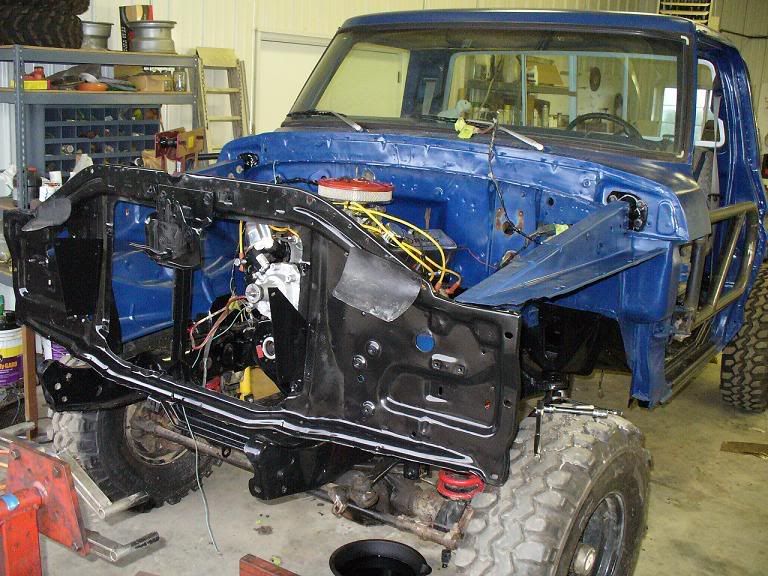
Radiator support and inner fenders on:
Clutch linkage setup:
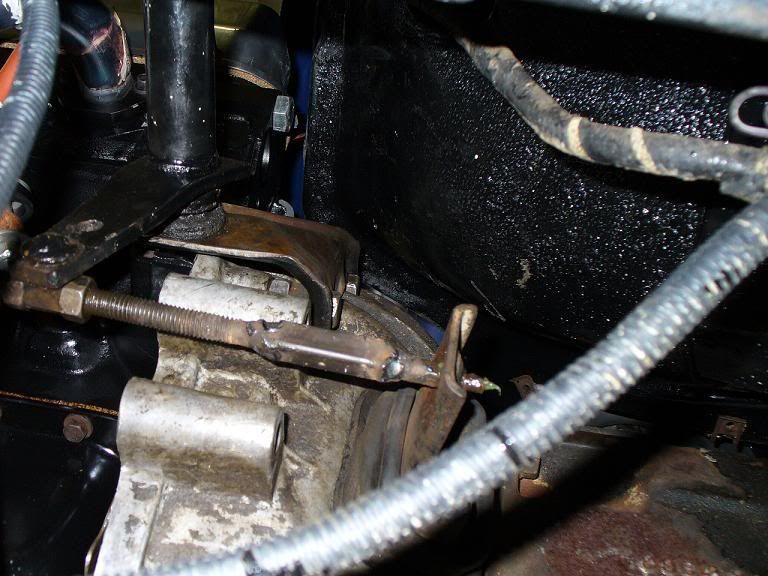
The clutch linkage isn't quite how I want it, but I think it will work for now. The fact that this truck was never available with a 351w and the fact that I had to use a hyd. clutch bellhousing and fork with manual linkages were all things that were working against me. Some grinding here and there, lengthend out the adjustment rod, and drilled the clutch fork for the rod and everything seems to be working ok. Only problem I forsee is that the clutch fork is a good bit shorter than the stock one, causing the release ratio to be pretty quick. I might have to fix this later.
Next weekend will finish the front clip, do a rear disc setup on the 9", maybe start fabbing my front bumper. I need to go through the front axle and install a lock-right in it, but I think I'll wait till its drivable and just do that in the parking lot of my apt. here in b'burg.
I have a 350mb video file of the engine start-up break in, idleing etc, but I can't figure out how to edit it down to about 2-3min where it'd be postable, anyone know?
So saturday night we pulled the truck out of the shop in preperation for the initial firing and break-in. Since I didn't have the front clip on by this point (nor any of the accessories on the motor), we had to rig every thing up as if we were starting it on an engine stand. Clamped the solinoid to the front coil bucket, ran all the grounds and cab power wire, connected everything to the battery (which was connected to a charger since theres not alt. yet), and lastly had a wire running directly from the battery to the HEI dizzy. The plumbing was similarly rigged, had a garden hose adapter that goes on the water pump intake, and a hose setup that discharges from the t-stat housing.
So by this time its about 9pm, everything seems to be ready to go, water and oiling systems primed, carb primed etc, go to fire it up and it wont start. Backfiring, blue flames out the headers, etc. After fiddling with several things for a while we discover that we have the timing 180* off, lol. One of the most common mistakes when starting a new engine and we completely overlooked it, oh well.
Get that fixed, and the thing fires right off. Ran it for about 30seconds and realized theres a huge spark show coming from inside the bellhousing!! Shut the motor down (which is bad durring break-in), and come to find out that the auto tranny dust shield that I used has a small hump in it thats contacting the flywheel, some short work and its fixed, start it up and its running again.
Runs about 3min more and the damn water hose blows off the pump due to the very high water pressure we have at the shop. Shut everything down real fast, get it fixed in about 30sec and its off running again. By this time were hopping that we don't have to shut it down again or the cam will be junk. Everything ran good for the rest of the 20min break in, now its time to hear this bad boy idle...
Idle it down to about 400rpms (which is about where I want it on the trail) and damn this thing thumps. Its got a tiny bit of a lope but nothing too extreme, should be ideal for crawling. Throttle responce is awsome too, I can't wait to wheel this motor!
After all is done we notice the paint hadn't been burnt of the #5 and 6 header tubes...haha, the damn thing was only running on 6 cylinders...no wonder it sounded like it had a little miss. Not sure what caused it, more than likely they were bad plugs or wires.
We have to get that little ignition problem fixed, add an adjustable vacuum advance and manual advance kit to the dizzy, find the Q-jet we want to run and she'll be ready to go.
Now on to some pics:
Motor after break-in, (don't laugh at my air cleaner, its temporary)
Radiator support and inner fenders on:
Clutch linkage setup:
The clutch linkage isn't quite how I want it, but I think it will work for now. The fact that this truck was never available with a 351w and the fact that I had to use a hyd. clutch bellhousing and fork with manual linkages were all things that were working against me. Some grinding here and there, lengthend out the adjustment rod, and drilled the clutch fork for the rod and everything seems to be working ok. Only problem I forsee is that the clutch fork is a good bit shorter than the stock one, causing the release ratio to be pretty quick. I might have to fix this later.
Next weekend will finish the front clip, do a rear disc setup on the 9", maybe start fabbing my front bumper. I need to go through the front axle and install a lock-right in it, but I think I'll wait till its drivable and just do that in the parking lot of my apt. here in b'burg.
I have a 350mb video file of the engine start-up break in, idleing etc, but I can't figure out how to edit it down to about 2-3min where it'd be postable, anyone know?
'79 F-150
'49 CJ-3A
'49 CJ-3A
-
VerticalTRX
- Club President
- Posts: 757
- Joined: Wed Oct 26, 2005 12:51 pm
- Location: Southwest VA
- Contact:
-
VerticalTRX
- Club President
- Posts: 757
- Joined: Wed Oct 26, 2005 12:51 pm
- Location: Southwest VA
- Contact:
Got a good bit done this weekend, although not nearly as much as I needed to (trying to get it done by Oct. 8th for the potts trip). The rest of the front clip is on, got the D44 'rebuilt', and we built a new radius arm brake line setup that provides unlimited travel without brake lines interfering. My buddy Terrence was the one who came up with this idea and I have to admit its pretty bitchin'.

First we flatted the stock axle brake hose mount and drilled a 7/16" hole. This allowed us to put a stock '79 F-150 rear hose in the place of the original one:

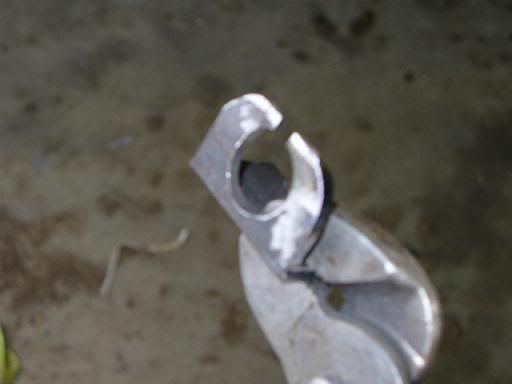
This hose runs over to the driver side radius arm and is attached to the arm with a small bracket. I made two of these brackets for each end of the radius arm, they are pretty simple angle brackets, 3/4" hole and a small slot to allow the hard line to pass through:
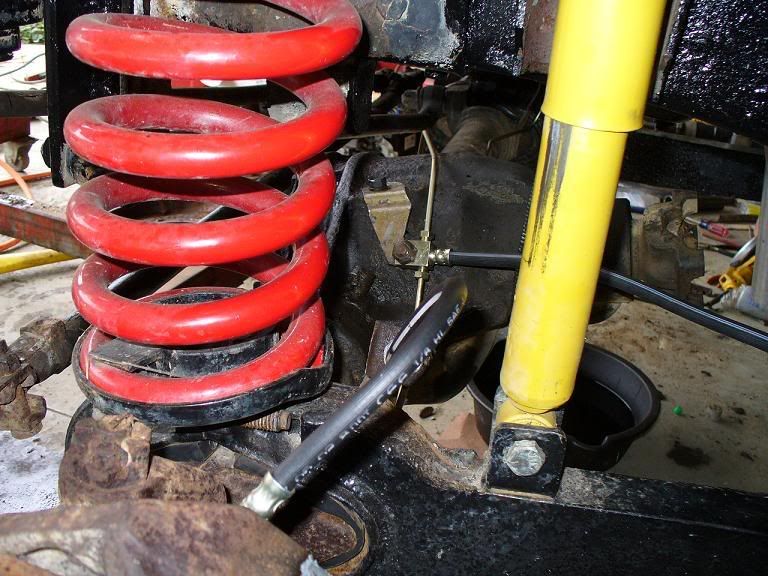
The hose that runs from the front axle attaches to the rad. arm with the little bracket and a large zip tie just to take out some extra play. Hard line is run down the radius arm to another bracket:

At the frame end it simply loops up to another bracket on the frame, then a hard line runs up to the proportioning valve:
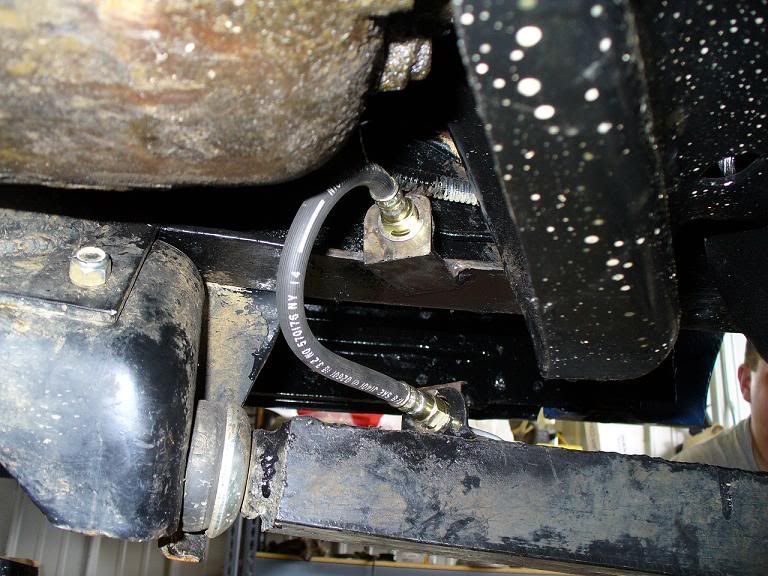
That little short hose is Advance Auto P/N H38378. If anyone knows what vehicle application that goes to I'd like to know. It'd make getting that hose much easier in the future if I blow one on the trail or something.
Here’s a pic of the truck as it sits:
Things left to do:
-finish wiring, including installing a relay to run HEI
-new brake shoes and bleeder screws for rear brakes (temporary until I have time to do rear discs)
-put latches on tube doors
-minor interior work (screw down tunnel cover, shifter boots, etc)
-paint and install the hood and other small parts
-build a front bumper
-rebuild and install Q-jet
-figure out whats wrong with #5 and 6 cylinders in the 351w (probably needs the rockers shimmed a little)
Overall theres nothing too huge left to do, but all these dang small things sure do add up.
First we flatted the stock axle brake hose mount and drilled a 7/16" hole. This allowed us to put a stock '79 F-150 rear hose in the place of the original one:
This hose runs over to the driver side radius arm and is attached to the arm with a small bracket. I made two of these brackets for each end of the radius arm, they are pretty simple angle brackets, 3/4" hole and a small slot to allow the hard line to pass through:
The hose that runs from the front axle attaches to the rad. arm with the little bracket and a large zip tie just to take out some extra play. Hard line is run down the radius arm to another bracket:
At the frame end it simply loops up to another bracket on the frame, then a hard line runs up to the proportioning valve:
That little short hose is Advance Auto P/N H38378. If anyone knows what vehicle application that goes to I'd like to know. It'd make getting that hose much easier in the future if I blow one on the trail or something.
Here’s a pic of the truck as it sits:
Things left to do:
-finish wiring, including installing a relay to run HEI
-new brake shoes and bleeder screws for rear brakes (temporary until I have time to do rear discs)
-put latches on tube doors
-minor interior work (screw down tunnel cover, shifter boots, etc)
-paint and install the hood and other small parts
-build a front bumper
-rebuild and install Q-jet
-figure out whats wrong with #5 and 6 cylinders in the 351w (probably needs the rockers shimmed a little)
Overall theres nothing too huge left to do, but all these dang small things sure do add up.
'79 F-150
'49 CJ-3A
'49 CJ-3A
-
TheGr8Doughboy

- Posts: 346
- Joined: Sun Oct 16, 2005 9:18 pm
- Location: Catawba
-
VerticalTRX
- Club President
- Posts: 757
- Joined: Wed Oct 26, 2005 12:51 pm
- Location: Southwest VA
- Contact:
-
VerticalTRX
- Club President
- Posts: 757
- Joined: Wed Oct 26, 2005 12:51 pm
- Location: Southwest VA
- Contact:
Updates:
I got a good bit done this weekend, although not quite as much as I'd have liked to (as usual.)
-tube doors are finished, painted and installed
-front bumper is completed, painted and installed
-all the accessories are on the motor and working
-wiring is 100% done
-finished up minor body mount things
-installed d-shafts
Whats left before its out on the trail:
-get compression on #5 and 6 cylinders
-rebuild and install Q-jet
-install master cylinder
-lengthen clutch fork (needs a slower throw ratio)
-paint and install hood
-install radiator
-exhaust
Last weekend I started the bumper which took longer than I thought it would to build.
Bumper in progress:
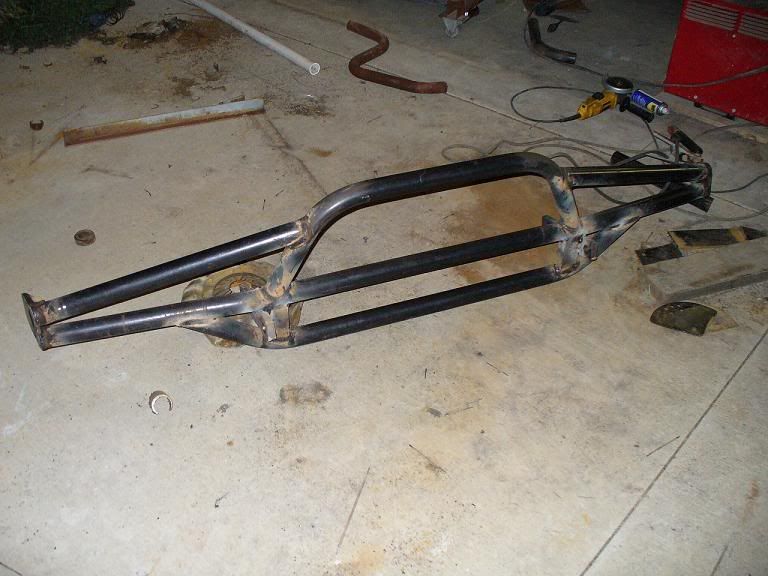
(a mig welder would be really nice)
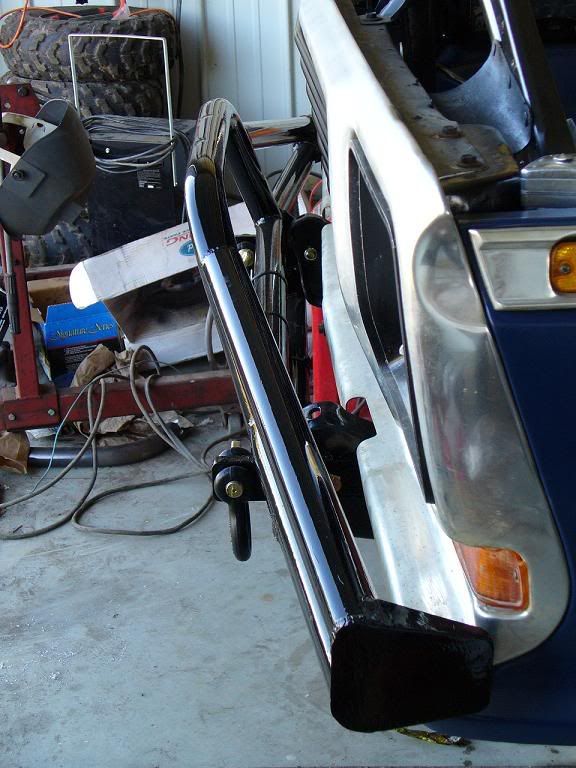
Finished bumper:

I originally stated that I didn't want a prerunner style bumper, but after looking at many options I decided that this would be light, practical and fairly easy to build (I was right about everything but the last part, lol).
I wanted the bumper tucked in as close as possible to the truck and I'm pretty pleased with it:
Eventually I'll tuck a winch in that area, probably will have to cut it back into the grille a bit.
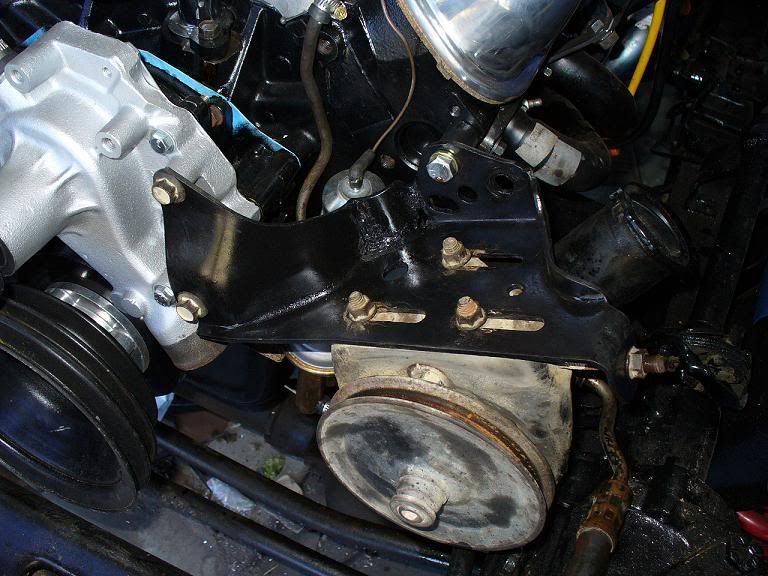
Next was to install the accessories on the motor. First order of business was the PS pump. The bracket off the 351M was a universal one and worked fine other than the fact that it hit my oil press. sending unit. A little modification and it bolted right up with perfect clearance:

Picture of pump installed and the notching culprit:
Installing the GM 1-wire alternator took a bit more bracket trickery, but it wasn't too bad:
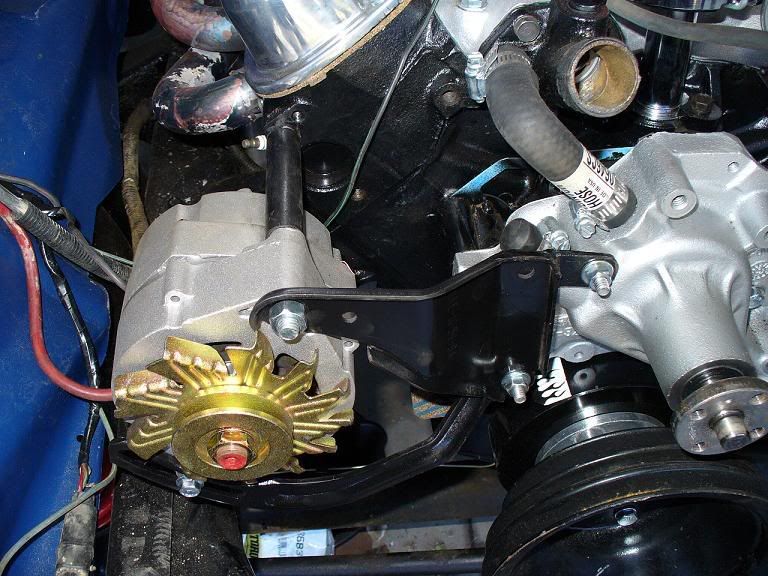
That setup consists of a 351M alt. bracket (lengthend top mounting position), a 351w adjusting bar (ground for alt. fan clearance) , and a custom length spacer. I also used studs to attach everything on this bracket so the whole setup can be removed without pulling the fan and water pump pulley.
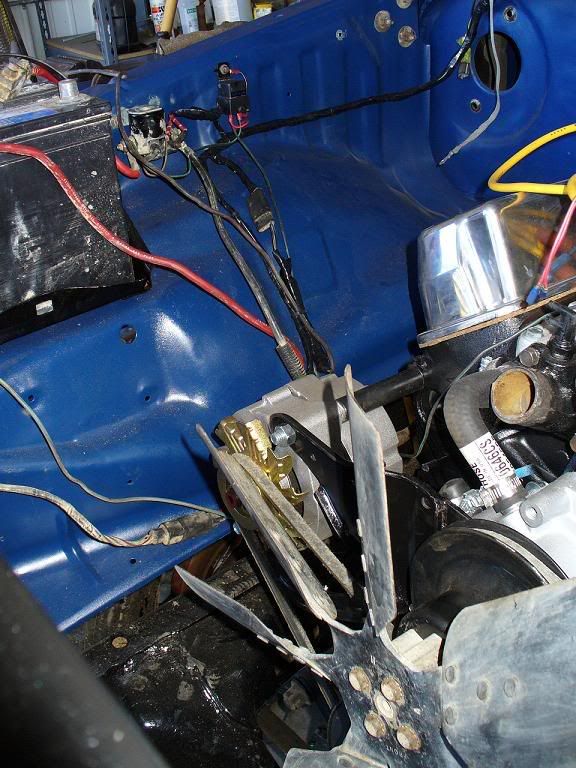
Heres the reason why I spent all the trouble rigging up a 1-wire alternator and HEI dizzy, this is my entire engine electrical system:

Hopefully this coming weekend I'll get most of the rest of the stuff done and get this thing out on the trails in a couple weeks.
I got a good bit done this weekend, although not quite as much as I'd have liked to (as usual.)
-tube doors are finished, painted and installed
-front bumper is completed, painted and installed
-all the accessories are on the motor and working
-wiring is 100% done
-finished up minor body mount things
-installed d-shafts
Whats left before its out on the trail:
-get compression on #5 and 6 cylinders
-rebuild and install Q-jet
-install master cylinder
-lengthen clutch fork (needs a slower throw ratio)
-paint and install hood
-install radiator
-exhaust
Last weekend I started the bumper which took longer than I thought it would to build.
Bumper in progress:
(a mig welder would be really nice)
Finished bumper:
I originally stated that I didn't want a prerunner style bumper, but after looking at many options I decided that this would be light, practical and fairly easy to build (I was right about everything but the last part, lol).
I wanted the bumper tucked in as close as possible to the truck and I'm pretty pleased with it:
Eventually I'll tuck a winch in that area, probably will have to cut it back into the grille a bit.
Next was to install the accessories on the motor. First order of business was the PS pump. The bracket off the 351M was a universal one and worked fine other than the fact that it hit my oil press. sending unit. A little modification and it bolted right up with perfect clearance:
Picture of pump installed and the notching culprit:
Installing the GM 1-wire alternator took a bit more bracket trickery, but it wasn't too bad:
That setup consists of a 351M alt. bracket (lengthend top mounting position), a 351w adjusting bar (ground for alt. fan clearance) , and a custom length spacer. I also used studs to attach everything on this bracket so the whole setup can be removed without pulling the fan and water pump pulley.
Heres the reason why I spent all the trouble rigging up a 1-wire alternator and HEI dizzy, this is my entire engine electrical system:
Hopefully this coming weekend I'll get most of the rest of the stuff done and get this thing out on the trails in a couple weeks.
'79 F-150
'49 CJ-3A
'49 CJ-3A


-
VerticalTRX
- Club President
- Posts: 757
- Joined: Wed Oct 26, 2005 12:51 pm
- Location: Southwest VA
- Contact:
Thanks for the compliments. 
Last edited by VerticalTRX on Mon Oct 16, 2006 1:19 pm, edited 1 time in total.
'79 F-150
'49 CJ-3A
'49 CJ-3A
-
VerticalTRX
- Club President
- Posts: 757
- Joined: Wed Oct 26, 2005 12:51 pm
- Location: Southwest VA
- Contact:
UPDATES:
-radiator is in
-clutch fork is lengthend and works much better
-master cylinder is installed and brakes are bled
-hood is painted but not installed yet
We tore into the motor and found what we expected. The rockers on #5 and 6 are too low and holding the valves open which is killing the compression. We loosend them slightly and had compression. Terrance is supposed to be either shimming the rockers or making custom length pushrods this week so hopefully that will fix the problem. I have no idea why this was a problem, my guess is either the junkyard block or remanned heads were deck milled at a slight angle or something, IDK.
All thats left is to install the hood, rear add-a-leafs, and get exhaust on it. Sometime before it gets 'really cold' I need to get the real doors finished and get the heater box in it, but that can wait a month or so. Hopefully by this coming weekend we'll have it out of the shop and driving around, probably wont get exhaust on it till the exhaust shop can do it however.
'79 F-150
'49 CJ-3A
'49 CJ-3A
-
VerticalTRX
- Club President
- Posts: 757
- Joined: Wed Oct 26, 2005 12:51 pm
- Location: Southwest VA
- Contact:
