Lol no worries. I don't have anything nice enough that's worth a screen shot.Jeeper52 wrote:looks like this will be interesting!
5 second snap chats are bold
My 1983 Toyota pickup resurrection.
Moderator: Club Officers
Re: My 1983 Toyota pickup resurrection.
Re: My 1983 Toyota pickup resurrection.
Finally finished all my knuckle gussets. It took me about 3hrs per gusset. Making sure the knuckle would clear the gusset and my welds took quite a bit of time.
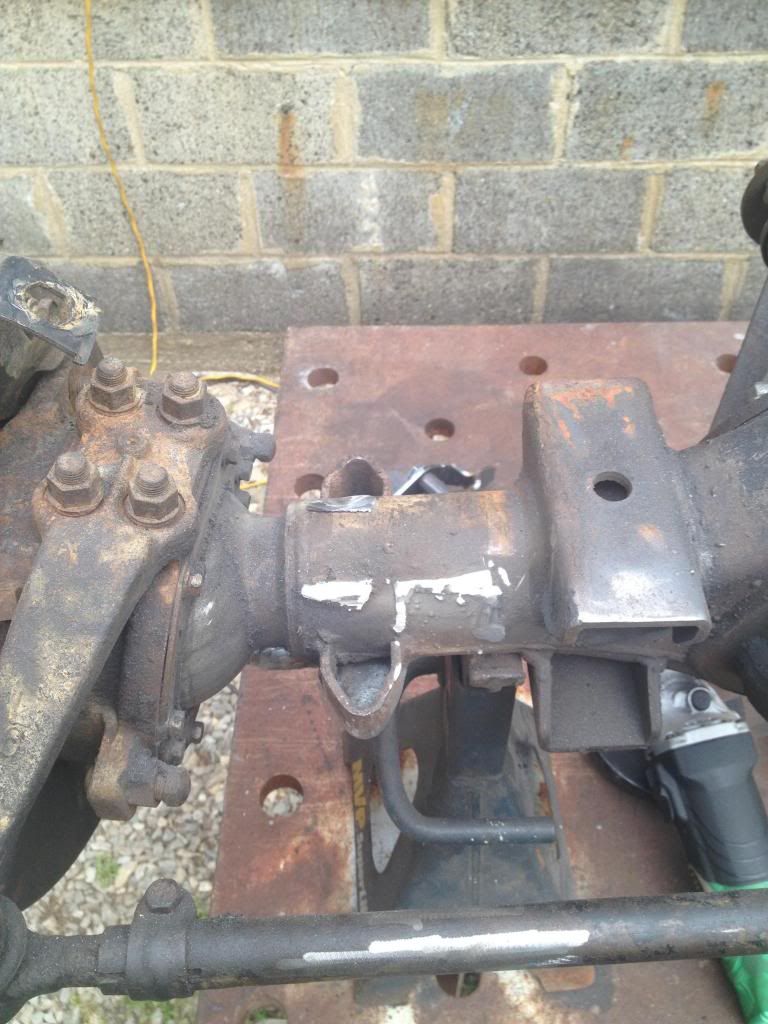
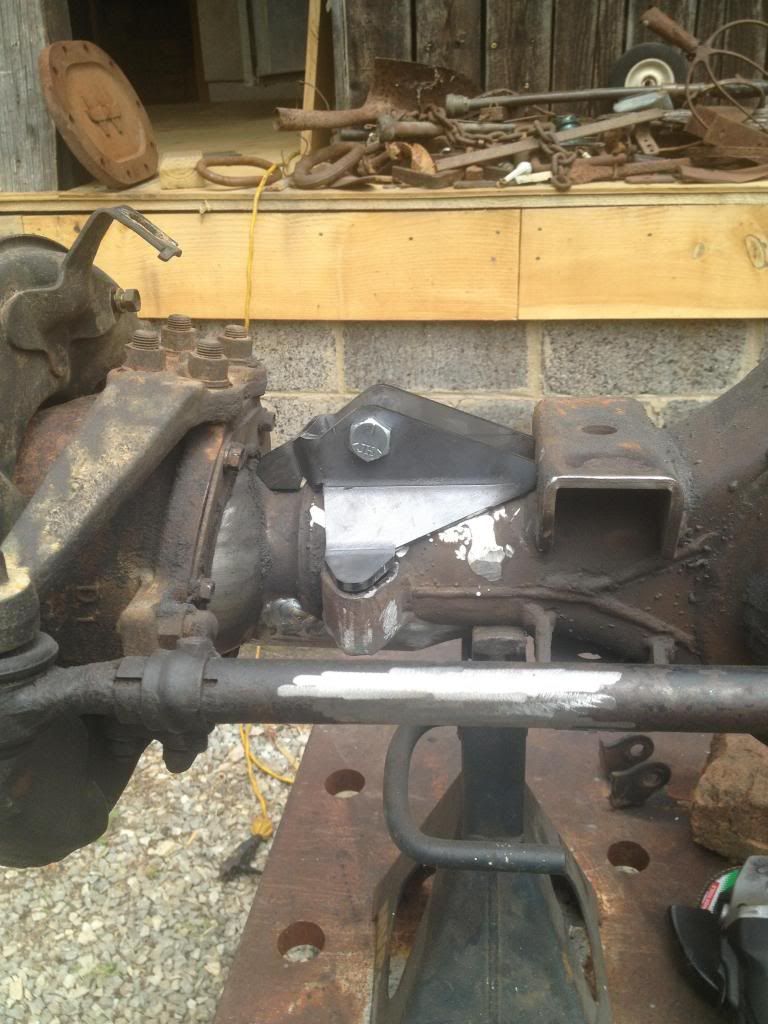
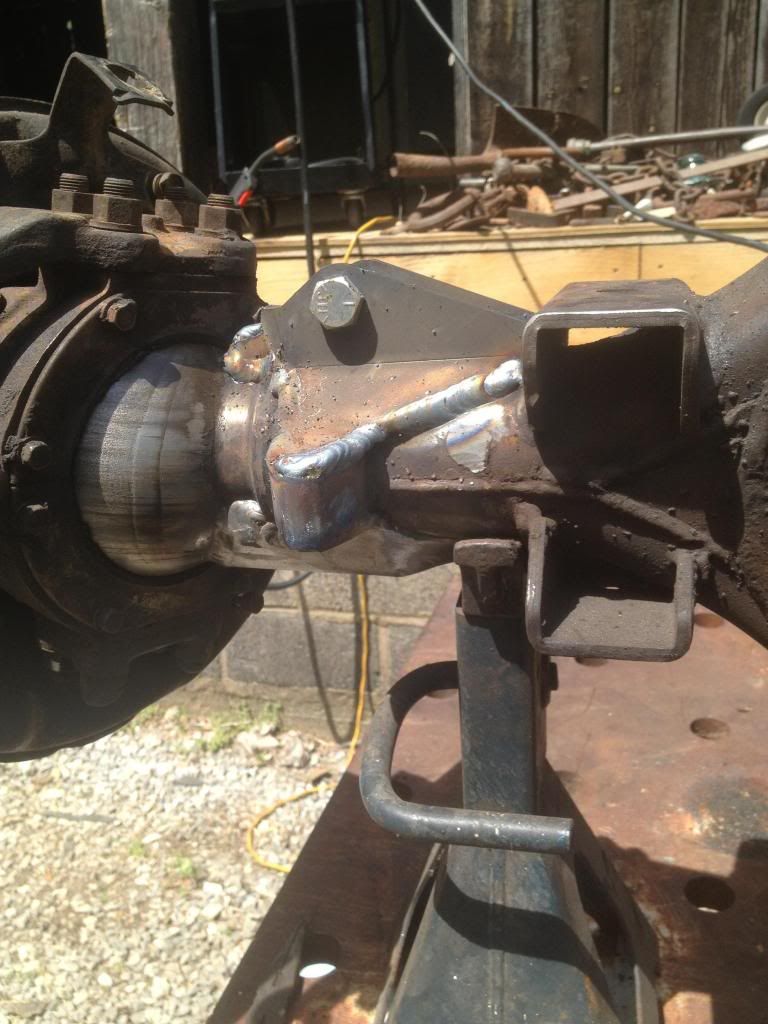
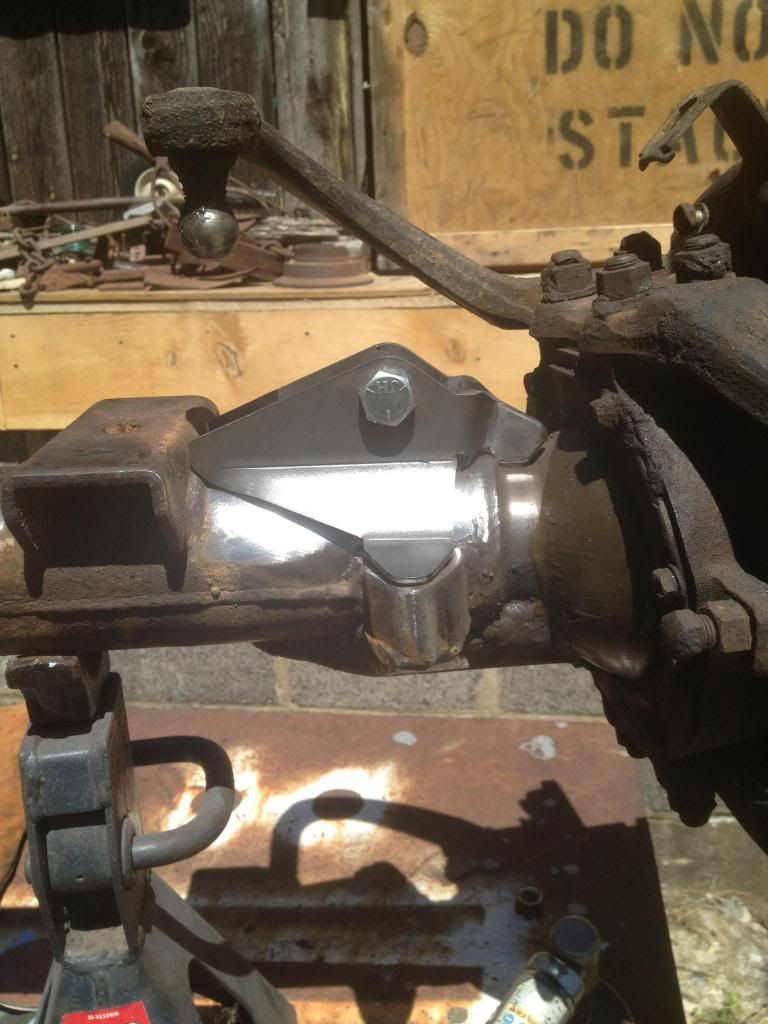
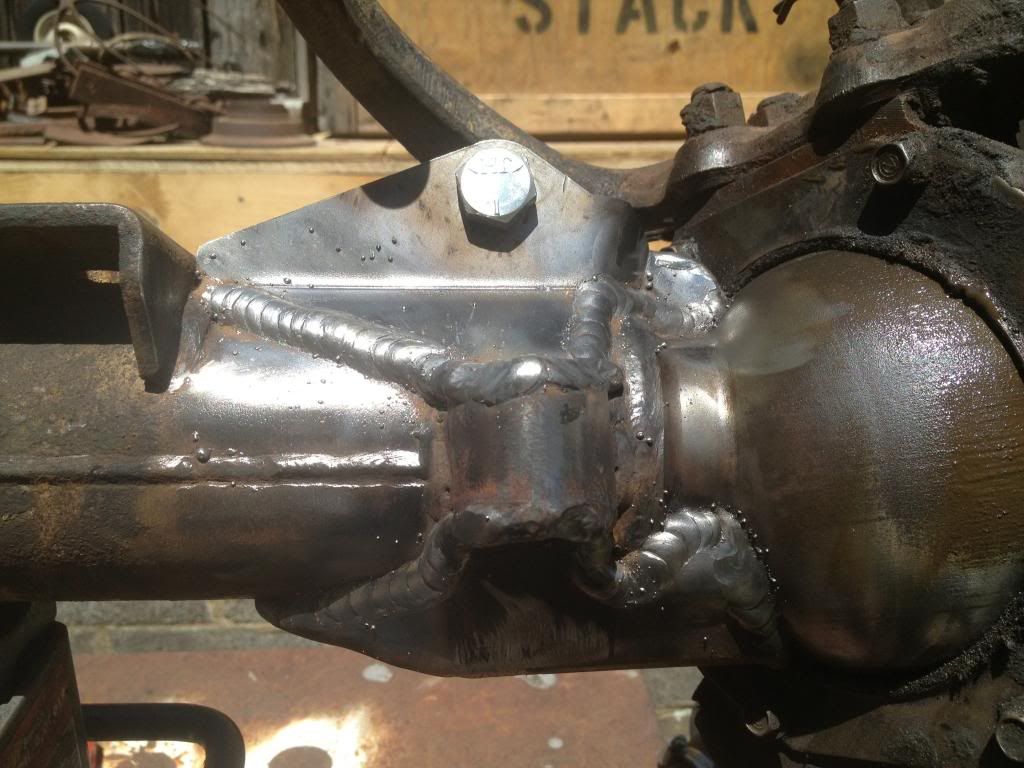
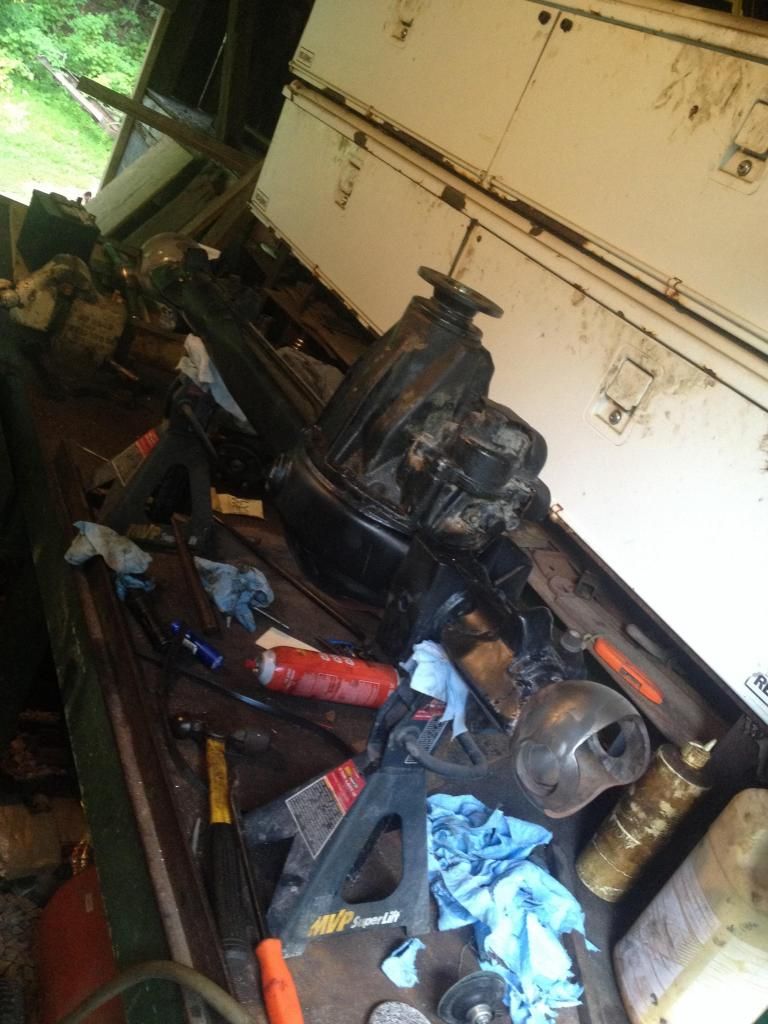
So now i'm ready to start tearing it down and do the rebuild/paint. I also started tearing apart my 83 dash in order to start on my floors and dash swap.
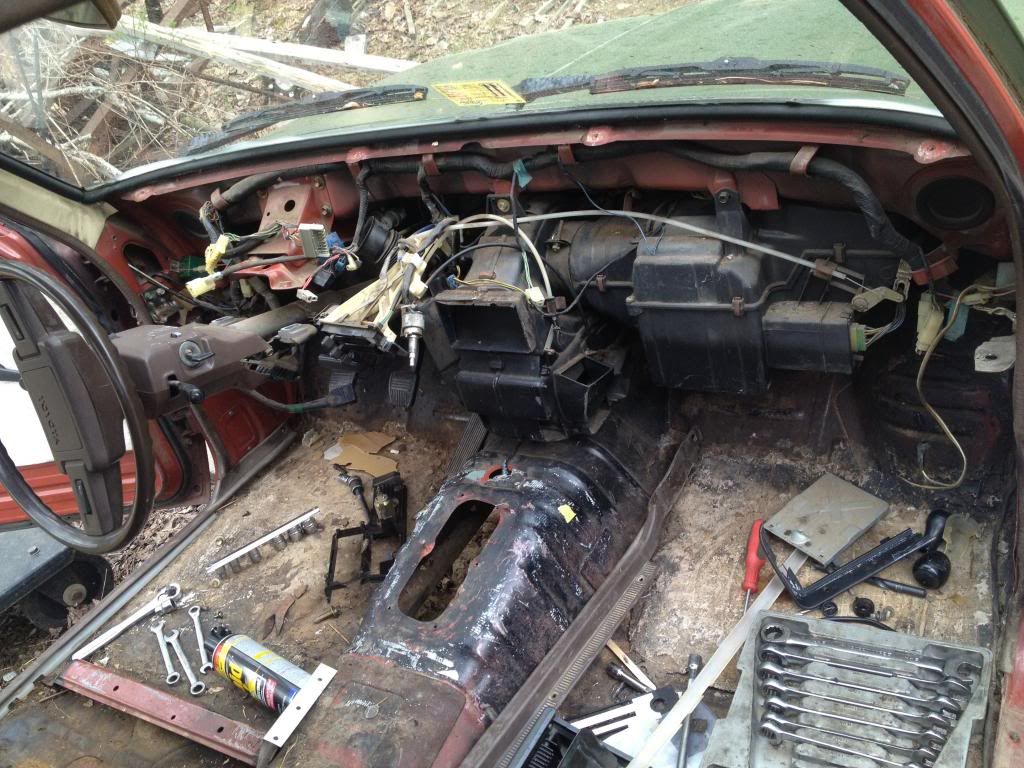


So now i'm ready to start tearing it down and do the rebuild/paint. I also started tearing apart my 83 dash in order to start on my floors and dash swap.

Re: My 1983 Toyota pickup resurrection.
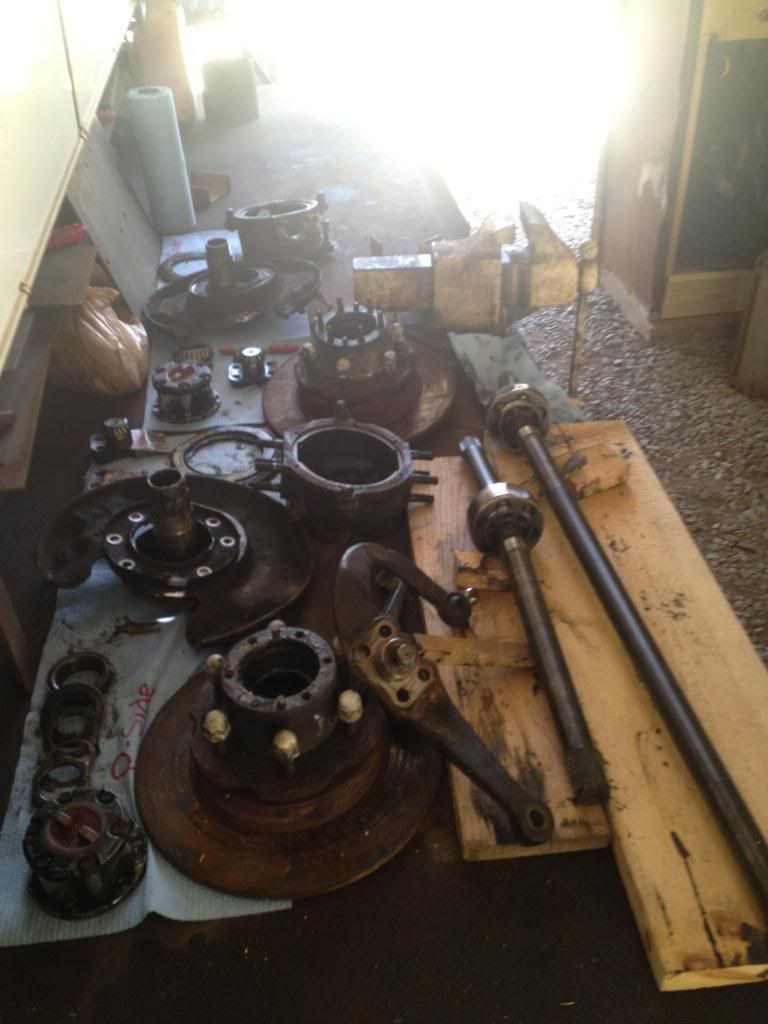
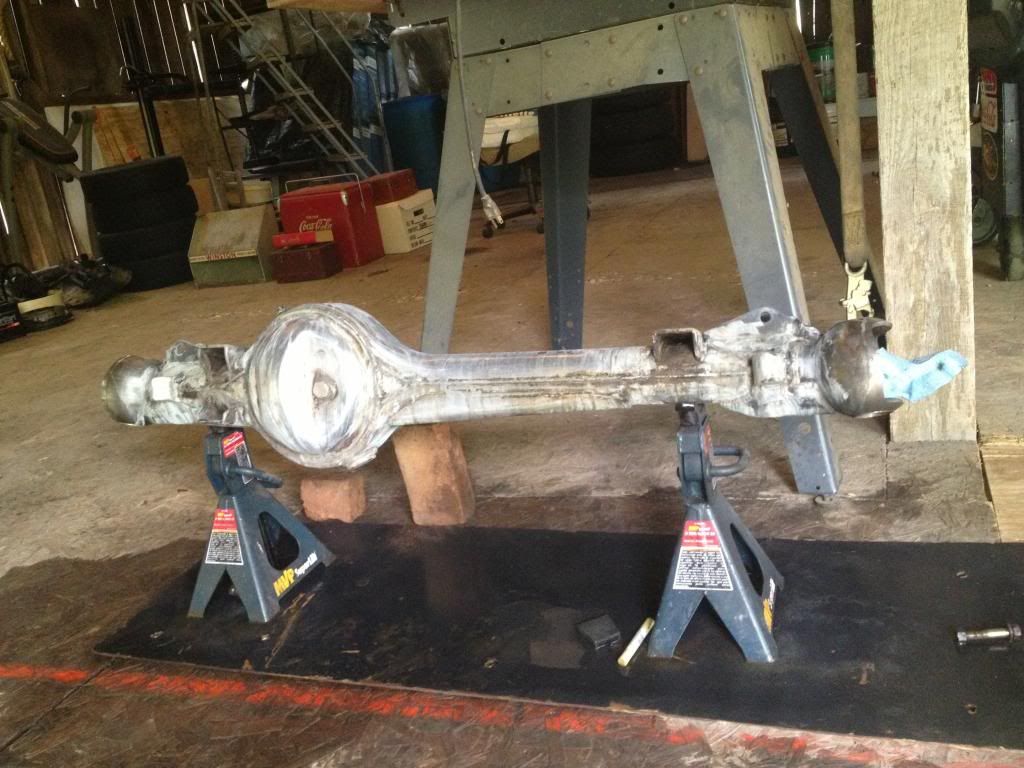
Made a little bit of progress on the front axle today. Got both sides torn down before work.

And I really hope I didn't warp my housing :/
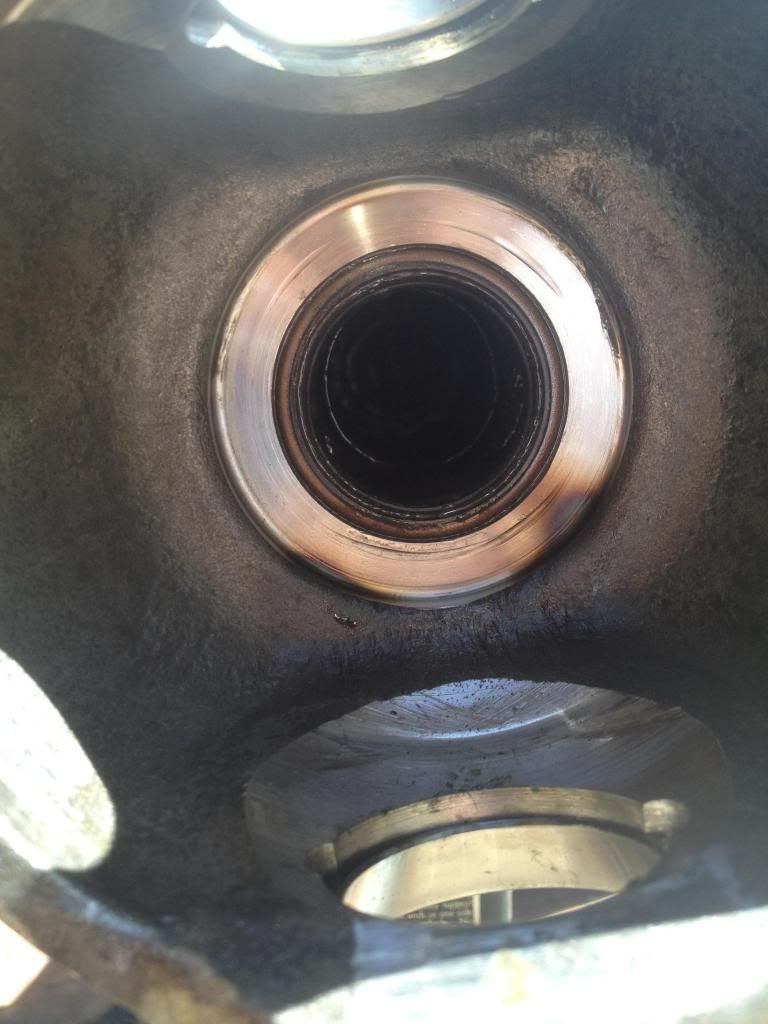

I left the axle assembled in hopes it would help transfer the heat and to check clearances.. Hopefully everything works out okay when I put it back together.
Also, is there some sort of axle alignment tool for re-installing shafts? It seems like the inner axle seal could get damaged when putting the axle back in the housing..
Re: My 1983 Toyota pickup resurrection.
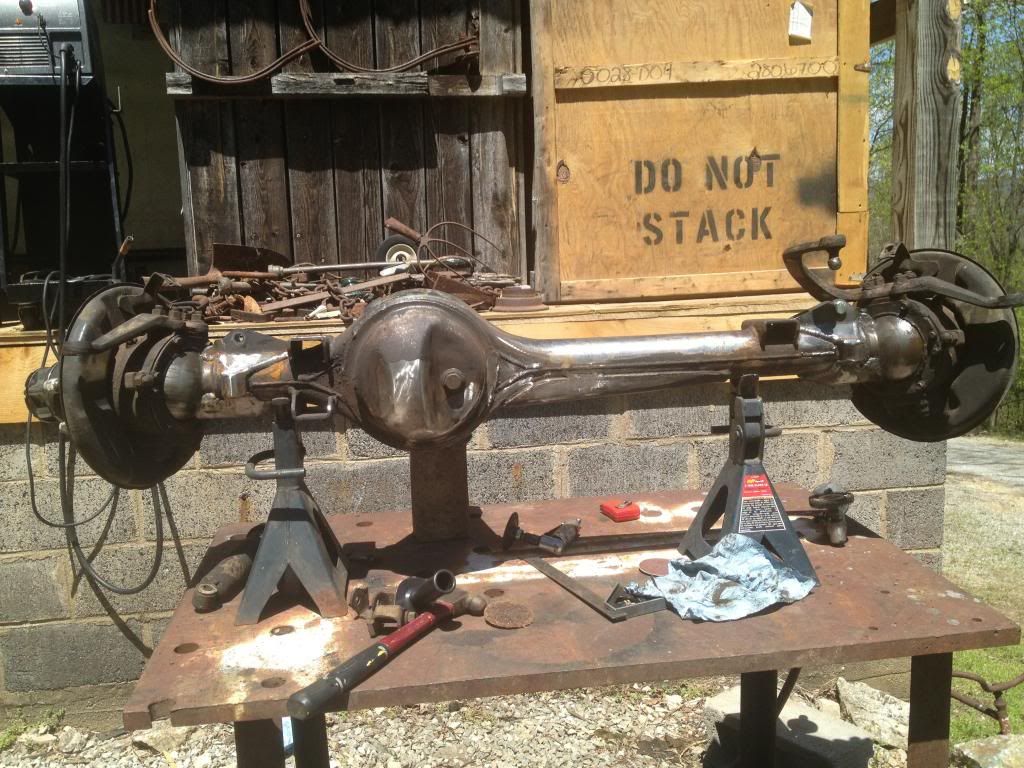
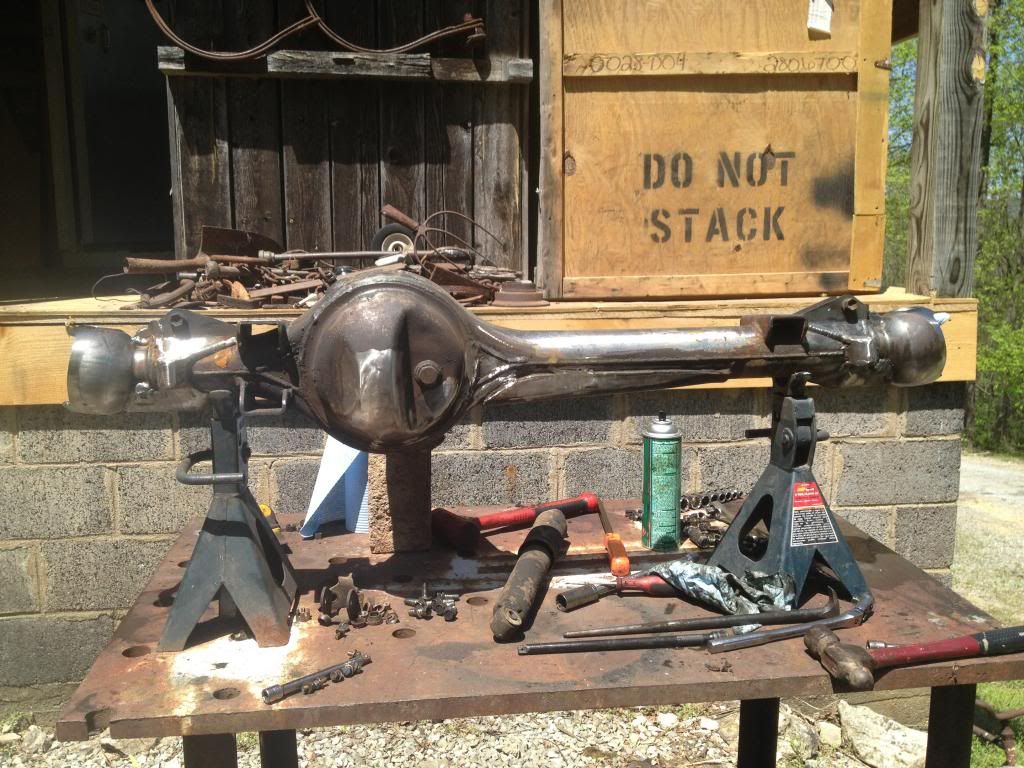
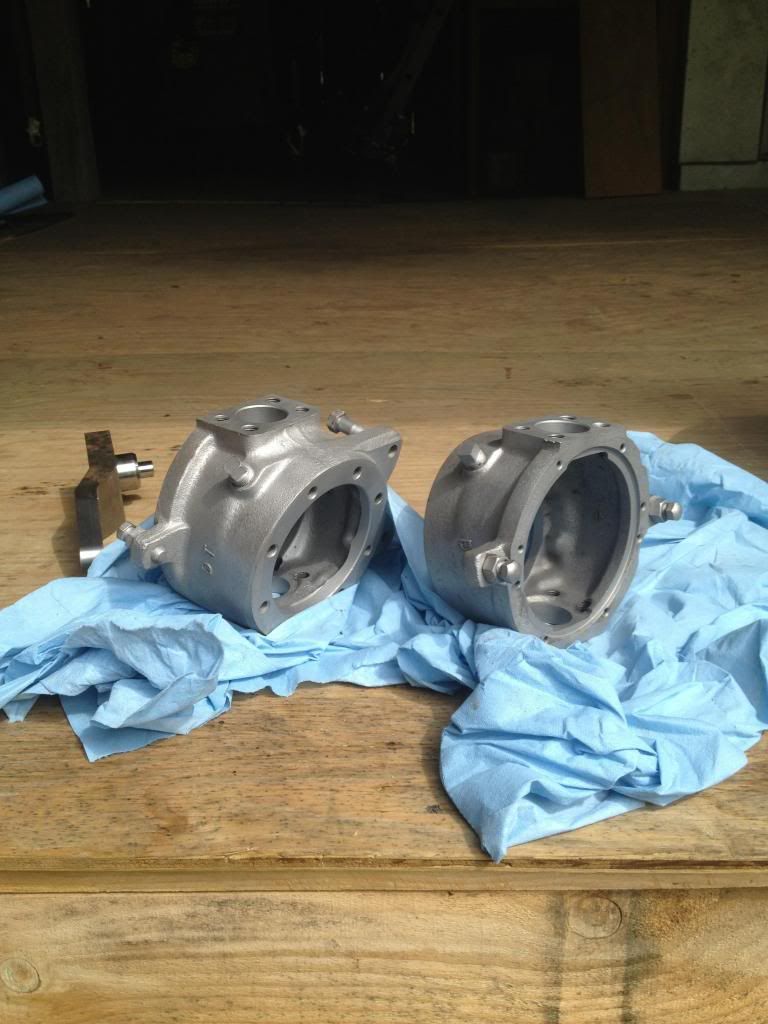
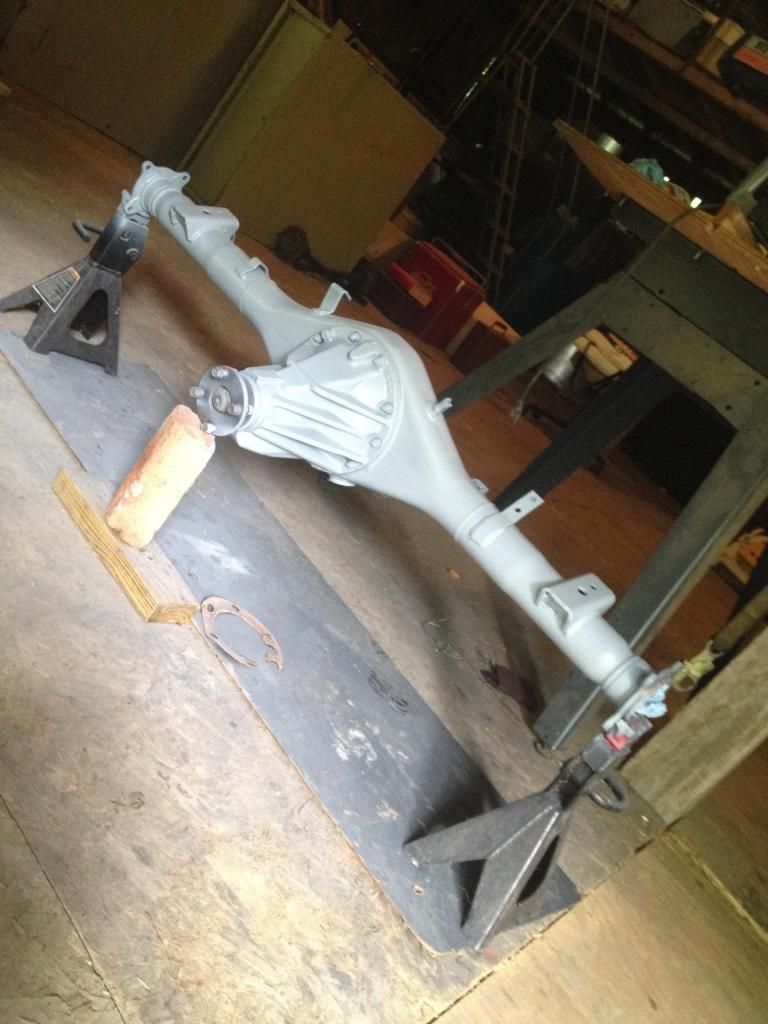
Had a little bit of time today so I managed to clean up the axle housing. I should be able to paint it tomorrow. I still need to clean up the knuckles, spindles, and whatnot. Oh and finals are finally over  so I should have a brief period of time where I can put out some work until summer classes start. Then I will have 00 life.
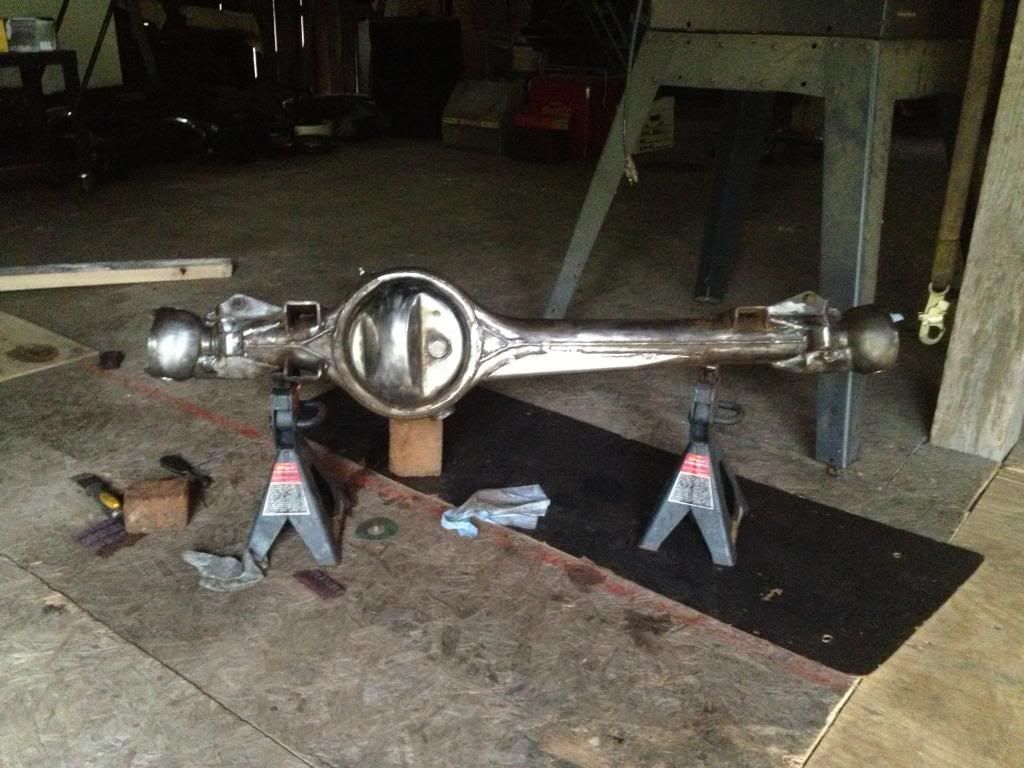
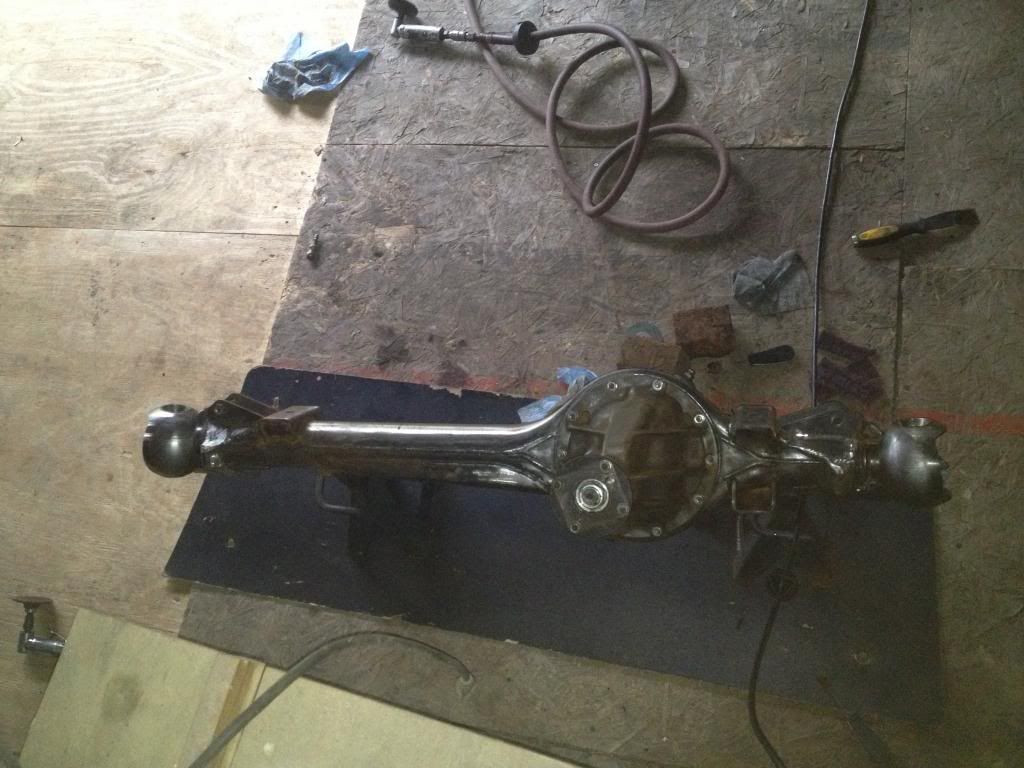
Cleaning the housing was a much bigger pain than I thought it'd be. Took me 3.5 hours. It seemed like every little nook and cranny had something to share.


Cleaning the housing was a much bigger pain than I thought it'd be. Took me 3.5 hours. It seemed like every little nook and cranny had something to share.
-
BadAssEddie

- Posts: 2635
- Joined: Sun Sep 27, 2009 11:12 pm
- Location: The Woods
Re: My 1983 Toyota pickup resurrection.
Looks good man.
1969 Cadillac Deville 7.7 Big Block
1978 Ford F-150 6.4 FE
1993 Ford Bronco 5.8 Windsor
1994 Ford F-250 7.3 Powerstroke
2016 Ford F-250 6.7 Powerstroke
1978 Ford F-150 6.4 FE
1993 Ford Bronco 5.8 Windsor
1994 Ford F-250 7.3 Powerstroke
2016 Ford F-250 6.7 Powerstroke
Re: My 1983 Toyota pickup resurrection.
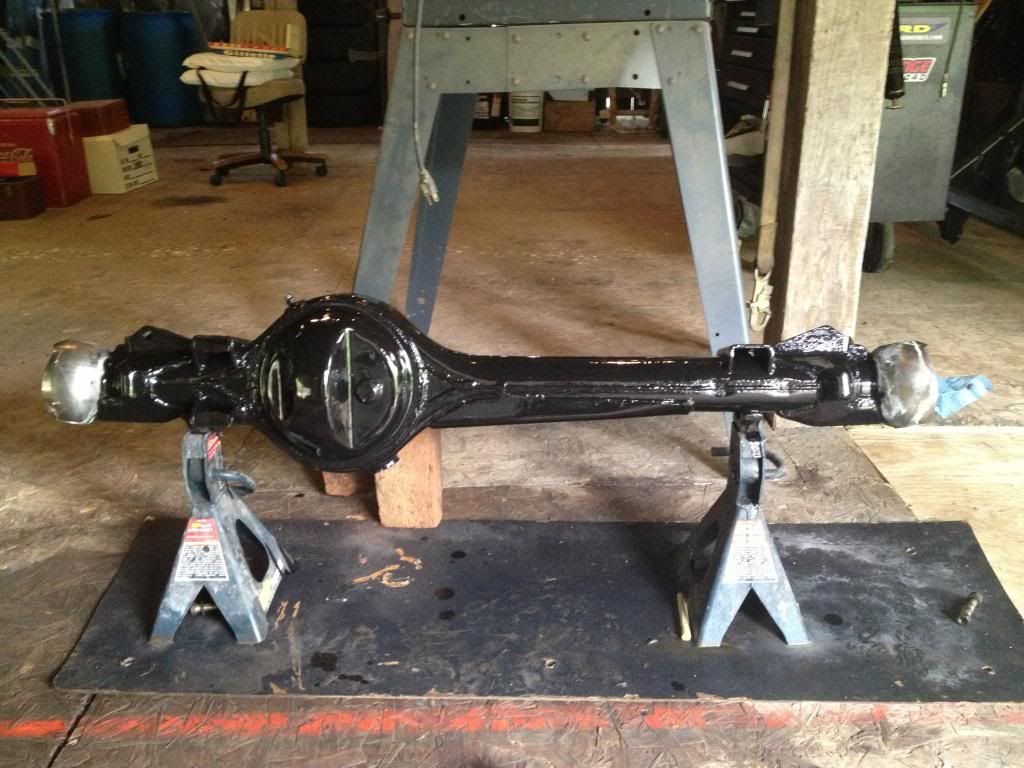
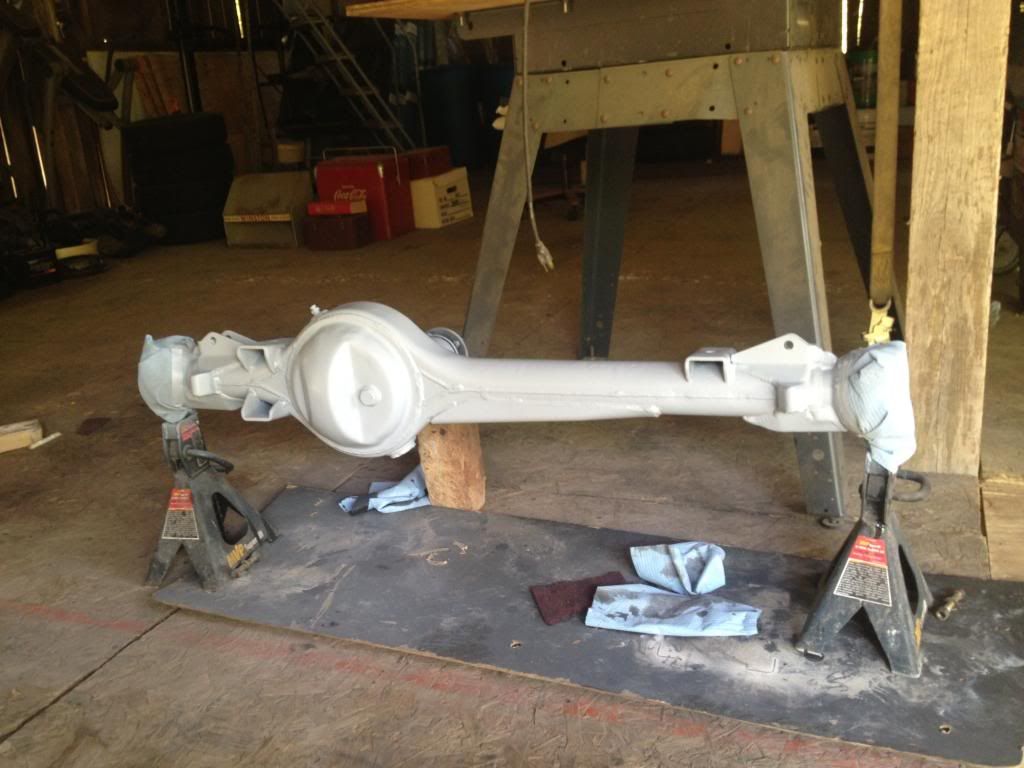
Today I applied Metal Ready to the axle housing and layed down the first coat of POR 15. I also sold my 22r, and I'm waiting on the machine shop to get me a quote on making some pieces to align my knuckles.
"Bone dry" Metal Ready applied:
1st coat POR 15 applied:
"Bone dry" Metal Ready applied:

1st coat POR 15 applied:

Re: My 1983 Toyota pickup resurrection.
I got a quote from the machine shop for the alignment tool and he said it'd cost $1200.00 to make! for a dummy bushing and shaft! i told the guy made out of steel.....not gold. So that plan is a no-go. So the guy that sells them on Pirate had one left, but I told him no because I bought an air dryer the other day for the compressor to help with using the sand blaster. It's from Ingersoll rand and it's a dryer/regulator combo. I also ordered my motor mounts today from Chilkat along with the oil pan, pickup tube, etc. I finished the POR 15 and top coated my front axle housing and sand blasted my knuckles, too.
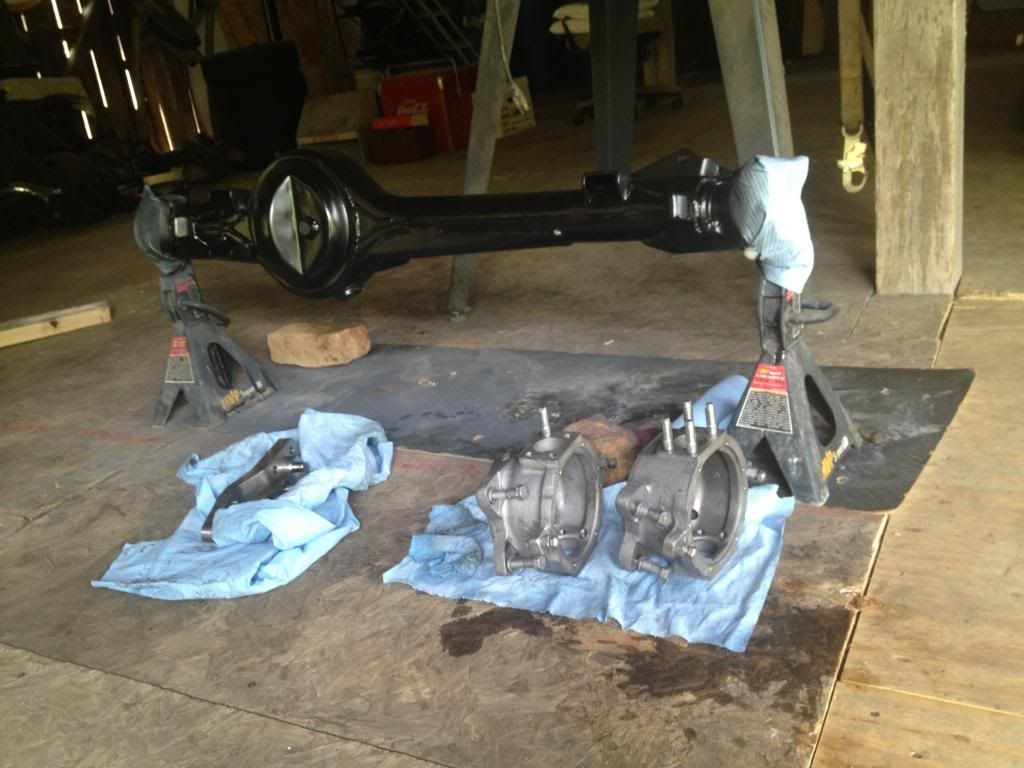
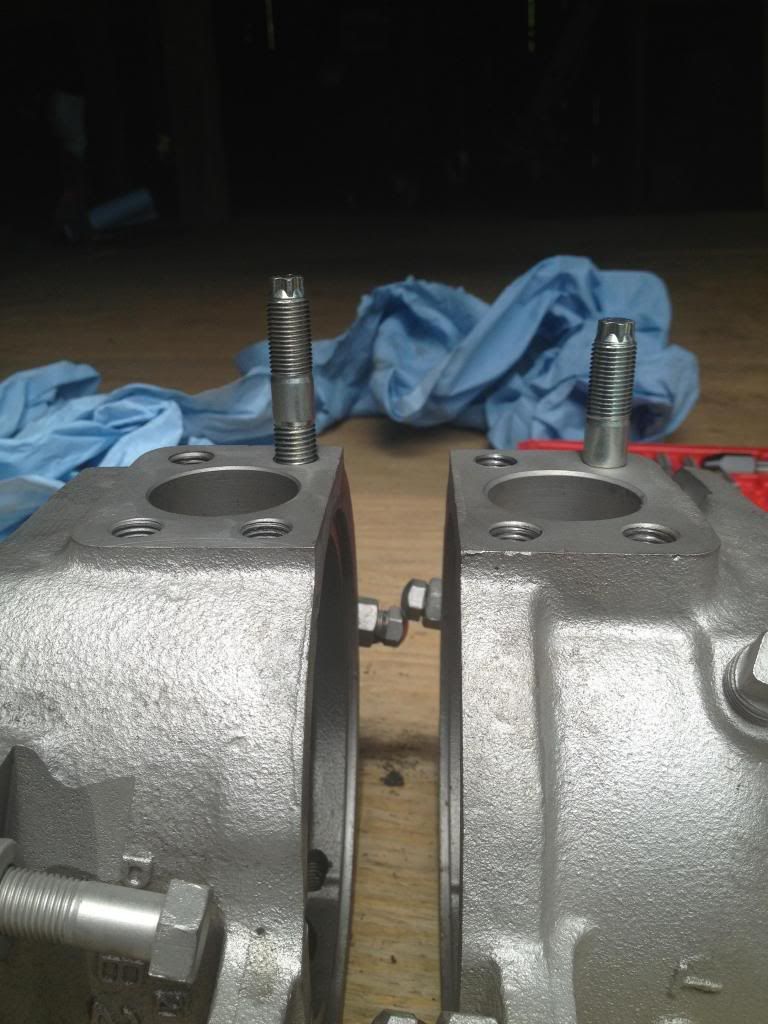
And when I went to see if my new studs would thread into the knuckles I could only get one thread in. When I blasted my knuckles all the excess grease migrated into the old bolt holes. I went to the store to get a tap and ended up getting a whole tap/die set. I'm glad I got it because I've already used three of the taps to chase threads on the knuckles.
In this picture you can see how far down the new stud threaded into the non-chased threads vs chased threads.
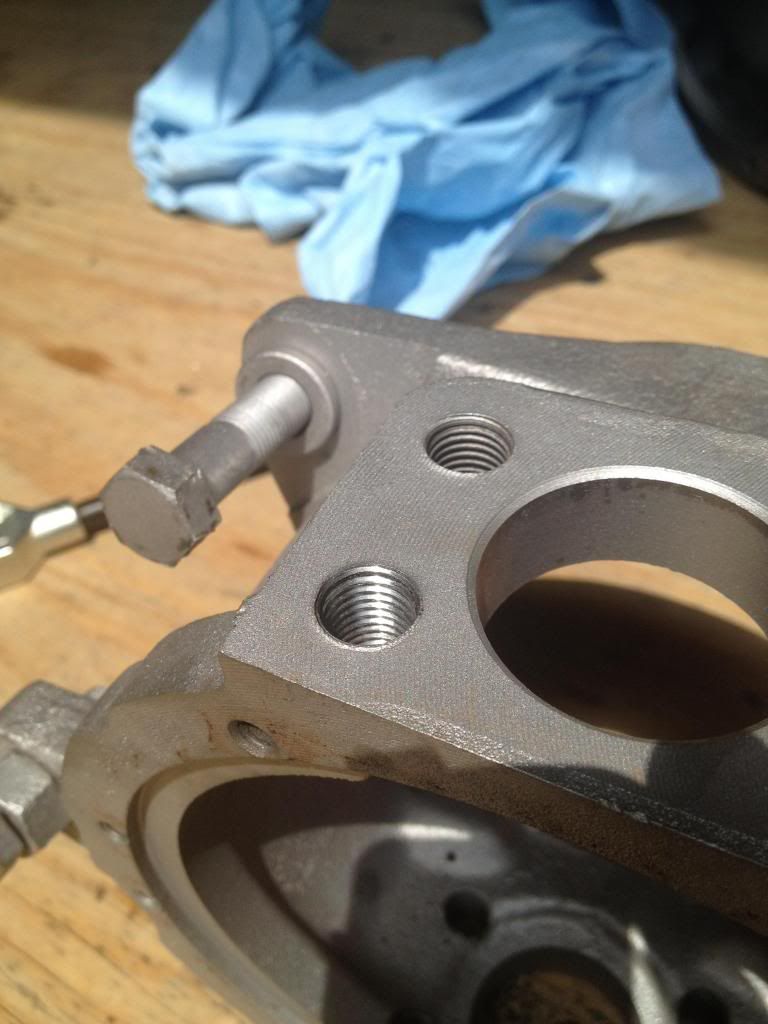
And how the chased threads look vs non chased.
I barely finished chasing all the threads before I came into work. I managed to coat them in Metal Ready, too, before work so they'll be ready to paint tomorrow!


And when I went to see if my new studs would thread into the knuckles I could only get one thread in. When I blasted my knuckles all the excess grease migrated into the old bolt holes. I went to the store to get a tap and ended up getting a whole tap/die set. I'm glad I got it because I've already used three of the taps to chase threads on the knuckles.
In this picture you can see how far down the new stud threaded into the non-chased threads vs chased threads.

And how the chased threads look vs non chased.

I barely finished chasing all the threads before I came into work. I managed to coat them in Metal Ready, too, before work so they'll be ready to paint tomorrow!
Re: My 1983 Toyota pickup resurrection.
The past couple days I have finished my knuckles, removed bearing races (Any tips for installing the new races into the axle?), went to the junkyard and picked up some wheels, doors, headlight trim, and headlight buckets.
Por15, primer, and painted knuckles:

Junkyard finds:

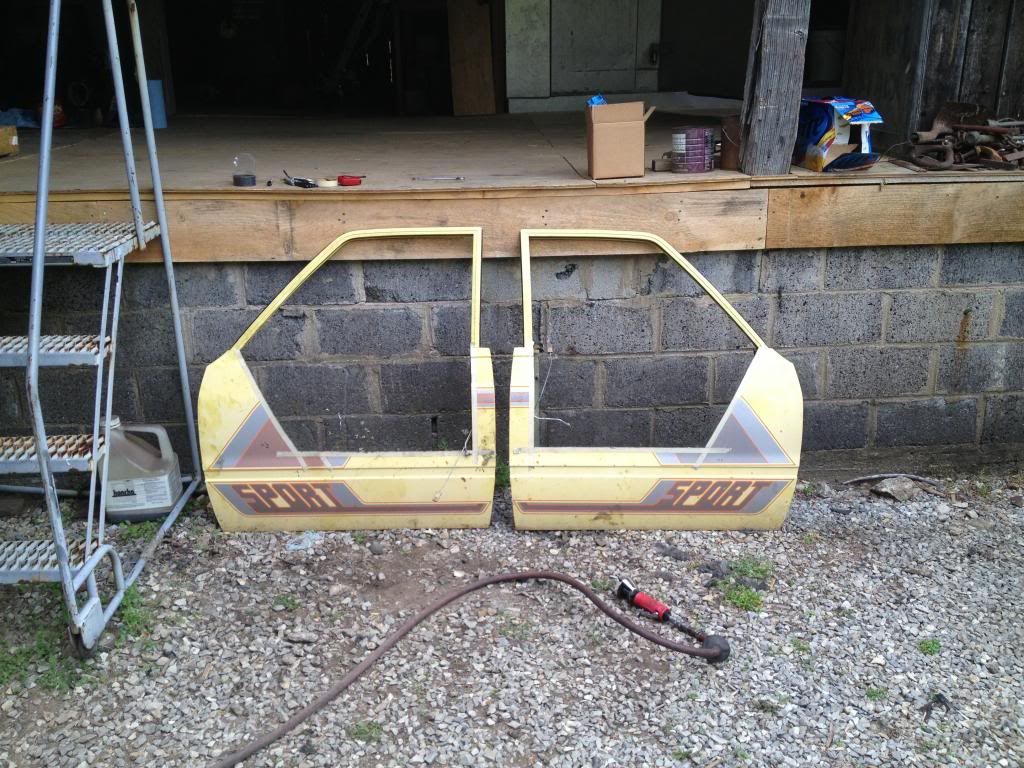
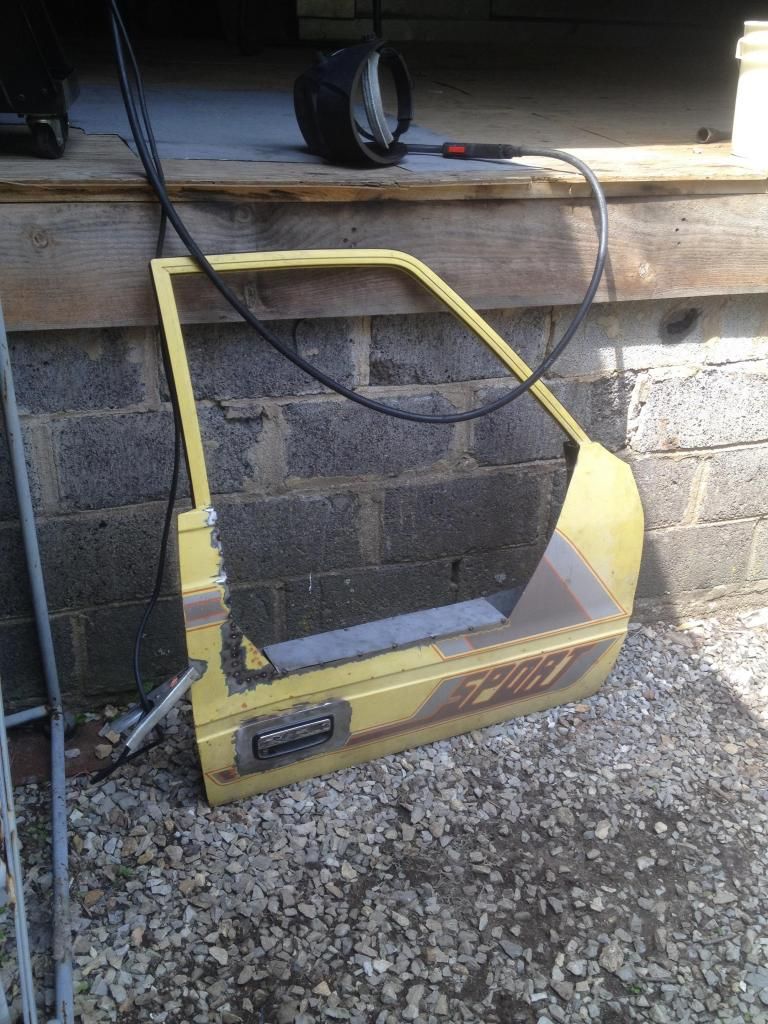
And I started working on the spare doors:

I also finished up another project: Lifting my engine stand. Now it's ready to play in the rocks!

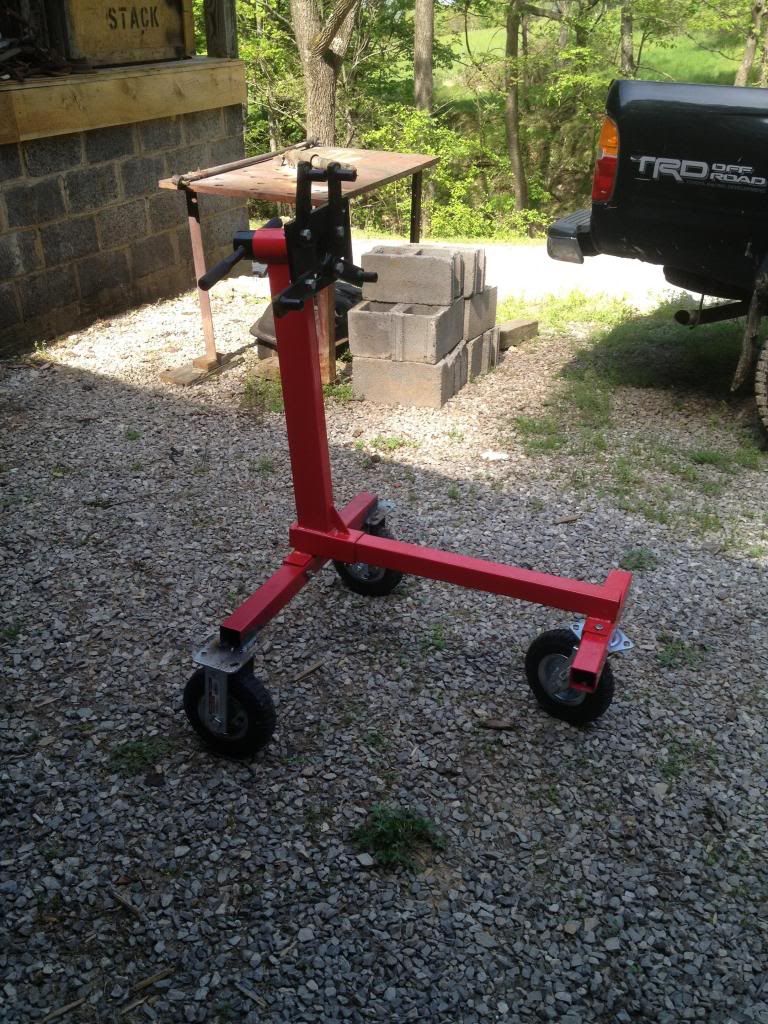
That's it for now. I still need to clean up my locking hubs, blast and paint the wheel hubs, get new wheel studs, vented rotors, v6 calipers, and then I should be ready to put it all back together.
Por15, primer, and painted knuckles:

Junkyard finds:

And I started working on the spare doors:


I also finished up another project: Lifting my engine stand. Now it's ready to play in the rocks!


That's it for now. I still need to clean up my locking hubs, blast and paint the wheel hubs, get new wheel studs, vented rotors, v6 calipers, and then I should be ready to put it all back together.

Re: My 1983 Toyota pickup resurrection.
Nice build. I have the factory knuckle alignment tool you can borrow. Where do you live?
Matt
85 4Runner
97 4Runner
97 LX450 Diesel
85 4Runner
97 4Runner
97 LX450 Diesel
Re: My 1983 Toyota pickup resurrection.
PM replied to. Freeze the races and with a little grease on the knuckle they’ll pop right in. I know you already painted the housing but I’d strongly recommend welding a ¼” thick maxi pad over the ring gear. The rear axle needs the maxi pad treatment too.
Matt
85 4Runner
97 4Runner
97 LX450 Diesel
85 4Runner
97 4Runner
97 LX450 Diesel
Re: My 1983 Toyota pickup resurrection.
I haven't updated in awhile. School, work, and fixing my daily drivers has taken up most of my time. It seems like as soon as I fix my car, my truck breaks down. My car had a bent wheel for the longest time so I hadn't been driving it, finally got a 13in wheel and tire for it. I began driving it because my f150 has a leaking rear main seal and a CEL, until my tags ran out on my car. So i filled the f150 up the other day with some oil, found time to go to the DMV, and on my way up the MF'n throttle cable breaks on the highway. So my stepdad couldn't come get me, and I didn't want to pay a tow truck to come get me. So this is what I came up with:
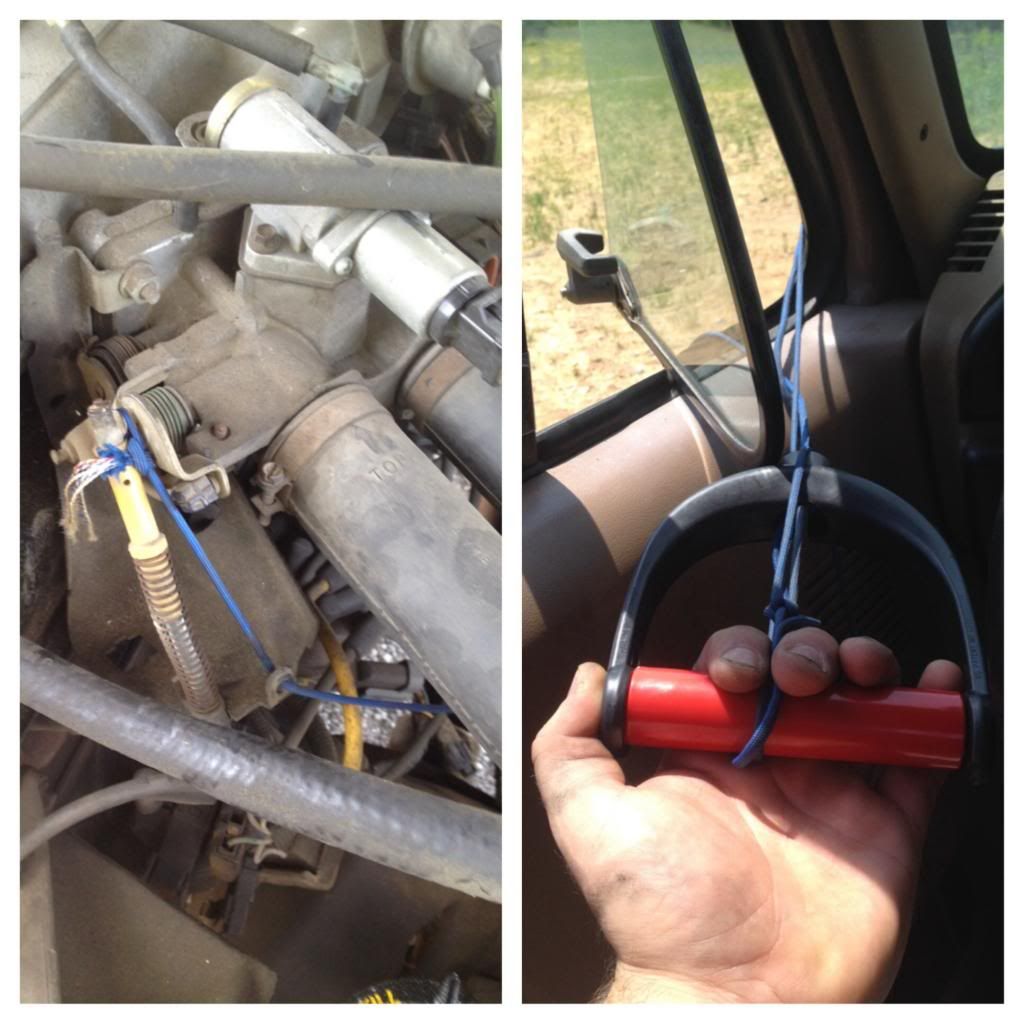
I had some 550 cord in my tool box, and a resistance band behind the seat of my truck. Tied the cord to the throttle body thing where the original cable goes, ran it to the cab and then tied the handle from my resistance band to it. Drove it about 20 miles like that all the way home. Very interesting to say the least...
As far as truck progress goes.... I got some IFS hubs, rear axle, and a steering box. Blasted, turned down, installed races, and painted the hubs, got the drums off the rear axle (that was a big PITA). That's about it. I still haven't gotten my sand blaster working. The air dryer I bought didn't come with a mount so I had to make one. Haven't really messed with anything since I finished the air dryer mount. I did order gears and a setup kit for my rear e-locker. I've pretty much decided I want a selectable locker for the front. I've come to the conclusion that with a selectable I will likely be spending around 1-1.5k when it's all said and done. So I may just say screw it and go with Marlins HP e-locker and be done with it, but that would be a ways down the road. Anyway, on to the pictures....
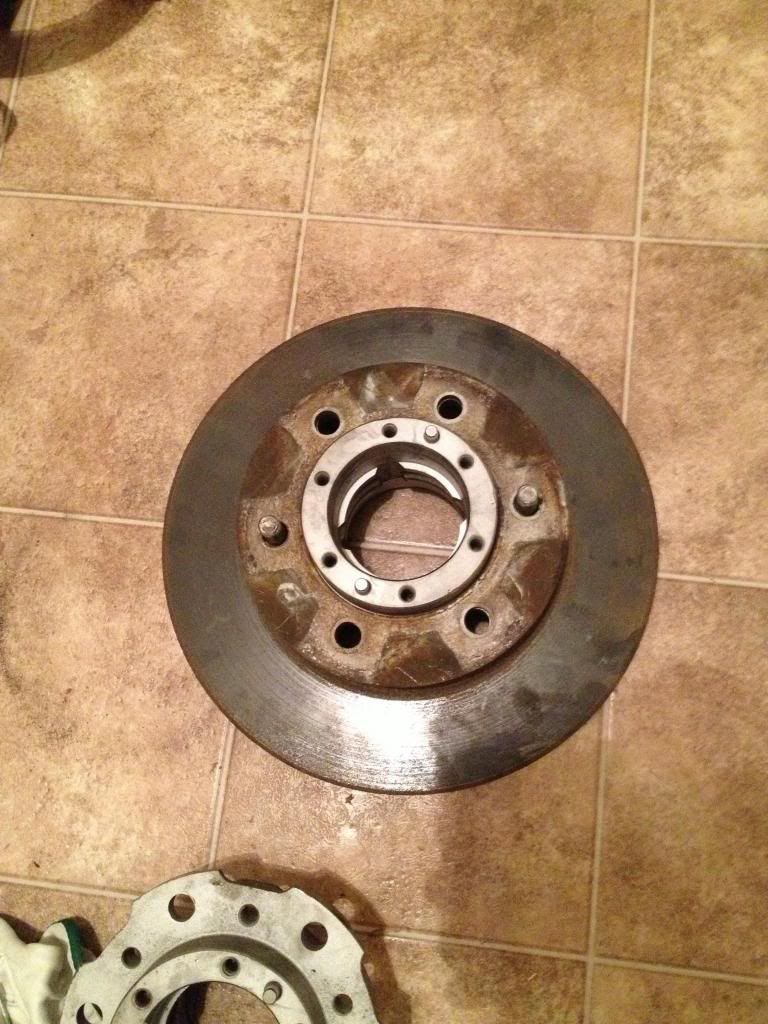
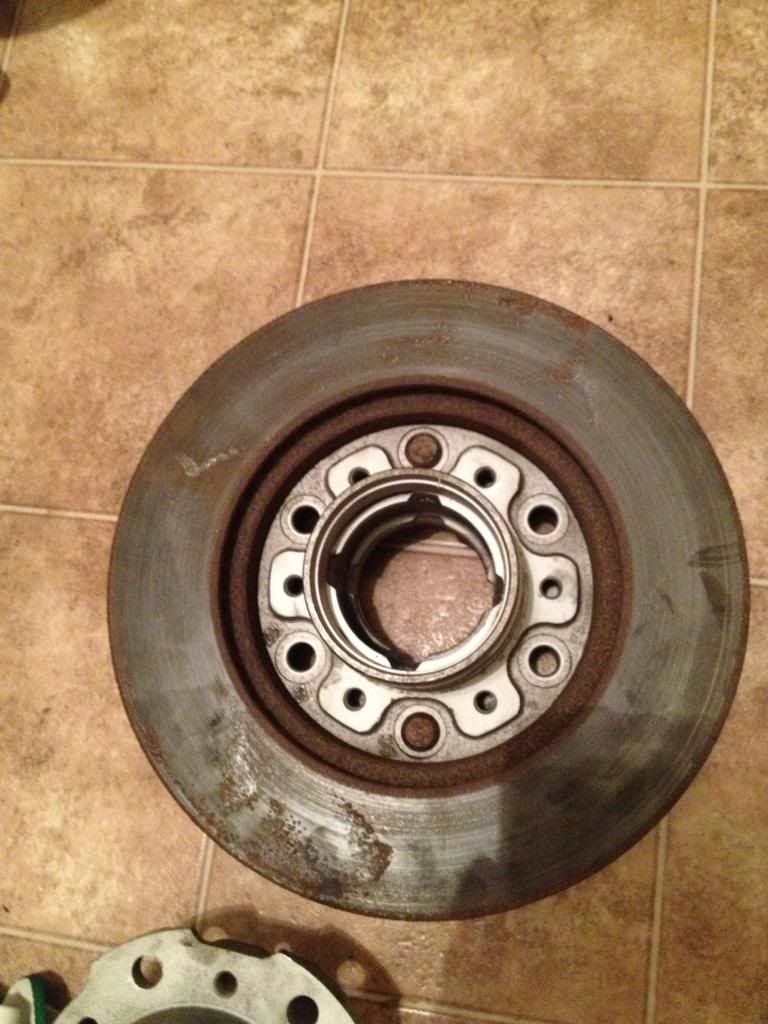
IFS hubs blasted and turned down.
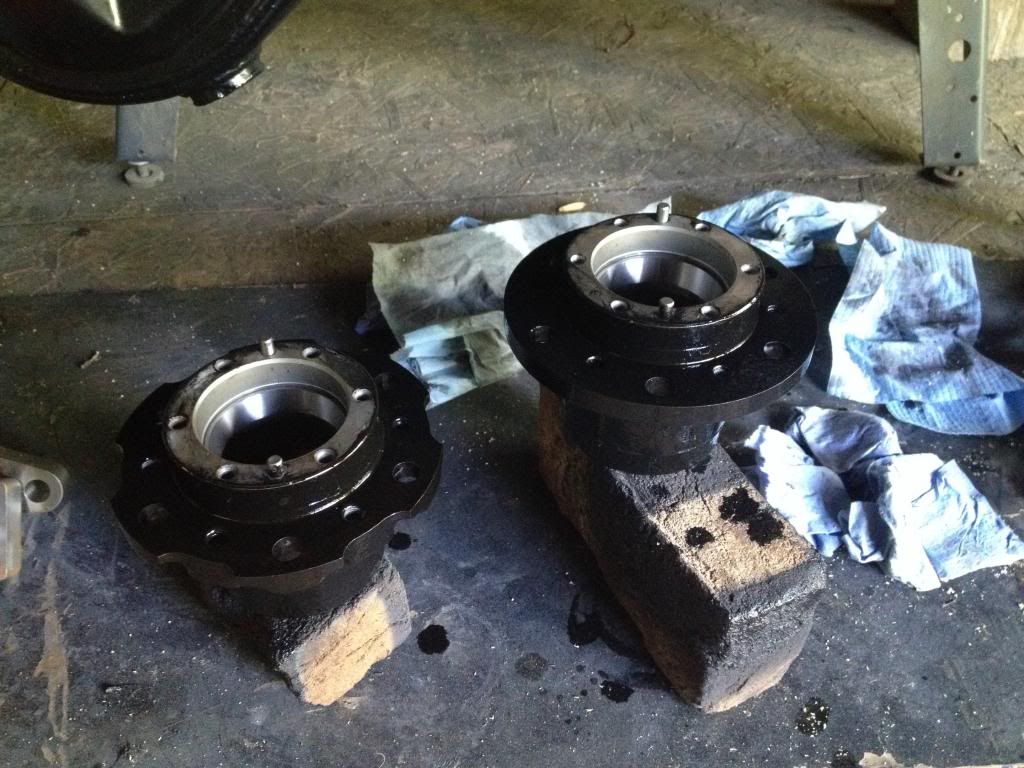
IFS hubs painted with races installed
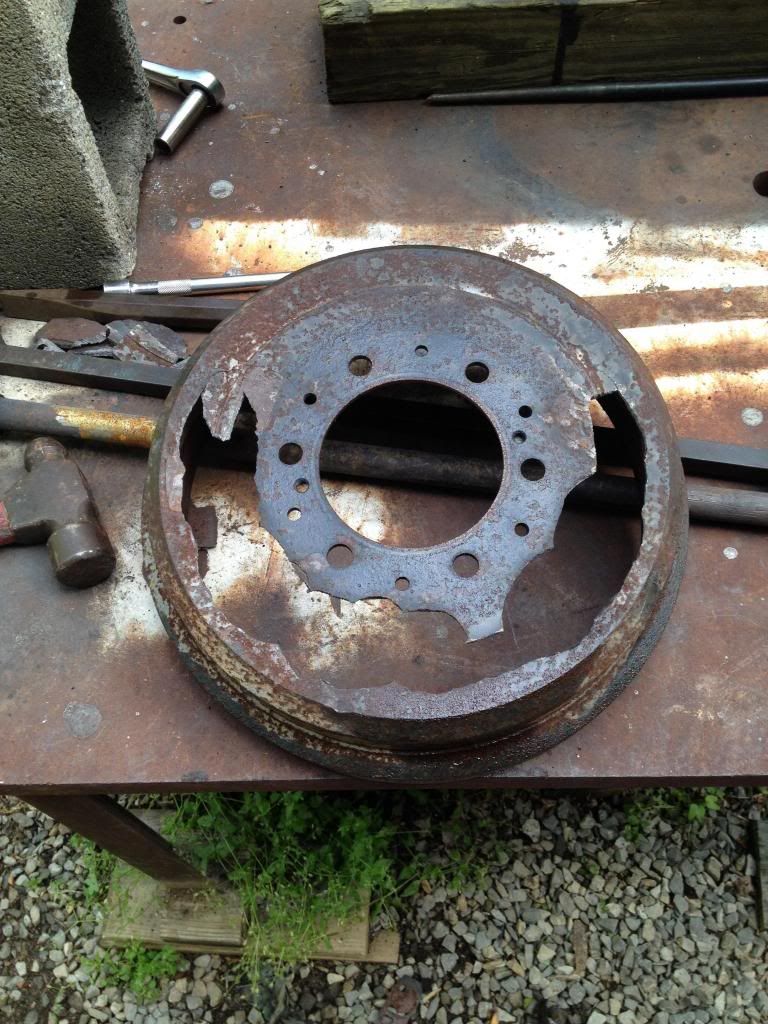
Getting the drums off the IFS rear was a big PITA. I wasn't kidding...
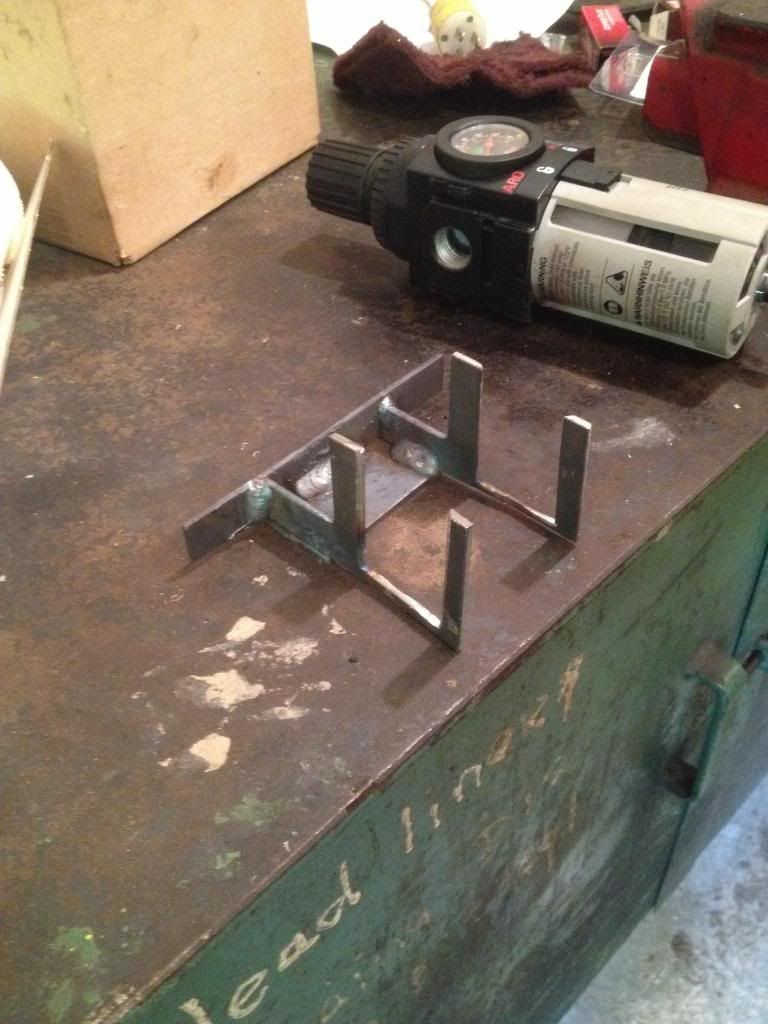
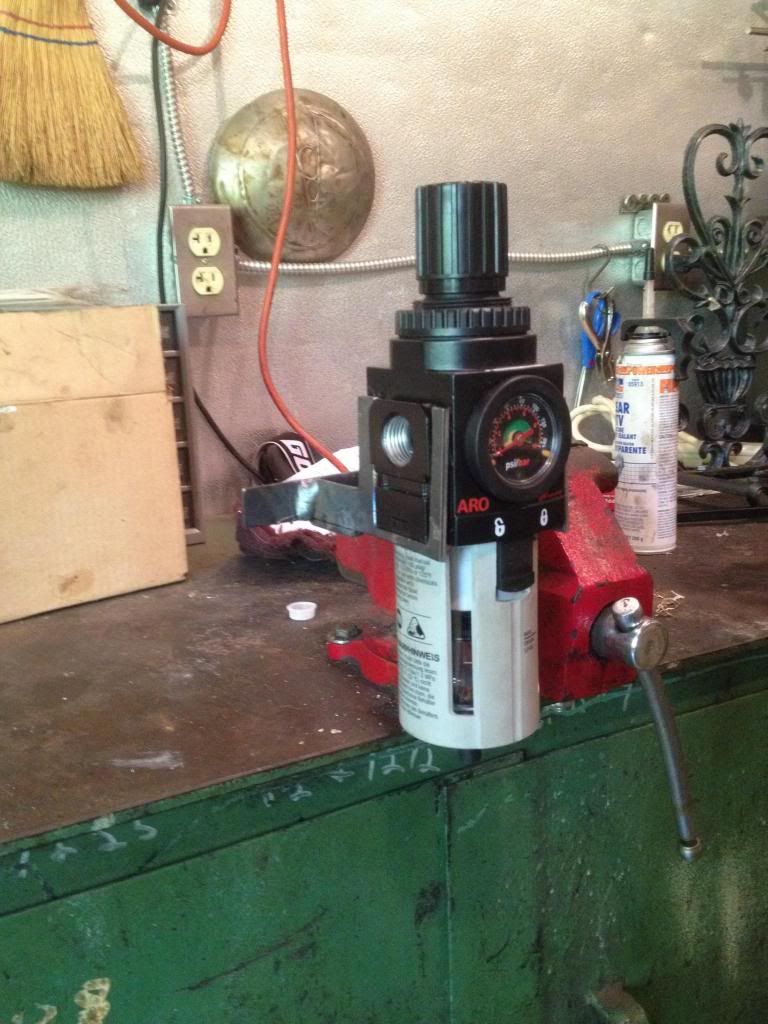
Air dryer mount
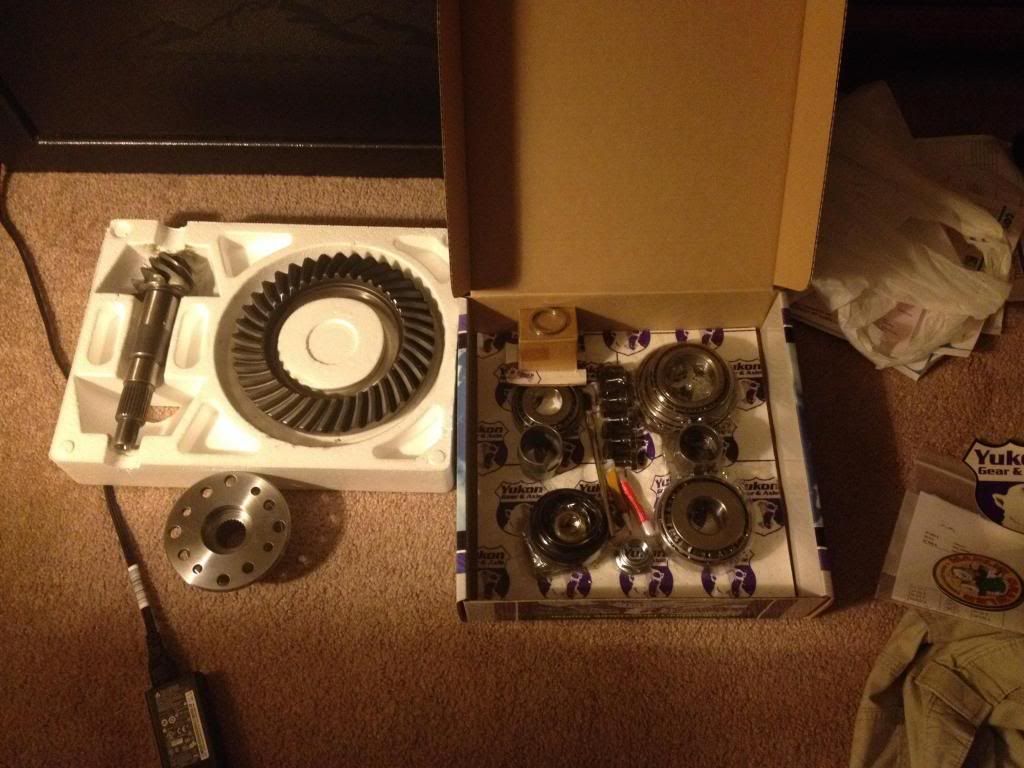
Parts, patiently waiting to be installed!
Re: My 1983 Toyota pickup resurrection.
I haven't updated this in awhile mainly because I haven't got much done on it. Up until now I've been trying to get my other vehicles in good shape. My F150 has had a rear main seal leak. So my neighbor let me use his lift and I put a oil pan gasket, RMS, flywheel, clutch, slave cylinder, and shifter bushing kit in it. The crank had a slight fingernail-catching groove in it from the old seal. I tried pushing the new one in past the groove, and the awesome part about it is after I got it all back together, the new RMS leaks worse than before. So out comes the tranny again......one day.
As for the Toyota progress, this is what I've got done so far.
- Sandblasted and painted rear axle. I'm still waiting on a rebuild kit so I can throw the shafts back in it. I got some rear disk brackets off a member from YT for IFS calipers, however, I'm going to try and locate calipers with an incorporated e-brake that way I don't have to use a transfer case e-brake. If I can't....no big deal. I'm also going to wait to put gears and a locker in the rear for the time being that way I can get a rolling chassis and get the engine, tranny, etc. mounted. I will just temporarily run one driveshaft if it comes down to it.
- Front axle is modified for front e-locker.
- Gears are currently being set up in the e-locker by a friend.
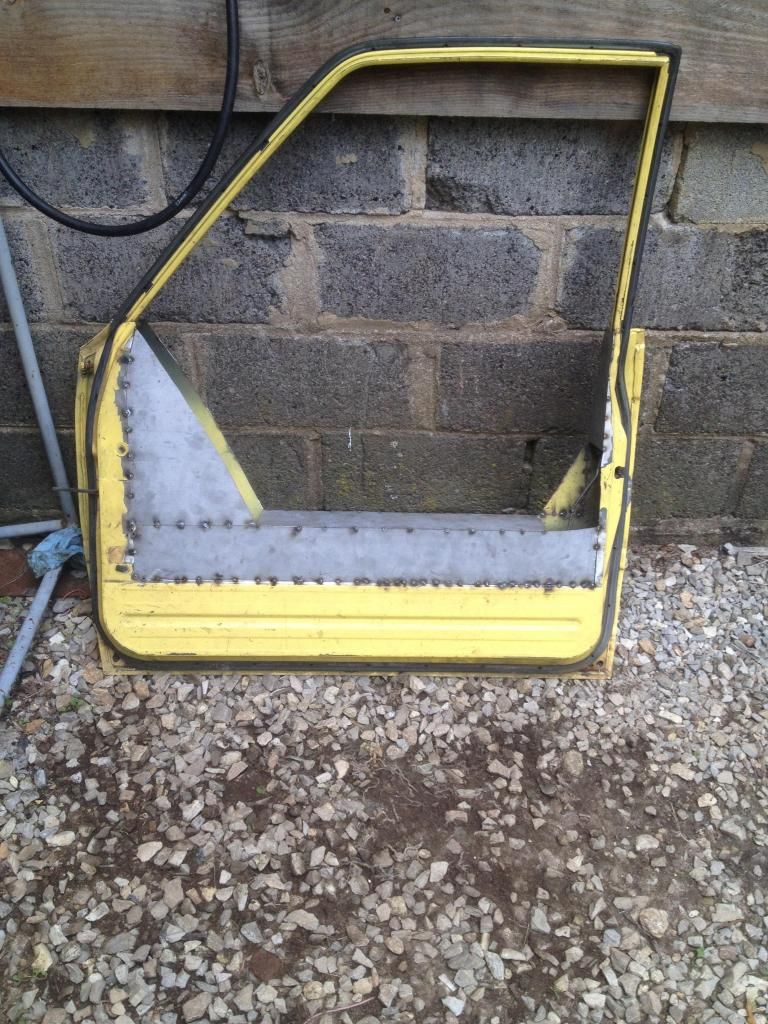
- Worked on half doors, however, I'm still toying ideas for an inside door latch. I'm thinking of getting some clutch/brake cable off a bike or motorcycle that way I can put the latch where I want it. I also want to sandblast the inside of the doors that way I can put POR15 on it before putting the rest of the metal on.
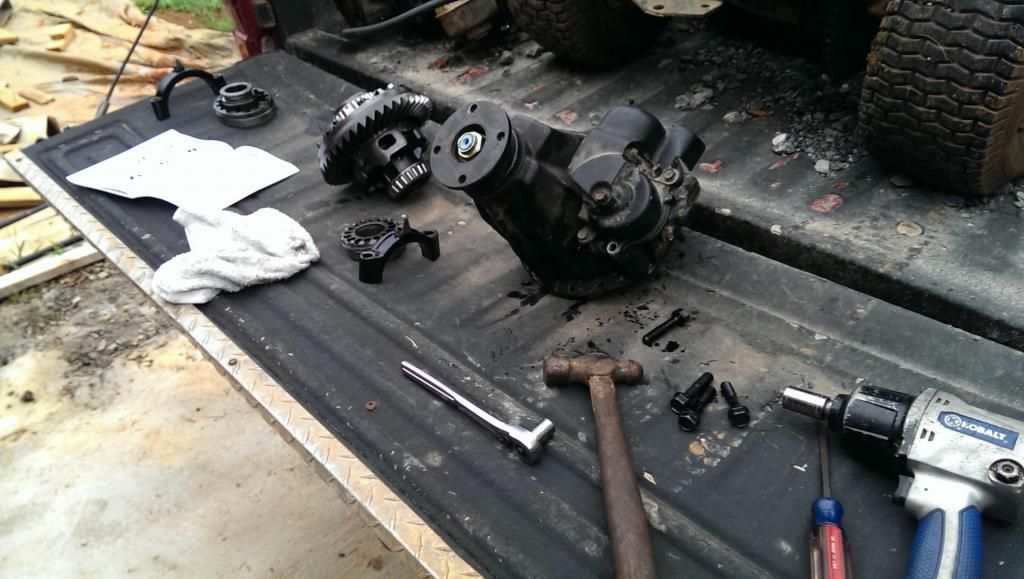
I also picked up what I thought was a W56 tranny, only to find out it is a G54. It did come with a transfercase, front driveshaft, and crossmember, though. I'm probably not going to use any of it except the transfer case. So if anyone is interested let me know. For the tranny, I decided I'm going to use the W59 in the tacoma, and get an adapter for the cases from Marlin. I will have spent about the same money to find a W56 to use with the 3rz as I will have spent on Marlin's adapter. Not only that, but heresay says the W59 is stronger than the W56, and it has the same amount of miles on it as the 3rz. Makes sense to me to just use the W59.
I don't have pics of it painted black, but you get the idea.
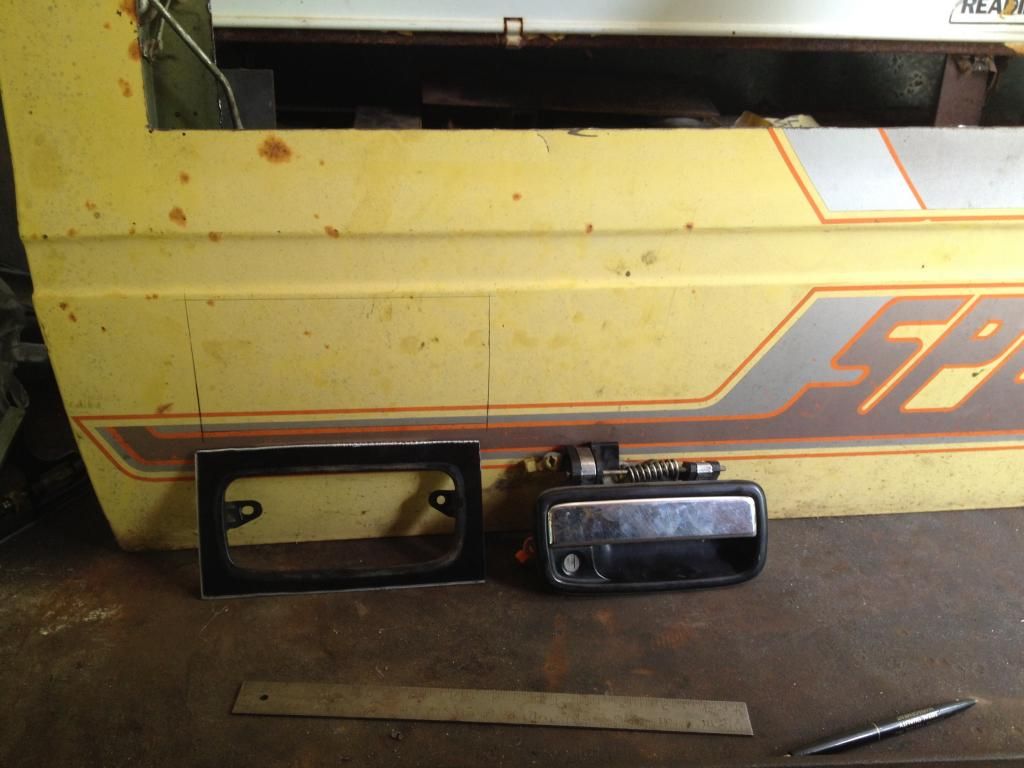
The latch and bracket came off the parts Tacoma.
As for the Toyota progress, this is what I've got done so far.
- Sandblasted and painted rear axle. I'm still waiting on a rebuild kit so I can throw the shafts back in it. I got some rear disk brackets off a member from YT for IFS calipers, however, I'm going to try and locate calipers with an incorporated e-brake that way I don't have to use a transfer case e-brake. If I can't....no big deal. I'm also going to wait to put gears and a locker in the rear for the time being that way I can get a rolling chassis and get the engine, tranny, etc. mounted. I will just temporarily run one driveshaft if it comes down to it.
- Front axle is modified for front e-locker.
- Gears are currently being set up in the e-locker by a friend.
- Worked on half doors, however, I'm still toying ideas for an inside door latch. I'm thinking of getting some clutch/brake cable off a bike or motorcycle that way I can put the latch where I want it. I also want to sandblast the inside of the doors that way I can put POR15 on it before putting the rest of the metal on.
I also picked up what I thought was a W56 tranny, only to find out it is a G54. It did come with a transfercase, front driveshaft, and crossmember, though. I'm probably not going to use any of it except the transfer case. So if anyone is interested let me know. For the tranny, I decided I'm going to use the W59 in the tacoma, and get an adapter for the cases from Marlin. I will have spent about the same money to find a W56 to use with the 3rz as I will have spent on Marlin's adapter. Not only that, but heresay says the W59 is stronger than the W56, and it has the same amount of miles on it as the 3rz. Makes sense to me to just use the W59.

I don't have pics of it painted black, but you get the idea.


The latch and bracket came off the parts Tacoma.


-
BadAssEddie
- Posts: 2635
- Joined: Sun Sep 27, 2009 11:12 pm
- Location: The Woods
Re: My 1983 Toyota pickup resurrection.
Nice half doors.
1969 Cadillac Deville 7.7 Big Block
1978 Ford F-150 6.4 FE
1993 Ford Bronco 5.8 Windsor
1994 Ford F-250 7.3 Powerstroke
2016 Ford F-250 6.7 Powerstroke
1978 Ford F-150 6.4 FE
1993 Ford Bronco 5.8 Windsor
1994 Ford F-250 7.3 Powerstroke
2016 Ford F-250 6.7 Powerstroke
Re: My 1983 Toyota pickup resurrection.
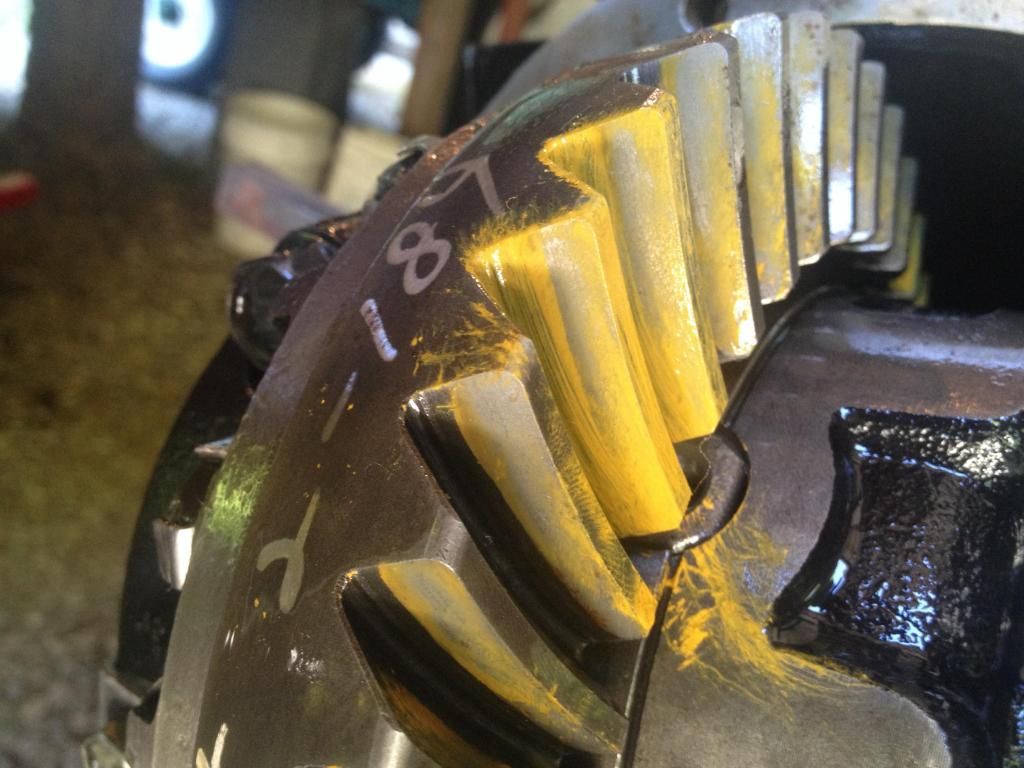
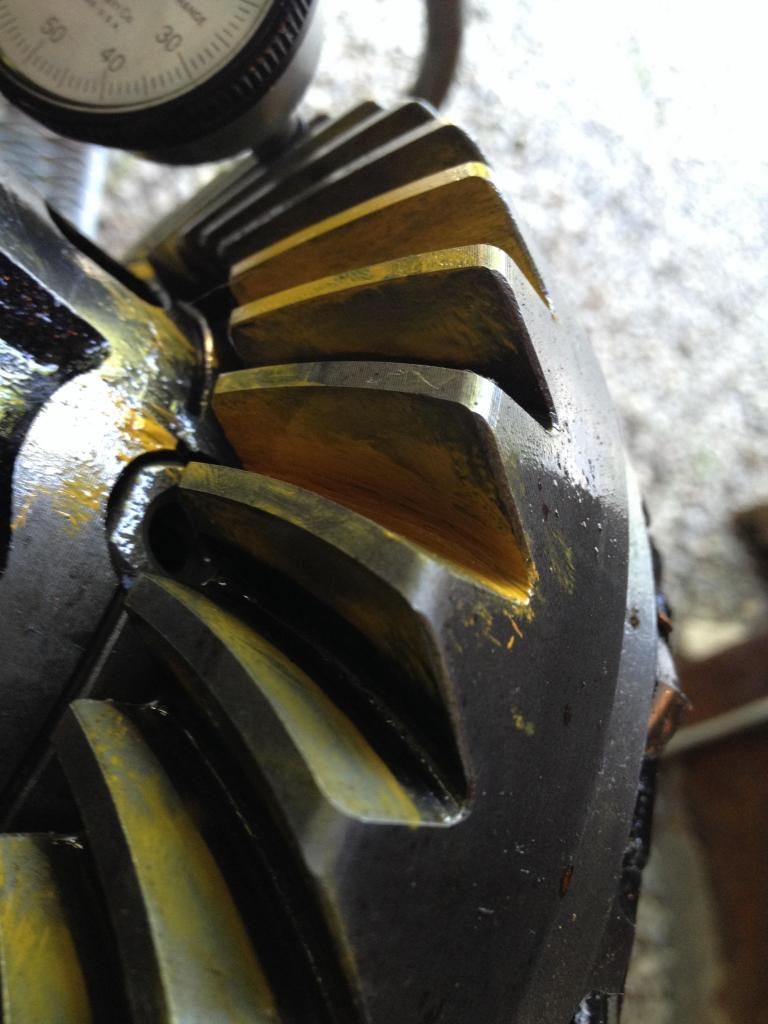
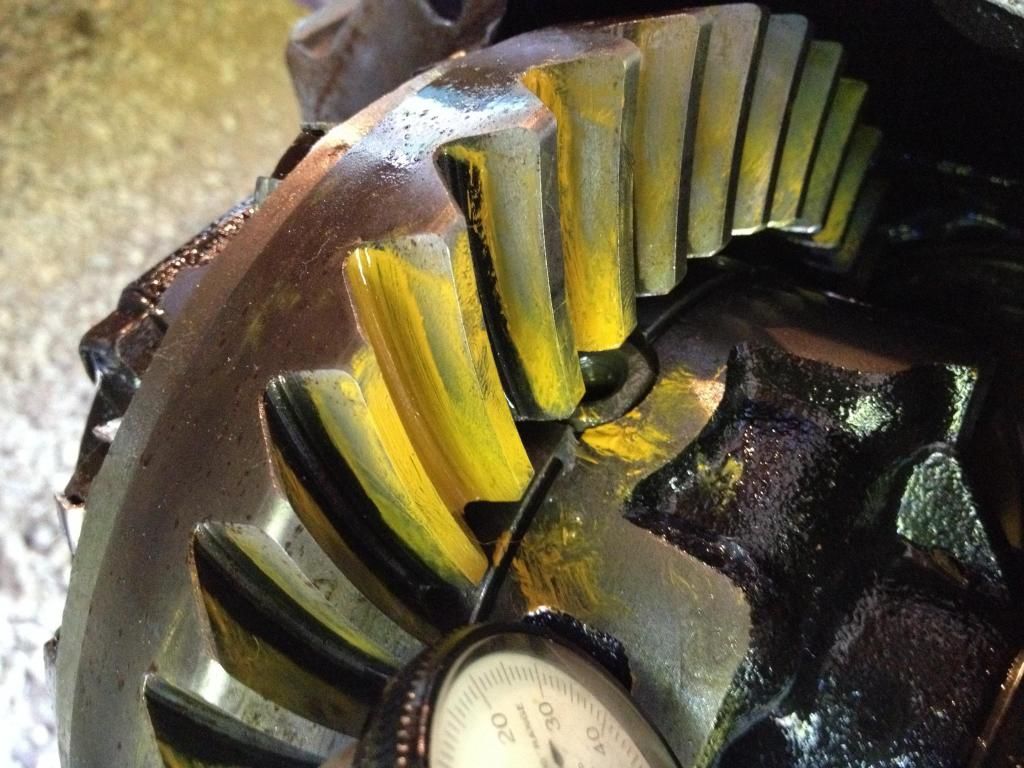
I received my e-locker back today setup with 5.29s. I'm less than pleased with the result. I payed a friend to set them up an right now I'm not sure what to do. I think I'm going to just try and set them up myself. I have never set up gears, but I've done a lot of reading and I feel like I can do it if I take my time. In my opinion the contact patch makes me think the pinion is too shallow on the ring gear. It is difficult to see the pattern but the pinion isn't touching anywhere on the lower half of the ring gear. Just the top half.. And I put two indicators on the ring gear and both measured 0.029 backlash. Idk what the preload on the bearings is as I don't have the proper wrench to check it. Here are some pictures and a video.
 [/QUOTE]


