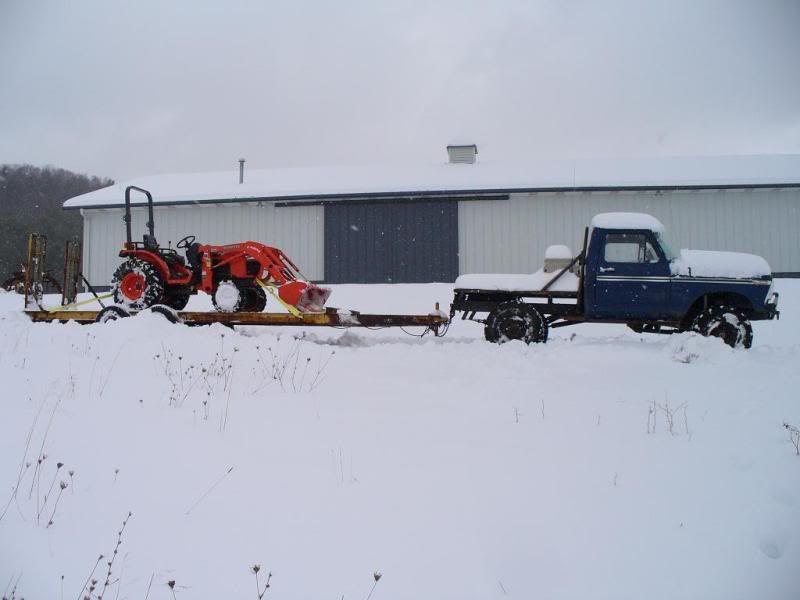
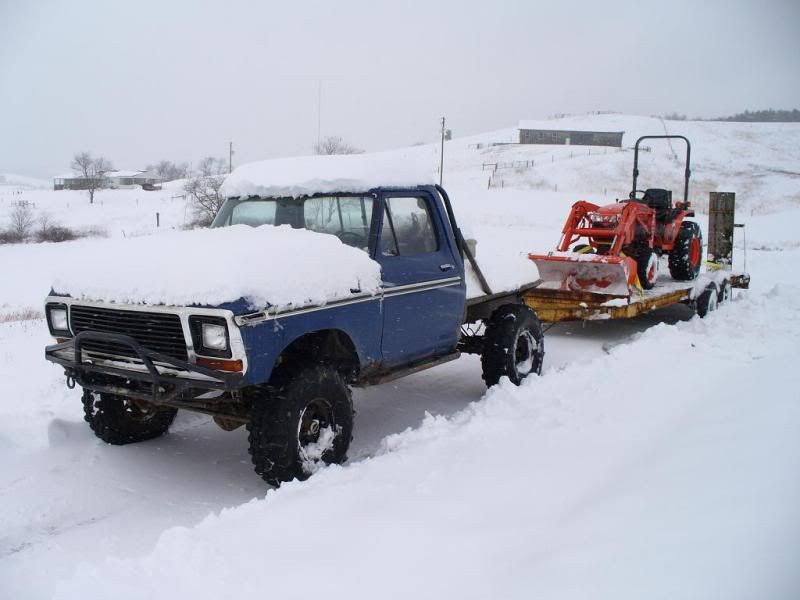
no no, he just has his own personal parts guy who has to find all this shit for him........Piney wrote:you have better luck at the parts stores than I. I went to all the major ones and nobody had poly items short of a FULL bushing kit. not surprised they were full of shit.
'79 F-150 build-up
Moderator: Club Officers
Last edited by TerryD on Sat Oct 20, 2007 11:28 pm, edited 1 time in total.
Terry
Offroading: The hobby of turning perfectly good vehicles into scrap metal.
Offroading: The hobby of turning perfectly good vehicles into scrap metal.
- VerticalTRX
- Club President
- Posts: 758
- Joined: Wed Oct 26, 2005 12:51 pm
- Location: Southwest VA
- Contact:
- Arya Ebrahimi
- Posts: 1896
- Joined: Tue Dec 14, 2004 10:58 pm
- VerticalTRX
- Club President
- Posts: 758
- Joined: Wed Oct 26, 2005 12:51 pm
- Location: Southwest VA
- Contact:
Since this section has been kinda dead lately I decided I'd update my build thread.
This weekends progress:
-cage coils in
-15" travel shocks are in
-shock hoops are 90% fabbed up
-wheeled the shit out of it sunday and the setup is 10x better than before
Tech:
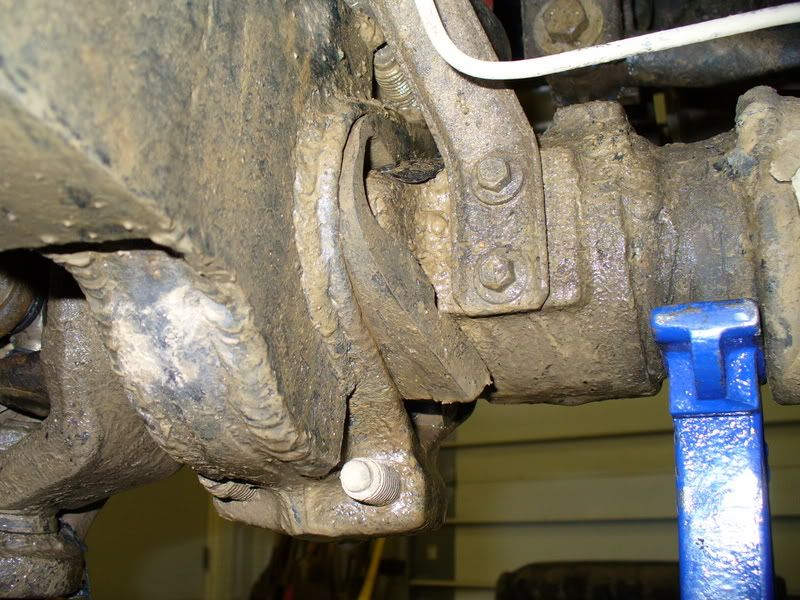
Had to fix this little problem before I started, the C-wedge bushings were trying to spit out the side, anyone had this happen before? :
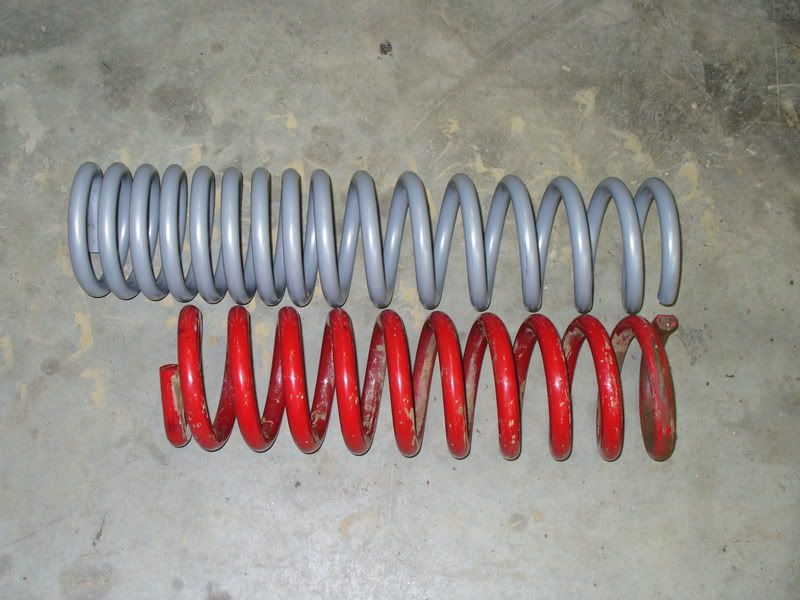
Here are the Cage Offroad 4" coils next to the 4" skyjacker coils. No wonder the skyjokers wouldn't flex.
House jacks are the shit, I've found them invaluable while building this rig:
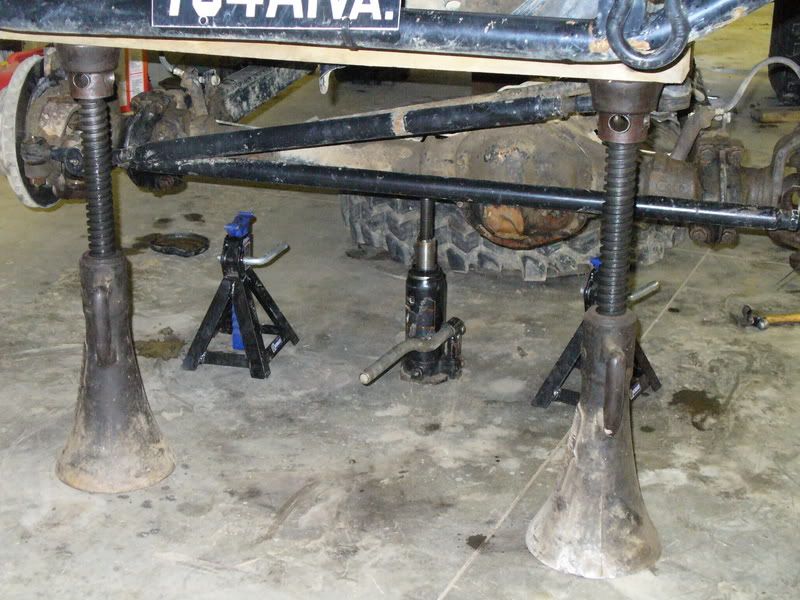
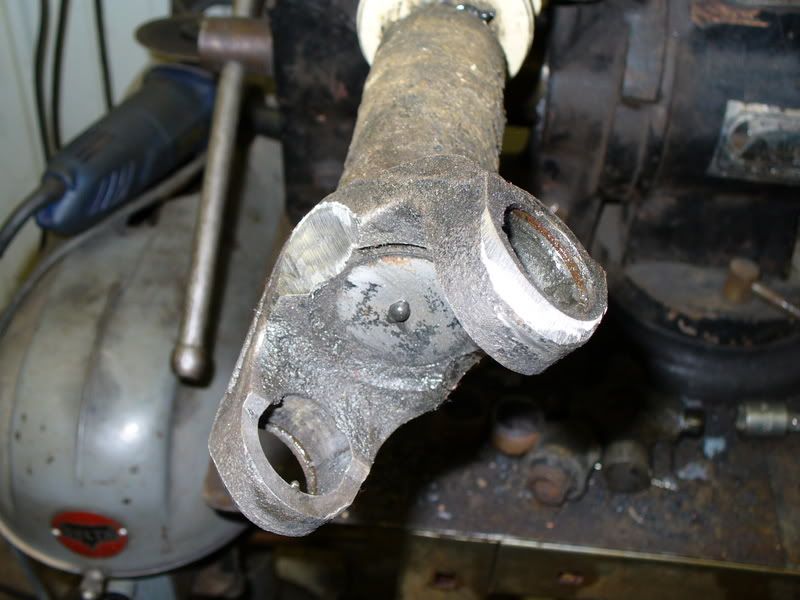
I installed the coils and all went well, then I flex it out in the shop (just the axle, no wheels) with a jack and found that my front driveshaft was binding up. I pulled the shaft and clearanced the yoke on both the shaft and also the T-case(which was a real joy):
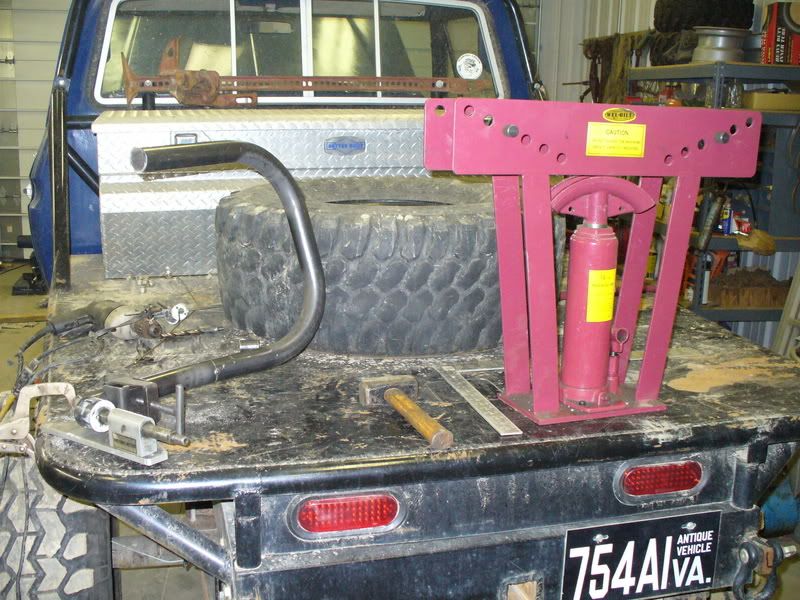
Mobile tube working station, lol:
Here's the finished driver side shock hoop:
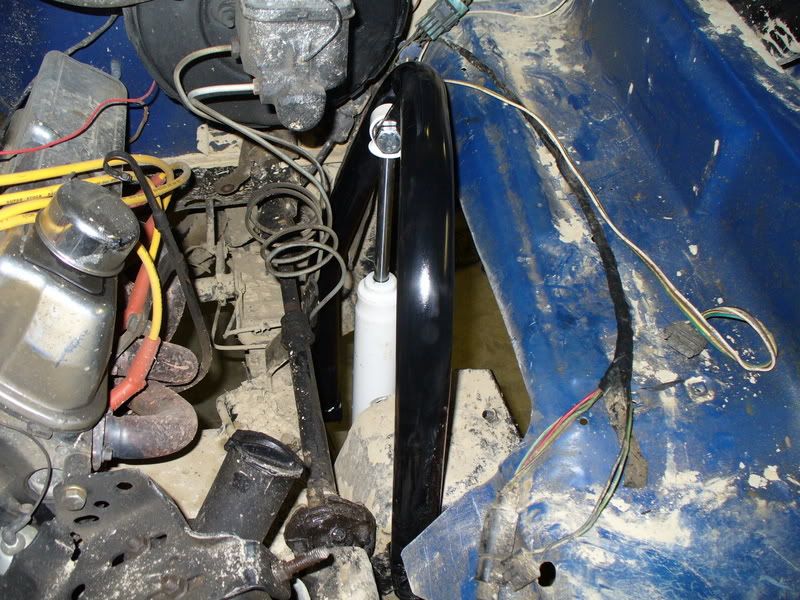
The driverside was kinda tricky to bend around the brake booster (especially with my HF type bender), but I got it done and it line up good. The passenger side is just a simple hoop, only two bends. At the time I took that last pic it was 1:30am and after working on the rig since about noon I was pretty tired, hence the lack of pictures. At this point I still didn't have a cross-over tube fabbed up so I decided just to bend something up quick and tack it on (had to leave for the trail cleanup run at 8:00am that morning). So once I get a chance I need to cut the tacks off and build a proper cross-over tube thats removeable.
The shocks are 15" travel Rancho RS5000's, part number RS5036. For $37 a pop they work pretty well, much better controll than the $12 yellow cheapo shocks I had on there. I set them with 6" up travel, 9" down.
Flex shot (before I put the shocks on), not bad for an old farm truck:
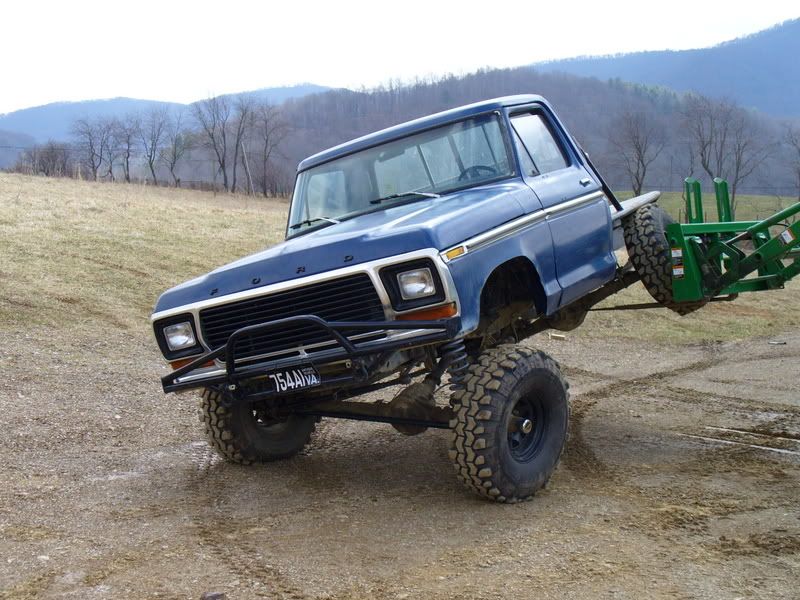
Compare those shots to the flex shots on the first page and you'll see the improvement
This weekends progress:
-cage coils in
-15" travel shocks are in
-shock hoops are 90% fabbed up
-wheeled the shit out of it sunday and the setup is 10x better than before
Tech:
Had to fix this little problem before I started, the C-wedge bushings were trying to spit out the side, anyone had this happen before? :

Here are the Cage Offroad 4" coils next to the 4" skyjacker coils. No wonder the skyjokers wouldn't flex.

House jacks are the shit, I've found them invaluable while building this rig:

I installed the coils and all went well, then I flex it out in the shop (just the axle, no wheels) with a jack and found that my front driveshaft was binding up. I pulled the shaft and clearanced the yoke on both the shaft and also the T-case(which was a real joy):

Mobile tube working station, lol:

Here's the finished driver side shock hoop:

The driverside was kinda tricky to bend around the brake booster (especially with my HF type bender), but I got it done and it line up good. The passenger side is just a simple hoop, only two bends. At the time I took that last pic it was 1:30am and after working on the rig since about noon I was pretty tired, hence the lack of pictures. At this point I still didn't have a cross-over tube fabbed up so I decided just to bend something up quick and tack it on (had to leave for the trail cleanup run at 8:00am that morning). So once I get a chance I need to cut the tacks off and build a proper cross-over tube thats removeable.
The shocks are 15" travel Rancho RS5000's, part number RS5036. For $37 a pop they work pretty well, much better controll than the $12 yellow cheapo shocks I had on there. I set them with 6" up travel, 9" down.
Flex shot (before I put the shocks on), not bad for an old farm truck:

Compare those shots to the flex shots on the first page and you'll see the improvement
'79 F-150
'49 CJ-3A
'49 CJ-3A
- VerticalTRX
- Club President
- Posts: 758
- Joined: Wed Oct 26, 2005 12:51 pm
- Location: Southwest VA
- Contact:
- VerticalTRX
- Club President
- Posts: 758
- Joined: Wed Oct 26, 2005 12:51 pm
- Location: Southwest VA
- Contact:
Re: '79 F-150 build-up
It's been 7yrs since I've updated this build thread 
Honestly though I haven't really changed much on the truck in the past 7yrs, it has worked very well and I haven't seen the need to go changing a bunch of things. That said, there are a few things that need upgrading and rebuilding on the rig, so I figured I'd show what I'm currently working on.
Here's the rig as it sits today on 35x12.50-15 BFG ATs on factory Ford wagon wheels (still have the Q78s for trail duty, but they are about shot): Broke my traction bar and did a quick emergency repair, going to build an entirely new and stronger unit in the near future:
The motor hasn't been running the best lately and I've been having some valvetrain noise so it was time to investigate:
Setup the dial indicator to measure cam lobe lift:
Found out I had lost a little bit of a few cam lobes and one was down .015" which is unacceptable IMO. I attribute this to our break-in which had a few issues and today's crappy oils without zinc. Also, while I can't completely blame Comp Cams, I will say all of their Xtreme energy line is really pushing the limits of what you can do with a flat tappet cam. Basically they're slinging the valves open and slamming them shut (especially on this short duration high lift cam I was running). Good for max power and a badass sound, but not good for valvetrain stability/life.
So, time for some new parts:
More to come soon....
'79 F-150
'49 CJ-3A
'49 CJ-3A
- FJCcrawler
- Posts: 505
- Joined: Fri Aug 30, 2013 7:18 pm
Re: '79 F-150 build-up
Keep it coming! I love engine tech! One of the spots I know almost jack shit about. Get me learnt. 
'01 4Runner -New lower ball joints
'85 4Runner
'04 GX470
’88 Xtra cab
’94 Land Cruiser
Chris
'85 4Runner
'04 GX470
’88 Xtra cab
’94 Land Cruiser
Chris
- BadAssEddie
- Posts: 2635
- Joined: Sun Sep 27, 2009 11:12 pm
- Location: The Woods
Re:
Man, I didn't know the paint was ever so minty.VerticalTRX wrote:

My favorite rig in the club, glad you're bringing the thread back from the depths, like Wong said, more engine tech!
1969 Cadillac Deville 7.7 Big Block
1978 Ford F-150 6.4 FE
1993 Ford Bronco 5.8 Windsor
1994 Ford F-250 7.3 Powerstroke
2016 Ford F-250 6.7 Powerstroke
1978 Ford F-150 6.4 FE
1993 Ford Bronco 5.8 Windsor
1994 Ford F-250 7.3 Powerstroke
2016 Ford F-250 6.7 Powerstroke
- VerticalTRX
- Club President
- Posts: 758
- Joined: Wed Oct 26, 2005 12:51 pm
- Location: Southwest VA
- Contact:
Re: '79 F-150 build-up
Thanks yall, yeah it used to have a pretty nice paint job, that is something that I'll also be redoing in the near future. Body isn't as straight now, but I really dig the look of a nice paint job over mashed metal. 
Although I haven't explicitly stated it before, this has always been sort of a retro build, using basic old school parts, tools and tech. Generally speaking, most of the parts on the truck are things that could have been bought in the 80's to early 90's, right down to the Q78-15 TSLs. With that in mind, I've decided to keep most of my engine mods to that time frame as well going forth.
So, all that to say I'm going from 21st century camshaft technology back to 1980's camshaft technology. I decided to go with an Edelbrock Performer Plus cam, this is what most would describe as an "RV" cam back in the day. As a quick little side note, back in the 60s/70s/80s the term Recreational Vehicle (RV) was broadly used to describe anything from jeeps to 4wd pickups to powerboats, and yes, even motorhomes. So an RV cam isn't really a cam meant for your Winnebago, although it could be used for such. Generally speaking an 'RV' cam is around 204/214 duration at .050", and in the mid .400" lift range, tons of low end torque, power range from idle to 5000rpms. All around a good match for the aforementioned applications.
Specs on the original cam:
Comp Extreme 4x4 X4250H
250/258 Advertised Duration, 206/214 Duration at .050, .448" Intake/.483" exhaust lift, 111* lobe separation
New cam:
Edelbrock Performer Plus 2182
270/280 Advertised Duration, 204/214 Duration at .050, .448" intake/.472 exhaust lift, 112* lobe separation
So on paper these cams look very similar, and performance wise they are within a few hp/ft-lbs of each other but there are some differences.
First off, when comparing cams generally you compare the "duration at .050"" numbers, that means the duration starting measurement at .050" of valve lift. 204/214 @ .050 is a very low end torque cam, start getting up into the .224/.234 range and your looking at more mid and top end hp. The first number is always the intake side, second number is exhaust side. You also compare the valve lift numbers, the higher the lift the more possible air flow and more hp.
"Advertised Duration" isn't very useful for comparing cams per say, but the numbers do mean something. Generally Advertised Duration is measured at about .006" valve lift which is when the valve is just starting to open. This is a trick I just learned: If you subtract duration at .050 from the Adv. duration you come up with a number which correlates to how aggressive the ramp profiles are.
For example:
Comp X4250H is 250/258 adv and 206/214 @ .050, subtract those numbers and you come up with 44/44
Edelbrock 2182 is 270/280 adv and 204/214 @ .050, subtract those and you get 66/66
The smaller the number the faster the valve is being pushed open and slammed shut, the larger the number the more gently it is. So the Edelbrock cam is 'lazier' off the seat, but will promote better valvetrain stability/longevity and quieter vavletrain operation. The Comp cam on the other hand is pushing the limit of how fast a flat tappet cam can open and close the valve, this gives a little more power and a more aggressive and racier sound.
So I picked the Edelbrock cam for the above mentioned reasons, plus I had the matching Edelbrock Performer intake, and lastly I could purchase it through Advance auto and use my speedperks rewards to get it for cheap.
I also picked up a matching set of valve springs (it's important to use the correct valve springs that are recommended for your cam, ask me how I know, lol) and a double roller timing chain set.
Here you can see how clean this motor is inside, I didn't clean this at all, just dabbed up the oil and spilled coolant. Running a hot enough thermostat (195* in my case) is one of the keys to keeping your motor free from gunk and sludge:
Here's a trick for camshaft installation and removal, screw a long bolt into the end of it for a handle. You must be very careful to gently and smoothly remove and install a cam to avoid nicking the cam bearings, which if bad enough can cause a loss in oil pressure:
Removed the old cam, installed the new cam (with proper break in lube applied to lobes and lifters) and here I'm "degreeing in the cam." Basically you are using the degree wheel bolted to the end of the crankshaft along with a pointer to see what the timing is in degrees vs valve lift. This will tell you a) if your cam timing is off (mine was off, more on that later) and b) how well the cam is ground to spec:
In that last pic I'm reusing the stock style timing chain, which turned out to be retarding the cam by about 4*, which will hurt performance. This could be attributed to wear, or possible the stock OEM replacement wasn't a 'straight up' timing set. A lot of the smog era motors from the 70's and 80's used a retarded timing set to improve emissions, but at the sacrifice of power. So, I installed my new Edelbrock double roller timing set, rechecked everything and the cam was dead on spec this time:
With everything right in the camshaft world I went to buttoning up the motor, installed the timing chain cover, intake manifold, accessories, etc. This time I splurged for the Fel-pro 'race' gaskets for the intake and it was a good choice, they are about 3x the cost but are better quality and have bigger port openings. These heads and intake manifold don't have huge intake ports (though we did open them up a little) but even still the stock gaskets barely clear the openings. This means if you don't get everything including the gaskets perfectly aligned your gaskets protrude into the ports disrupting air flow, I found my old ones were by about 1/8" in some ports hence going with the better/larger gaskets this time. Also to note, throw away the gaskets for the ends of the intake manifold and use a good bead of black RTV instead, you'll never get a good seal here with gaskets. RTV around the water passages as well, just for good measure:
One last thought, Terry and I built this motor the first go round basically as quickly and as cheaply(<----Alright Terry, you can say I told you so ) as possible. While I have found a few problems in our original engine build most of them could have been avoided if I had spent a little more money and a little more time researching things. The bottom end is still very solid, with excellent compression (190psi !) and decent oil pressure, just tidying up some things I should have done the first time around.
More to come soon, including setting up Ford lifter preload with roller rockers, carb and ignition tuning, a new 3" exhaust system, and maybe some pulls on the dyno
Although I haven't explicitly stated it before, this has always been sort of a retro build, using basic old school parts, tools and tech. Generally speaking, most of the parts on the truck are things that could have been bought in the 80's to early 90's, right down to the Q78-15 TSLs. With that in mind, I've decided to keep most of my engine mods to that time frame as well going forth.
So, all that to say I'm going from 21st century camshaft technology back to 1980's camshaft technology. I decided to go with an Edelbrock Performer Plus cam, this is what most would describe as an "RV" cam back in the day. As a quick little side note, back in the 60s/70s/80s the term Recreational Vehicle (RV) was broadly used to describe anything from jeeps to 4wd pickups to powerboats, and yes, even motorhomes. So an RV cam isn't really a cam meant for your Winnebago, although it could be used for such. Generally speaking an 'RV' cam is around 204/214 duration at .050", and in the mid .400" lift range, tons of low end torque, power range from idle to 5000rpms. All around a good match for the aforementioned applications.
Specs on the original cam:
Comp Extreme 4x4 X4250H
250/258 Advertised Duration, 206/214 Duration at .050, .448" Intake/.483" exhaust lift, 111* lobe separation
New cam:
Edelbrock Performer Plus 2182
270/280 Advertised Duration, 204/214 Duration at .050, .448" intake/.472 exhaust lift, 112* lobe separation
So on paper these cams look very similar, and performance wise they are within a few hp/ft-lbs of each other but there are some differences.
First off, when comparing cams generally you compare the "duration at .050"" numbers, that means the duration starting measurement at .050" of valve lift. 204/214 @ .050 is a very low end torque cam, start getting up into the .224/.234 range and your looking at more mid and top end hp. The first number is always the intake side, second number is exhaust side. You also compare the valve lift numbers, the higher the lift the more possible air flow and more hp.
"Advertised Duration" isn't very useful for comparing cams per say, but the numbers do mean something. Generally Advertised Duration is measured at about .006" valve lift which is when the valve is just starting to open. This is a trick I just learned: If you subtract duration at .050 from the Adv. duration you come up with a number which correlates to how aggressive the ramp profiles are.
For example:
Comp X4250H is 250/258 adv and 206/214 @ .050, subtract those numbers and you come up with 44/44
Edelbrock 2182 is 270/280 adv and 204/214 @ .050, subtract those and you get 66/66
The smaller the number the faster the valve is being pushed open and slammed shut, the larger the number the more gently it is. So the Edelbrock cam is 'lazier' off the seat, but will promote better valvetrain stability/longevity and quieter vavletrain operation. The Comp cam on the other hand is pushing the limit of how fast a flat tappet cam can open and close the valve, this gives a little more power and a more aggressive and racier sound.
So I picked the Edelbrock cam for the above mentioned reasons, plus I had the matching Edelbrock Performer intake, and lastly I could purchase it through Advance auto and use my speedperks rewards to get it for cheap.
I also picked up a matching set of valve springs (it's important to use the correct valve springs that are recommended for your cam, ask me how I know, lol) and a double roller timing chain set.
Here you can see how clean this motor is inside, I didn't clean this at all, just dabbed up the oil and spilled coolant. Running a hot enough thermostat (195* in my case) is one of the keys to keeping your motor free from gunk and sludge:
Here's a trick for camshaft installation and removal, screw a long bolt into the end of it for a handle. You must be very careful to gently and smoothly remove and install a cam to avoid nicking the cam bearings, which if bad enough can cause a loss in oil pressure:
Removed the old cam, installed the new cam (with proper break in lube applied to lobes and lifters) and here I'm "degreeing in the cam." Basically you are using the degree wheel bolted to the end of the crankshaft along with a pointer to see what the timing is in degrees vs valve lift. This will tell you a) if your cam timing is off (mine was off, more on that later) and b) how well the cam is ground to spec:
In that last pic I'm reusing the stock style timing chain, which turned out to be retarding the cam by about 4*, which will hurt performance. This could be attributed to wear, or possible the stock OEM replacement wasn't a 'straight up' timing set. A lot of the smog era motors from the 70's and 80's used a retarded timing set to improve emissions, but at the sacrifice of power. So, I installed my new Edelbrock double roller timing set, rechecked everything and the cam was dead on spec this time:
With everything right in the camshaft world I went to buttoning up the motor, installed the timing chain cover, intake manifold, accessories, etc. This time I splurged for the Fel-pro 'race' gaskets for the intake and it was a good choice, they are about 3x the cost but are better quality and have bigger port openings. These heads and intake manifold don't have huge intake ports (though we did open them up a little) but even still the stock gaskets barely clear the openings. This means if you don't get everything including the gaskets perfectly aligned your gaskets protrude into the ports disrupting air flow, I found my old ones were by about 1/8" in some ports hence going with the better/larger gaskets this time. Also to note, throw away the gaskets for the ends of the intake manifold and use a good bead of black RTV instead, you'll never get a good seal here with gaskets. RTV around the water passages as well, just for good measure:
One last thought, Terry and I built this motor the first go round basically as quickly and as cheaply(<----Alright Terry, you can say I told you so
More to come soon, including setting up Ford lifter preload with roller rockers, carb and ignition tuning, a new 3" exhaust system, and maybe some pulls on the dyno
'79 F-150
'49 CJ-3A
'49 CJ-3A
Re: '79 F-150 build-up
VerticalTRX wrote:Alright Terry, you can say I told you so
No no, I think you suffering through Andrew's Jeep engine is enough satisfaction for me....

Although, looking at those pitiful excuses for heads still makes me a little dead inside... I do wish I had degreed your cam, although general convention is that slight retarding will help RPM while advancing will help bottom end grunt. My Camaro engine is straight up (+2* for timing set wear) so I could maximize the cam's range. Your engine could have used a little more bottom end for crawling and since you can't really make power above 4500 with those heads anyways, you probably wouldn't have noticed it.
Let me take this time to mention the fact that an engine is more than a random assembly of pieces. A huge "lopey" cam is only going to make power if you have the heads, intake, and bottom end to support it. Understanding where your cam is going to make power and how to pick pieces to get the power where you want it is a very important thing so many people overlook. Just cramming in a cam doesn't mean your engine will make more power. You can easily get more cam than your engine can support and wind up with less power than it was stock.
Terry
Offroading: The hobby of turning perfectly good vehicles into scrap metal.
Offroading: The hobby of turning perfectly good vehicles into scrap metal.
- redneckrapunzel
- Posts: 572
- Joined: Wed Oct 01, 2014 10:48 am
Re: '79 F-150 build-up
Can you just build motors constantly so we can read you threads and learn...?
1997 TJ
04 superduty
10 civic #nolifelikethelowlife
"If you'd stop flirting with the and worked, you'd be almost done." - alec
^ very true ^
04 superduty
10 civic #nolifelikethelowlife
"If you'd stop flirting with the
^ very true ^
- VerticalTRX
- Club President
- Posts: 758
- Joined: Wed Oct 26, 2005 12:51 pm
- Location: Southwest VA
- Contact:
Re: '79 F-150 build-up
What Terry is saying about cams and engine combos is very true, and I'm kind of skipping a lot of stuff in this thread, so I'll back up a minute and go over some of the basics. In fact, I think I'll start a new thread in the tech section since there seems to be a lot of interest in this subject.
'79 F-150
'49 CJ-3A
'49 CJ-3A
