BadAssEddie wrote:Thanks for the info.
Give me a call when you dyno. I have been saying for years I wanted to put the rig on one, and it would be interesting like you said, to have a baseline for any future modifications.
Will do, there is a chassis dyno in Pulaski, I'm going to call him this week and get some details on pricing, appointments, etc.
Just be aware that our rigs are probably going to make some pitiful rear wheel HP numbers. Heavy 4wd drivetrains and big tires really suck up power, totally different ball game then say a Mustang running through a T5 tranny and 27" slicks. I'm guessing we're looking at a minimum 30-35% drivetrain loss for a trail rig.
FJCcrawler wrote:Badass tech! Makes me wanna start building a small block for shits and giggles.

People have been swapping small block Chevy motors into Landcrusier for decades. I think you should take the trend into the 21st century and swap a Chevy LS motor into your 4runner

Time for some more tech:
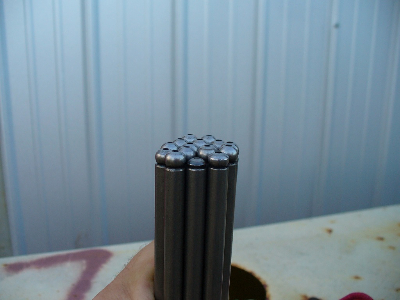
So the next step was to install the push rods and roller rocker arms. The push rods I was running were shot, not sure what happened but this was the cause of the valvetrain noise.These were some pretty good custom pushrods too, they shouldn't have failed like this. My guess is it was due to lifter preload issues, either from loss of cam or just cheap lifters that were failing. It pretty much beat the ball ends in on a few push rods:
- P1020674.JPG (124.44 KiB) Viewed 38716 times
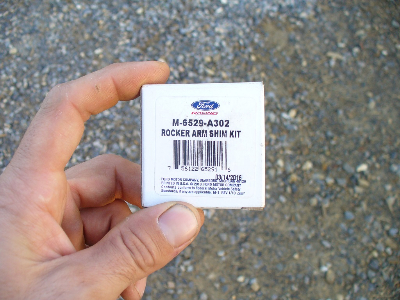
So I dropped in a stock set of push rods I had laying around, which were about .060 too long with this particular valvetrain combo. It's very common to need different length pushrods when you change anything with the block/heads/cam/rockers, etc. The best option is to order custom length pushrods, but I'm not sure how long I'll run this current setup, so I didn't want to spend the time/money. In this case (with most Fords using pedestal mount rocker arms) it's OK to shim the rocker arm assemblies up to make up this distance, so as to achieve proper lifter preload. Hydraulic lifter preload should be between .020 and .060, so in this case that's roughly 1/4 to 3/4 turn of the rocker arm bolt. Here is the shim kit, only about $14 and comes with an assortment of .030 and .060 shims to get the preload right:
- P1020668.JPG (185.32 KiB) Viewed 38716 times
Once the valvetrain was done I primed the oiling system and installed the distributor. Most Fords are easy to prime as a 5/16" socket on a long 1/4 drive extension will work to turn the oil pump shaft. Put a drill on it and spin it (same direction as the distributor turns) until you have oil pressure on the gauge, and you're good.
Here's how to get the distributor in right:
1. Place the #1 cylinder at Top Dead Center on the Compression stroke. With the valve cover off turn the motor over by hand until the piston is at the top of its stroke AND both valves are closed. With the valve cover off it's easy to see this as both rocker arms are in the up position. What happens often is people install the distributor at Top Dead Center, but they are on the exhaust stroke instead of the compression stroke and then your timing is 180* off, motor wont fire.
2. Install the distributor in the position you want it, with the rotor pointing at the terminal you want for the number one cylinder. The actual orientation of the distributor isn't important, as long as everything clears and it's sitting the way you want. As mentioned before, point the rotor at (actually just slightly before) the terminal you will use for number one, and go ahead and mark it on your distributor cap which is #1.
3. Wire the motor as per the firing order.
4. When you go to start the motor have someone crank it over while you turn the distributor back and forth slightly, if needed, to get the motor to fire. Once running set the timing with a timing light and lock the distributor down.
When installing a flat tappet cam it is critical to break it in properly, this usually entails running the motor at 2000-3000rpms for the first 20-25 minutes. It's very important that the motor fires right off and goes straight to that RPM range, if you crank the motor over for a long period of time before it fires it wipes the lifter break-in lube off and you can wreck the cam. Also if you let the motor idle or run at lower than ideal rpms you run the risk that you aren't building enough oil pressure to keep the lifters spinning, and you wreck the cam. Needless to say, there is a lot that can go wrong and it's usually a tense 20-30 minutes as you're breaking it it. This time I used Shell Rotella 10w30 with a Lucas ZDDP (Zinc) additive for break-in, the motor fired right off and ran perfectly and break in went well. After break-in shut the motor down, then change the oil and filter again.
With that complete I moved on to some of the other sundry things that needed attention.
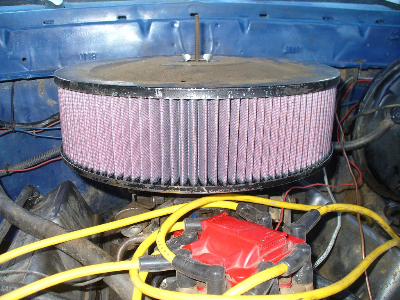
New 14x4" K&N, I need to get a pre-filter so this one doesn't get caked with mud and ruined like the last one:
- P1020666.JPG (235.88 KiB) Viewed 38716 times
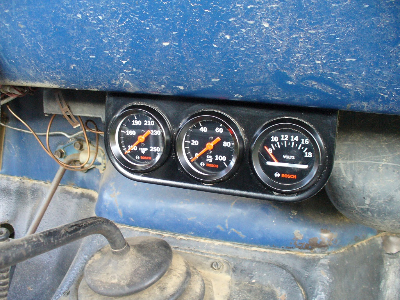
Installed a set of mechanical gauges:
- P1020653.JPG (245.41 KiB) Viewed 38716 times
I splurged for a copper oil pressure line. I don't trust the plastic ones that come in the kit, they aren't very sturdy and if they break you have a bad oil leak, not something you want out in the wilderness:
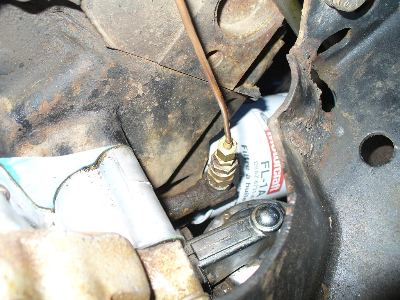
- P1020664.JPG (219.08 KiB) Viewed 38716 times
The capillary tube for the temp sending unit, installed with PTFE thread sealant (which is kind of a mess in the pic). Also in the pic you can see the valve covers are mounted using studs instead of bolts and rubber valve cover seals instead of cork. Both of those were Terrys doings when we built this motor and they are very nice, makes the valve covers easy to remove and install and the gaskets are reusable and haven't leaked a drop in ten years:
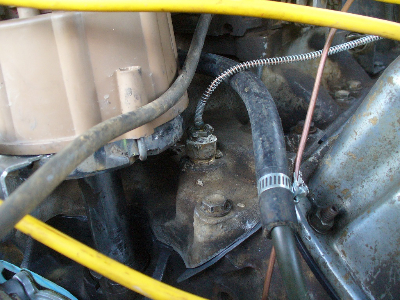
- P1020661.JPG (213.65 KiB) Viewed 38716 times
Last pic shows my new 3" single exhaust with Dynomax Super Turbo muffler and custom high-clearance, thick wall drive shaft. The guys at VA driveline built it for me years ago and retubed it this time after I bent it. They are good, it ran so true it didn't even need any weights to balance it:
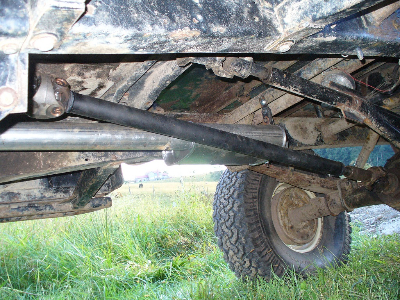
- P1020659.JPG (265.07 KiB) Viewed 38716 times
That pretty much brings yall up to where I'm at now, next step is retuning the carb and ignition system. Maybe I'll get a chance to do that in the next few days.


