Good stuff
'79 F-150 build-up
Moderator: Club Officers
-
BadAssEddie

- Posts: 2635
- Joined: Sun Sep 27, 2009 11:12 pm
- Location: The Woods
Re: '79 F-150 build-up
Did any of the older small blocks have roller tappet cams? You staying with a flat tappet in going with the retro theme or is there an advantage to one over the other in various applications? I ask because I know the FI 5.8's switched from flat tappet to roller tappet in '94 or '95 and was doing some research into the use of both in a build.
Good stuff
Good stuff
1969 Cadillac Deville 7.7 Big Block
1978 Ford F-150 6.4 FE
1993 Ford Bronco 5.8 Windsor
1994 Ford F-250 7.3 Powerstroke
2016 Ford F-250 6.7 Powerstroke
1978 Ford F-150 6.4 FE
1993 Ford Bronco 5.8 Windsor
1994 Ford F-250 7.3 Powerstroke
2016 Ford F-250 6.7 Powerstroke
-
VerticalTRX
- Club President
- Posts: 757
- Joined: Wed Oct 26, 2005 12:51 pm
- Location: Southwest VA
- Contact:
Re: '79 F-150 build-up
None of the windsor family had roller cams until the 5.0 HO in the mid to late 80s. As you mentioned the 351w was factory roller cam starting in '94. That said, it is super easy to install a roller cam in any of these motors, I just haven't done it yet due to cost (and a couple other reason.) There are two ways of running a roller cam in a non-roller windsor block, option one is install the factory Ford spider in the lifter valley and use 5.0 lifters (all factory Ford parts, or you can get it all as an aftermarket kit). Only problem with this setup is you have to run a small base circle cam, which means either limited cam choices or a custom ground cam. There is also some question about the strength of a small base circle cam, but for our uses I doubt it be an issue. You also have to drill and tap two holes in the lifter valley to install the spider, but it's pretty simple. Option two is use a regular roller cam and use link bar roller lifters. This is a good option (lots of cam choices, no block modifications) but link bar lifters are very expensive, like starting at $500-$700 for good ones. Basically to convert a non-roller 351w you are looking at about $500 to go with the factory type spider setup and $800-1000 to go with the linked lifters.BadAssEddie wrote:Did any of the older small blocks have roller tappet cams? You staying with a flat tappet in going with the retro theme or is there an advantage to one over the other in various applications? I ask because I know the FI 5.8's switched from flat tappet to roller tappet in '94 or '95 and was doing some research into the use of both in a build.
Good stuff
As for my choice, it's partly due to cost but also to see what kind of power a basic engine build with a flat tappet cam will make. I'm going to dyno this setup, then do another round of mods with better heads and dyno again, then I might go roller cam and dyno again. Basically I'm doing all this in steps to arrive at a power level I want, and in the name of science to see what different combos actually make. That said, a roller cam is a good choice across the board, less internal friction, more power from a different lobe profile, and it will probably broaden the power curve. You also don't have to worry about wiping a cam out during or after break-in like you do with a flat tappet cam. Really cost is the biggest factor why most people stick with flat tappet cams.
'79 F-150
'49 CJ-3A
'49 CJ-3A
-
BadAssEddie
- Posts: 2635
- Joined: Sun Sep 27, 2009 11:12 pm
- Location: The Woods
Re: '79 F-150 build-up
Thanks for the info.
Give me a call when you dyno. I have been saying for years I wanted to put the rig on one, and it would be interesting like you said, to have a baseline for any future modifications.
Give me a call when you dyno. I have been saying for years I wanted to put the rig on one, and it would be interesting like you said, to have a baseline for any future modifications.
1969 Cadillac Deville 7.7 Big Block
1978 Ford F-150 6.4 FE
1993 Ford Bronco 5.8 Windsor
1994 Ford F-250 7.3 Powerstroke
2016 Ford F-250 6.7 Powerstroke
1978 Ford F-150 6.4 FE
1993 Ford Bronco 5.8 Windsor
1994 Ford F-250 7.3 Powerstroke
2016 Ford F-250 6.7 Powerstroke
-
FJCcrawler
- Posts: 505
- Joined: Fri Aug 30, 2013 7:18 pm
Re: '79 F-150 build-up
Badass tech! Makes me wanna start building a small block for shits and giggles. 
'01 4Runner -New lower ball joints
'85 4Runner
'04 GX470
’88 Xtra cab
’94 Land Cruiser
Chris
'85 4Runner
'04 GX470
’88 Xtra cab
’94 Land Cruiser
Chris
-
VerticalTRX
- Club President
- Posts: 757
- Joined: Wed Oct 26, 2005 12:51 pm
- Location: Southwest VA
- Contact:
Re: '79 F-150 build-up
Will do, there is a chassis dyno in Pulaski, I'm going to call him this week and get some details on pricing, appointments, etc.BadAssEddie wrote:Thanks for the info.
Give me a call when you dyno. I have been saying for years I wanted to put the rig on one, and it would be interesting like you said, to have a baseline for any future modifications.
Just be aware that our rigs are probably going to make some pitiful rear wheel HP numbers. Heavy 4wd drivetrains and big tires really suck up power, totally different ball game then say a Mustang running through a T5 tranny and 27" slicks. I'm guessing we're looking at a minimum 30-35% drivetrain loss for a trail rig.
People have been swapping small block Chevy motors into Landcrusier for decades. I think you should take the trend into the 21st century and swap a Chevy LS motor into your 4runnerFJCcrawler wrote:Badass tech! Makes me wanna start building a small block for shits and giggles.
Time for some more tech:
So the next step was to install the push rods and roller rocker arms. The push rods I was running were shot, not sure what happened but this was the cause of the valvetrain noise.These were some pretty good custom pushrods too, they shouldn't have failed like this. My guess is it was due to lifter preload issues, either from loss of cam or just cheap lifters that were failing. It pretty much beat the ball ends in on a few push rods:
- P1020674.JPG (124.44 KiB) Viewed 44618 times
- P1020668.JPG (185.32 KiB) Viewed 44618 times
Here's how to get the distributor in right:
1. Place the #1 cylinder at Top Dead Center on the Compression stroke. With the valve cover off turn the motor over by hand until the piston is at the top of its stroke AND both valves are closed. With the valve cover off it's easy to see this as both rocker arms are in the up position. What happens often is people install the distributor at Top Dead Center, but they are on the exhaust stroke instead of the compression stroke and then your timing is 180* off, motor wont fire.
2. Install the distributor in the position you want it, with the rotor pointing at the terminal you want for the number one cylinder. The actual orientation of the distributor isn't important, as long as everything clears and it's sitting the way you want. As mentioned before, point the rotor at (actually just slightly before) the terminal you will use for number one, and go ahead and mark it on your distributor cap which is #1.
3. Wire the motor as per the firing order.
4. When you go to start the motor have someone crank it over while you turn the distributor back and forth slightly, if needed, to get the motor to fire. Once running set the timing with a timing light and lock the distributor down.
When installing a flat tappet cam it is critical to break it in properly, this usually entails running the motor at 2000-3000rpms for the first 20-25 minutes. It's very important that the motor fires right off and goes straight to that RPM range, if you crank the motor over for a long period of time before it fires it wipes the lifter break-in lube off and you can wreck the cam. Also if you let the motor idle or run at lower than ideal rpms you run the risk that you aren't building enough oil pressure to keep the lifters spinning, and you wreck the cam. Needless to say, there is a lot that can go wrong and it's usually a tense 20-30 minutes as you're breaking it it. This time I used Shell Rotella 10w30 with a Lucas ZDDP (Zinc) additive for break-in, the motor fired right off and ran perfectly and break in went well. After break-in shut the motor down, then change the oil and filter again.
With that complete I moved on to some of the other sundry things that needed attention.
New 14x4" K&N, I need to get a pre-filter so this one doesn't get caked with mud and ruined like the last one:
- P1020666.JPG (235.88 KiB) Viewed 44618 times
- P1020653.JPG (245.41 KiB) Viewed 44618 times
- P1020664.JPG (219.08 KiB) Viewed 44618 times
- P1020661.JPG (213.65 KiB) Viewed 44618 times
- P1020659.JPG (265.07 KiB) Viewed 44618 times
That pretty much brings yall up to where I'm at now, next step is retuning the carb and ignition system. Maybe I'll get a chance to do that in the next few days.
'79 F-150
'49 CJ-3A
'49 CJ-3A
-
BadAssEddie
- Posts: 2635
- Joined: Sun Sep 27, 2009 11:12 pm
- Location: The Woods
Re: '79 F-150 build-up
Update?
1969 Cadillac Deville 7.7 Big Block
1978 Ford F-150 6.4 FE
1993 Ford Bronco 5.8 Windsor
1994 Ford F-250 7.3 Powerstroke
2016 Ford F-250 6.7 Powerstroke
1978 Ford F-150 6.4 FE
1993 Ford Bronco 5.8 Windsor
1994 Ford F-250 7.3 Powerstroke
2016 Ford F-250 6.7 Powerstroke
Re: '79 F-150 build-up


Terry
Offroading: The hobby of turning perfectly good vehicles into scrap metal.
Offroading: The hobby of turning perfectly good vehicles into scrap metal.
-
FJCcrawler
- Posts: 505
- Joined: Fri Aug 30, 2013 7:18 pm
Re: '79 F-150 build-up
Well, hot damn! What's the story?!
'01 4Runner -New lower ball joints
'85 4Runner
'04 GX470
’88 Xtra cab
’94 Land Cruiser
Chris
'85 4Runner
'04 GX470
’88 Xtra cab
’94 Land Cruiser
Chris
Re: '79 F-150 build-up
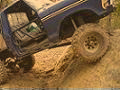
Took a trip to Uwharrie so Grubb's brother could play with is CJ. We went to get gas from the Outpost and on the way back, a 1-2 shift on pavement @ 10psi. Tore the spanner nut out of the third member and sent us on a 3 hour excursion to get some new shafts and get it all back together to wheel the rest of the day. Set the backlash by driving the spanner nut against the carrier bearing and torquing the cap back. Nothing really unusual... 
Terry
Offroading: The hobby of turning perfectly good vehicles into scrap metal.
Offroading: The hobby of turning perfectly good vehicles into scrap metal.
-
VerticalTRX
- Club President
- Posts: 757
- Joined: Wed Oct 26, 2005 12:51 pm
- Location: Southwest VA
- Contact:
Re: '79 F-150 build-up
Yeah, somehow I always seem to tear up more stuff on the street than the trail.
Glad you got those pics Terry, do you have any of the third member "repair"?
Broke the axleshaft, mangled the spanner nut, mangled the retainer clip, mushroomed out the end of the carrier itself, bent the inner race of the bearing. It was one of the more violent rear axleshaft breaks I've seen, literally blew the spanner nut right out of the bearing cap lol. I guess grabbing 2nd at full throttle with the tires at 10psi, on the street, isn't advisable.
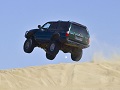
I never did carry spare 9" axleshafts because I thought they were moderately indestructible, but I know otherwise now. We called around and found an old farmer who had a junkyard full of '70-80s vintage fords on the back of his farm, about an hour from Uwharrie. Took the tow rig and drove up there with tools and cash in hand. I thought I knew my Ford 9" trivia better than I did, it took pulling the shafts on a truck or two and searching through a bunch of others before giving up, and searching through the axleshafts he had ricked up in his shed. Luckily he had a set exactly like I needed and the 20-30 year old bearings and seals were fair to midlin'. Quick stop back by Advance in Denton for supplies and back to the campground for repairs. Pulled the '79 up on the trailer for a flat working surface, pull both rear axleshafts, rear drive shaft and the third member. Took lots of beating, coaxing and swearing to get the mangled stub out of the carrier and get everything reassembled. Cleaned out all of the shards of metal from the housing (there were a lot), some fresh RTV, and stuck everything back together. After lunch topped it off with some fresh 80w90, and we were off for another good day of wheeling.
So, now I need to pull the rear axle apart again and fix it right and proper. At the very least I'll need a new spanner nut, retainer clip, bearings and carrier. I'll install a full spool this time instead of the mini-spool to get rid of another weak link. I had thought about going 35 spline, but realistically this is the first time I've broken it in 11yrs of hard use, so I think I'll stick with stock shafts and just carry a spare.
Glad you got those pics Terry, do you have any of the third member "repair"?
Broke the axleshaft, mangled the spanner nut, mangled the retainer clip, mushroomed out the end of the carrier itself, bent the inner race of the bearing. It was one of the more violent rear axleshaft breaks I've seen, literally blew the spanner nut right out of the bearing cap lol. I guess grabbing 2nd at full throttle with the tires at 10psi, on the street, isn't advisable.
I never did carry spare 9" axleshafts because I thought they were moderately indestructible, but I know otherwise now. We called around and found an old farmer who had a junkyard full of '70-80s vintage fords on the back of his farm, about an hour from Uwharrie. Took the tow rig and drove up there with tools and cash in hand. I thought I knew my Ford 9" trivia better than I did, it took pulling the shafts on a truck or two and searching through a bunch of others before giving up, and searching through the axleshafts he had ricked up in his shed. Luckily he had a set exactly like I needed and the 20-30 year old bearings and seals were fair to midlin'. Quick stop back by Advance in Denton for supplies and back to the campground for repairs. Pulled the '79 up on the trailer for a flat working surface, pull both rear axleshafts, rear drive shaft and the third member. Took lots of beating, coaxing and swearing to get the mangled stub out of the carrier and get everything reassembled. Cleaned out all of the shards of metal from the housing (there were a lot), some fresh RTV, and stuck everything back together. After lunch topped it off with some fresh 80w90, and we were off for another good day of wheeling.
So, now I need to pull the rear axle apart again and fix it right and proper. At the very least I'll need a new spanner nut, retainer clip, bearings and carrier. I'll install a full spool this time instead of the mini-spool to get rid of another weak link. I had thought about going 35 spline, but realistically this is the first time I've broken it in 11yrs of hard use, so I think I'll stick with stock shafts and just carry a spare.
'79 F-150
'49 CJ-3A
'49 CJ-3A
-
VerticalTRX
- Club President
- Posts: 757
- Joined: Wed Oct 26, 2005 12:51 pm
- Location: Southwest VA
- Contact:
Re: '79 F-150 build-up
So a continuation on what I had been working on this fall:
Carb and ignition:
I plan to upgrade to a better HEI unit, but in the mean time I did a little tuning on this one. I discovered that I wasn't getting full mechanical advance due to the design of the weights. It was only bringing in 10* of mechanical advance and should be 20*. This little kit contains different weights, springs and bushings to recurve a HEI distributor:
After examining things I determined the stock weights were actually best, but they were designed wrong and needed some grinding to allow full advance. Here you can see the stock weight on the bottom and the reground one on top: (the left weight is stacked on top of the right weight to show the difference)
Then I set the base timing to 12*, which gave me 32* total. Also installed an adjustable vacuum advance canister and tuned it on the street for max part-throttle advance without pinging. Retuned the carb idle circuit and idle speed, but haven't messed with the primary or secondary jets or rods yet. It's running good as is, not perfect but quite good. I'll fiddle with it a little more when I put the 4-hole carb spacer on it.
Also splurged and bought a wide-band O2 sensor setup. These have come down in price a lot in the last few years and I decided it was time to get one. Installed it in place of the volt gauge in my 3-gauge cluster, welded in the O2 sensor bung and wired it up. It's a great tuning aid, right now the air/fuel ratio at idle is about 15:1 to 16:1, runs about 13:1 to 14:1 on the trail at part throttle and full power is about 10:1 when it's in the secondaries (a touch rich). Here's the kit:
It's running pretty good, much more top-end power with this new cam. I did find that at 6200rpms the alternator belt flies off. However, it conveniently lands over here on the driver side inner fender.
Carb and ignition:
I plan to upgrade to a better HEI unit, but in the mean time I did a little tuning on this one. I discovered that I wasn't getting full mechanical advance due to the design of the weights. It was only bringing in 10* of mechanical advance and should be 20*. This little kit contains different weights, springs and bushings to recurve a HEI distributor:
- P1020675.JPG (197.13 KiB) Viewed 44508 times
- P1020679.JPG (211.51 KiB) Viewed 44508 times
Also splurged and bought a wide-band O2 sensor setup. These have come down in price a lot in the last few years and I decided it was time to get one. Installed it in place of the volt gauge in my 3-gauge cluster, welded in the O2 sensor bung and wired it up. It's a great tuning aid, right now the air/fuel ratio at idle is about 15:1 to 16:1, runs about 13:1 to 14:1 on the trail at part throttle and full power is about 10:1 when it's in the secondaries (a touch rich). Here's the kit:
- P1020689.JPG (220.88 KiB) Viewed 44508 times
It's running pretty good, much more top-end power with this new cam. I did find that at 6200rpms the alternator belt flies off. However, it conveniently lands over here on the driver side inner fender.
- P1020682.JPG (186.78 KiB) Viewed 44508 times
'79 F-150
'49 CJ-3A
'49 CJ-3A
Re: '79 F-150 build-up


Post repair stuff-strutting:

Terry
Offroading: The hobby of turning perfectly good vehicles into scrap metal.
Offroading: The hobby of turning perfectly good vehicles into scrap metal.
-
BadAssEddie
- Posts: 2635
- Joined: Sun Sep 27, 2009 11:12 pm
- Location: The Woods
Re: '79 F-150 build-up
Nice update
Pretty impressive you were able to find a new shaft and get everything reassembled. Sounds like it could have easily been a weekend killer.
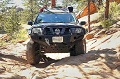
Those swampers look fresher than I remember your Q78s? Did you get new meats?
Pretty impressive you were able to find a new shaft and get everything reassembled. Sounds like it could have easily been a weekend killer.
Those swampers look fresher than I remember your Q78s? Did you get new meats?
1969 Cadillac Deville 7.7 Big Block
1978 Ford F-150 6.4 FE
1993 Ford Bronco 5.8 Windsor
1994 Ford F-250 7.3 Powerstroke
2016 Ford F-250 6.7 Powerstroke
1978 Ford F-150 6.4 FE
1993 Ford Bronco 5.8 Windsor
1994 Ford F-250 7.3 Powerstroke
2016 Ford F-250 6.7 Powerstroke
Re: '79 F-150 build-up
It was a fun adventure even thought it cost us the morning's wheeling. The guy who ran the place, Floyd, seemed impressed with Matt's knowledge of the trucks and our ability to work on these things in the field (literally!) I think we were impressed with his collection of vehicles there, including Fox-era Mustangs stacked up anywhere there was space and even a Corvair Coupe stashed in the corner.
I've got to remember to take more pictures when things like this happen but I'm afraid my documenting skills are lacking.
I've got to remember to take more pictures when things like this happen but I'm afraid my documenting skills are lacking.
Terry
Offroading: The hobby of turning perfectly good vehicles into scrap metal.
Offroading: The hobby of turning perfectly good vehicles into scrap metal.