'79 F-150 build-up

Show off your build here!

Moderator: Club Officers

User avatar
VerticalTRX
Club President
Posts: 758
Joined: Wed Oct 26, 2005 12:51 pm
Location: Southwest VA
Contact:

Post by VerticalTRX »

After wheeling the rig for a couple months the t-case has begun to leak profusely so I decided it was time for a rebuild. Naturally, while the case was out I decided to twin stick it as well.

I decided that the bearings were probably still good so I just ordered a seal kit (OEM New Process kit), from bronco graveyard for $32.

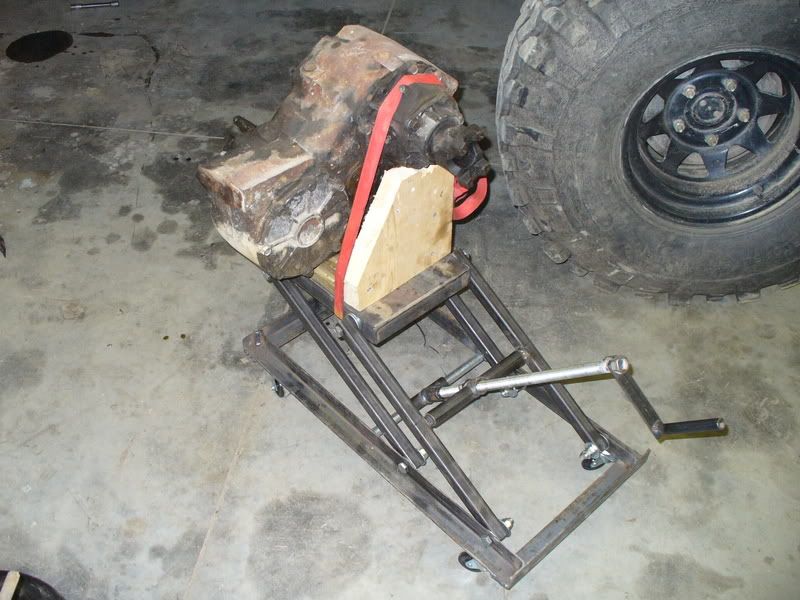
As most of you know the 205 is one heavy SOB so I decided to build a tranny jack instead of trying to lower it out by hand.

Here's the tranny jack I built, it cost about $60 in materials and raises from ~6" up to 20" :

Image

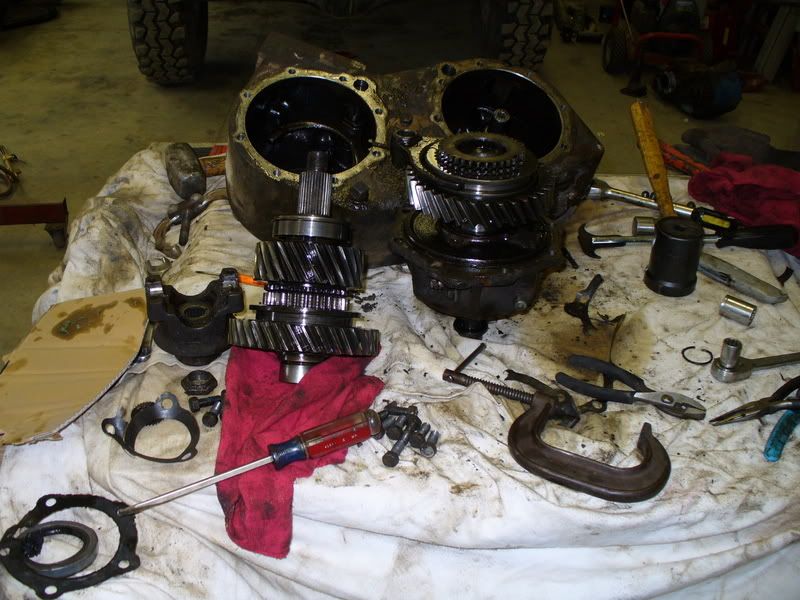
T-case being disassembled, what a mess:

Image

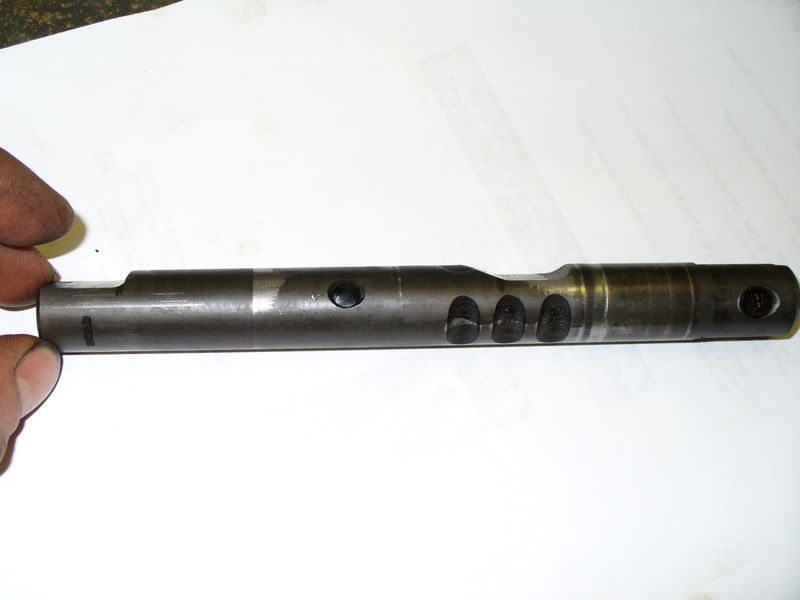
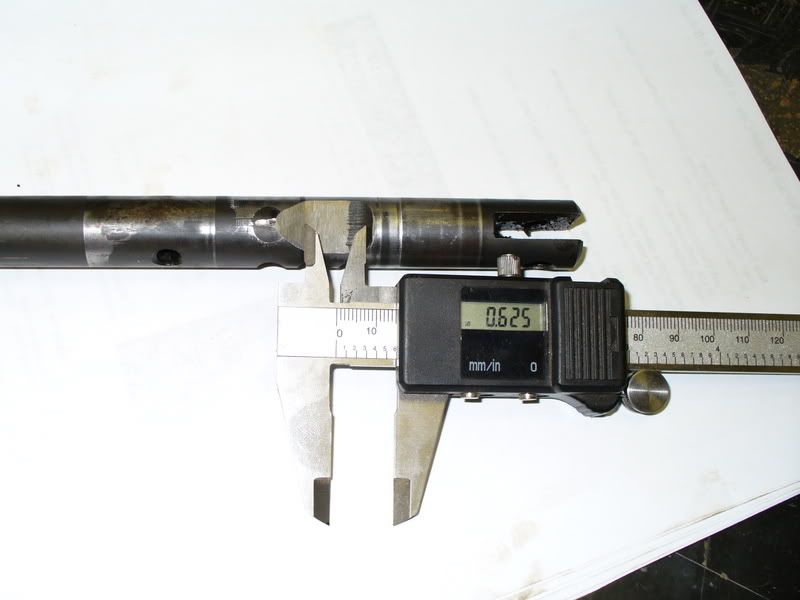
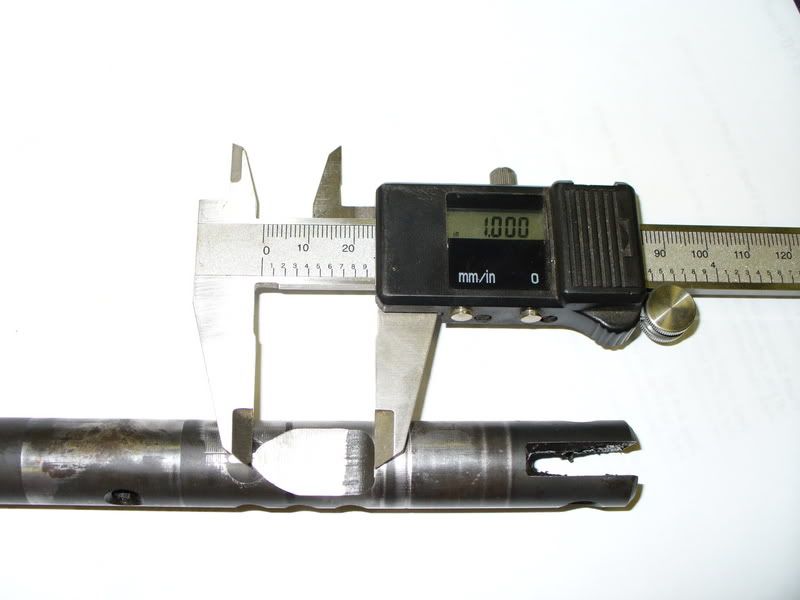
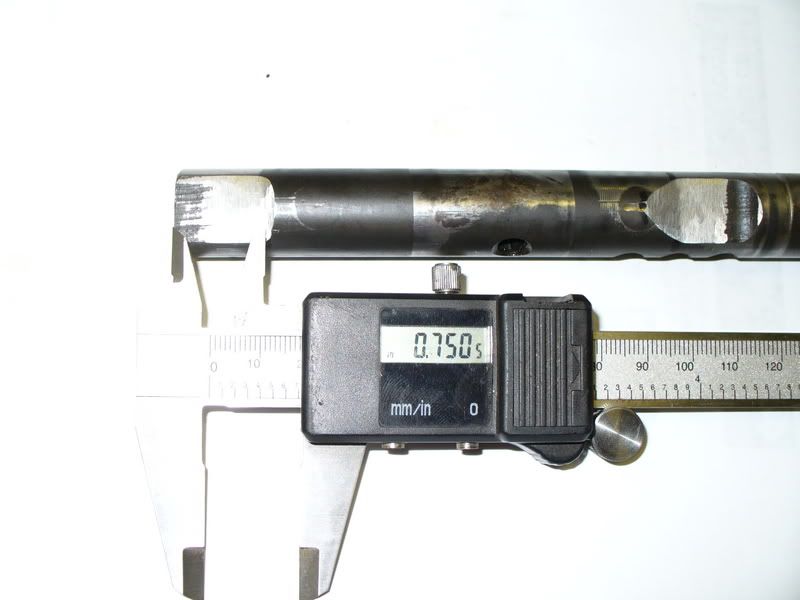
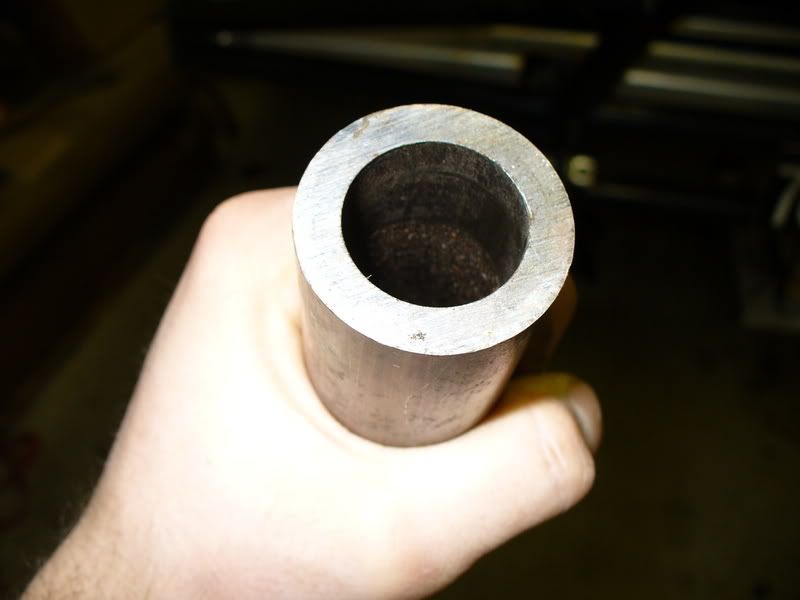
After rebuilding the t-case it was time to grind the shift rail for the twin stick conversion. I just used an angle grinder to grind it down, just taking a tiny bit at a time. Here's the modified shift rail:

Image

Image

Image

Image

That's all for now, tomorrow I will cover how I made the shift linkages, and shifters which mount in the factory location.
'79 F-150
'49 CJ-3A
User avatar
Leach
Posts: 823
Joined: Tue Dec 14, 2004 10:41 pm

Post by Leach »

Love the tranny jack, not a bad idea/execution. Nice man, time for front digs though better have a good ebrake/cutting brake.
member # dos
User avatar
TerryD
Posts: 1905
Joined: Mon Sep 04, 2006 7:57 pm
Location: Covington, Va
Contact:

Post by TerryD »

yeah, time for those linelocks we talked about!!!!!!
Terry
Offroading: The hobby of turning perfectly good vehicles into scrap metal. :cool:
User avatar
VerticalTRX
Club President
Posts: 758
Joined: Wed Oct 26, 2005 12:51 pm
Location: Southwest VA
Contact:

Post by VerticalTRX »

Yeah F/R line locks will be in the works sometime in the near future, however I was quite surprised at how well it did a front dig with just holding the brakes. It pretty much pivoted around one back tire, I guess my rear brakes must be working better than I through.
'79 F-150
'49 CJ-3A
User avatar
VerticalTRX
Club President
Posts: 758
Joined: Wed Oct 26, 2005 12:51 pm
Location: Southwest VA
Contact:

Post by VerticalTRX »

Here's the details on the twin stick shifters & linkages:

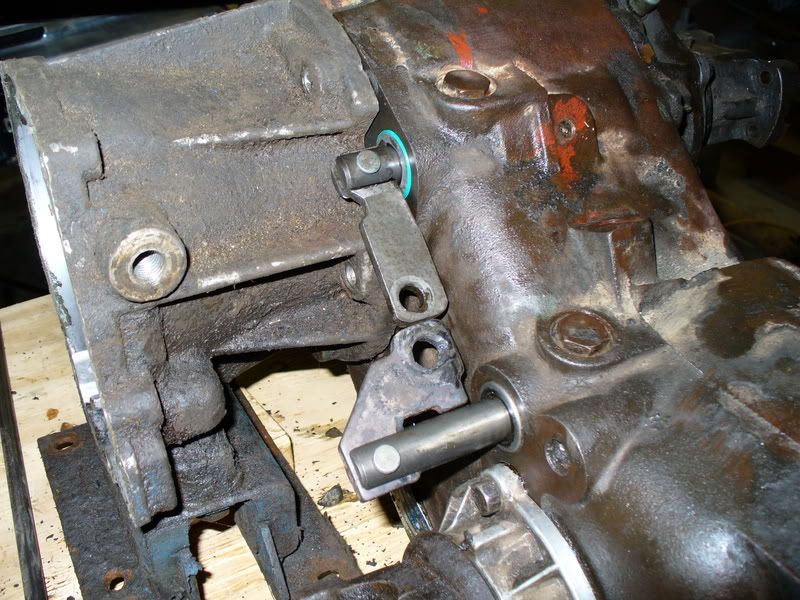
First I cut the factory link bar in half, flipped the rear shift bar, and ground down and reinstalled the front shift bar. I used the factory hole in the rear shift bar, and made a new hole in the front shift bar(had to cut it with a torch since this piece is apparently hardened and I didn't have the proper bits to go through it.)
Image


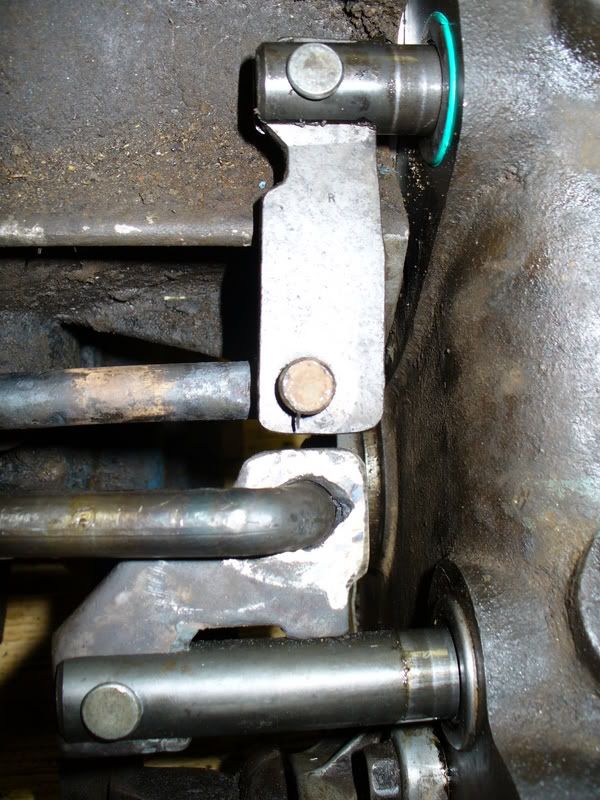
Next was the linkages. The linkage on the left was the factory one, the only change to it was to heat and straighten it. The linkage on the right is the one I made, using 1/2" round rod.
Image


Here's the completed linkages and bottom of the shifter assembly. I cut the bottom half off the factory shift lever assembly and used it for the rear shifter (the inner one). Also, I cut off the excess bushing/tube on it and used it for the bushing on the new front shift lever (outer.) The outer shift lever was made using 1/4" plate. Both shifters hinge on the factory bolt, and used the factory plastic bushings.
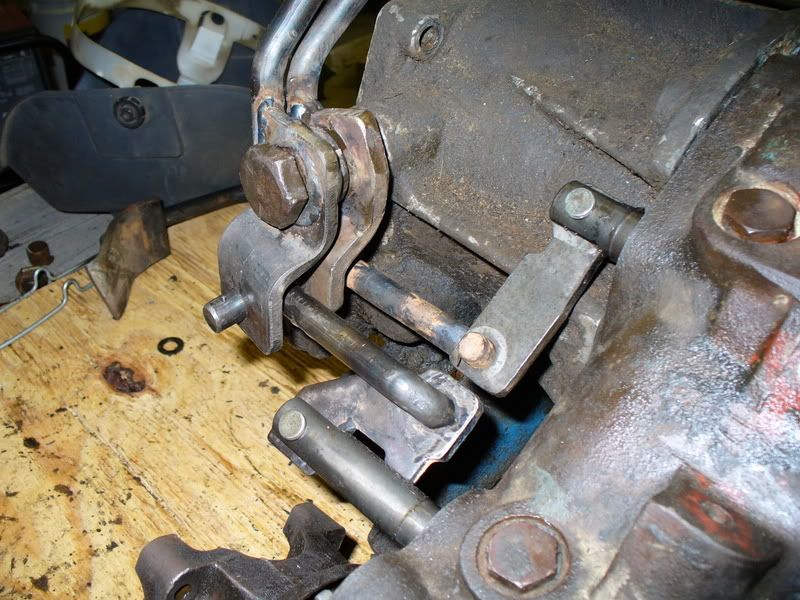
Image

Here's the completed shifters, made from 1/2" rod.
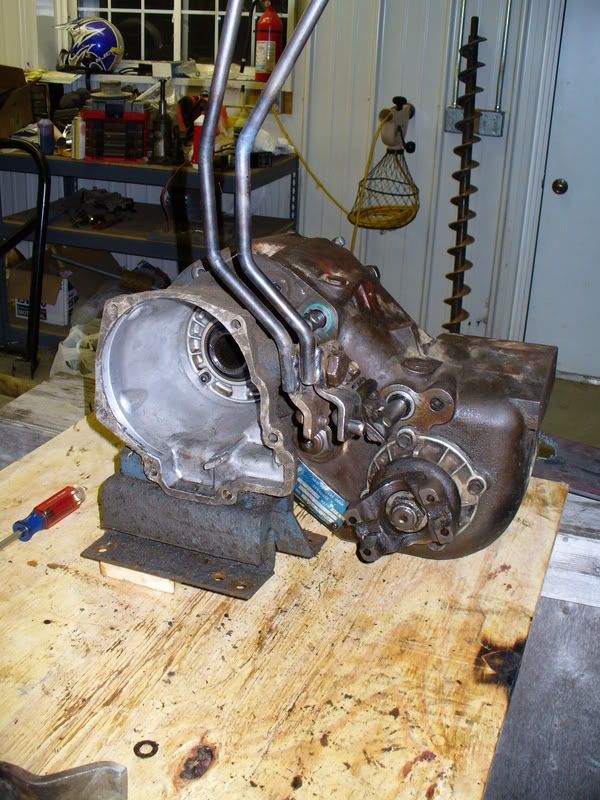
Image


Next was to cut out an adapter plate to mount the shifter boot into the factory location:
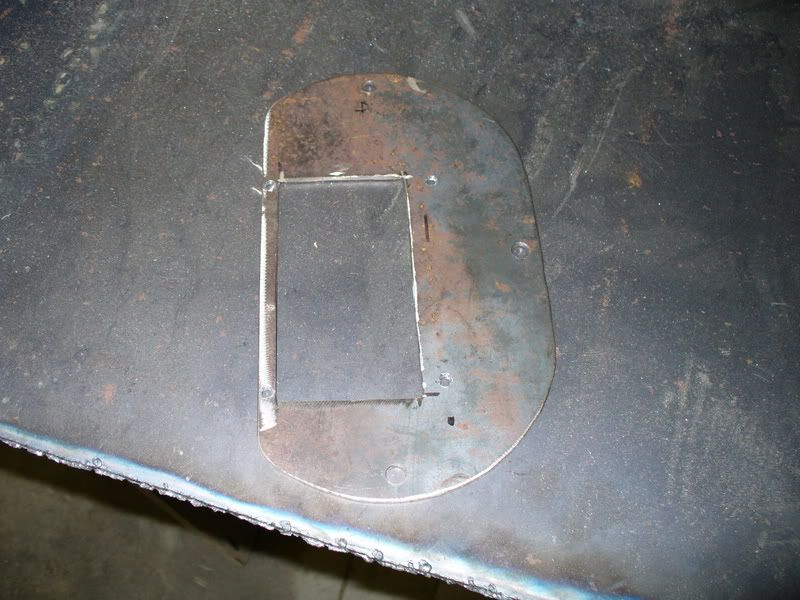
Image


Here's a picture of the final installation. I used a Dana 300 twinstick boot which fit perfectly around the 1/2" dia. shifters. I welded a fine thread bolt (can't remember dia.) to the top of each stick so the factory shift knobs would screw back on:
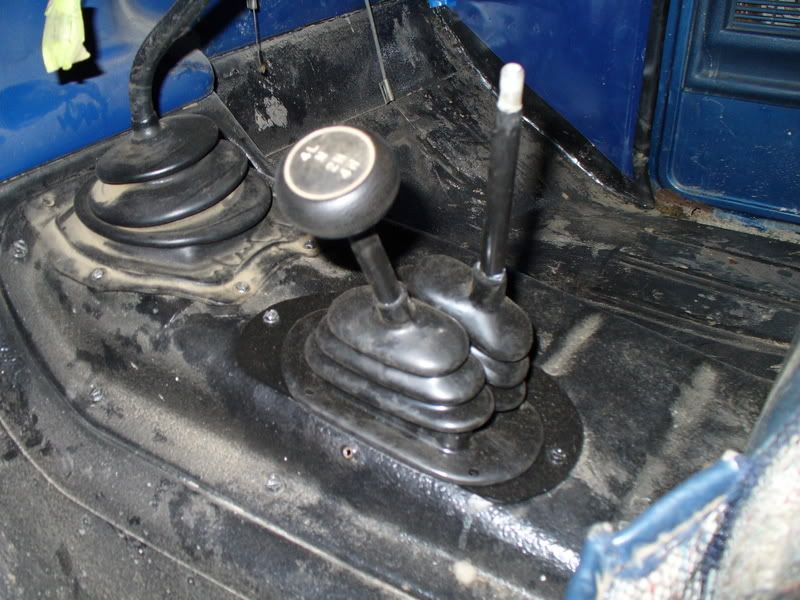
Image
(I still need one more factory shift knob, so if anyone has one let me know)


Next step is building a 1.5" .250 wall tie-rod and drag link using GM 1-ton TRE's. Hopefully I'll get to that fairly soon.
'79 F-150
'49 CJ-3A
User avatar
VerticalTRX
Club President
Posts: 758
Joined: Wed Oct 26, 2005 12:51 pm
Location: Southwest VA
Contact:

Post by VerticalTRX »

I was curious on how much I've actually spent on this rig so I totaled it all up. Here's the parts list, it seems as though I've gone way over my original budget of $3000.

'79 F-150 SWB $500

Engine:

Junkyard 351w long
block $200
Speed Pro Rebuild Kit
w/ 9.25:1 pistons $350
Edlebrock Performer
Intake $176
Summit Shorty Headers $150
ARP head, main and rod
bolts $130
Machine shop work $300
Custom pushrods $40
Remanned E7TE heads $230
Proform HEI dizzy $150
Truck Oil pan $85
Carb adapter $15
Q-jet $0
Q-jet rebuild kit $15
14"x3" Round K&N $36
Air filter riser and
stud kit $10
Comp Extreme 4x4 cam $115
Ford Racing tall valve
covers $100

Motor Total: $2102
Misc:

GM-1 wire alternator $50
3 core Heavy Duty
Radiator $120
Starter $50
Water pump $25
P/S pressure hose $17
Brake pads & shoes $36
All new brake lines $85
4 cheapo shocks $65
Stuff for twin-stick $30
one 15x8 rim (for spare) $45
4- Q78-15 TSL's $759
Aluminum tool box $0
Misc. bolts & hardware $70
LED taillights $80
1 gal. Balck Rustoleum $30
10 cans of Duplicolor
Royal Blue $45
5 cans Rustoleum Primer $30
2 bottles of rust
converter $15
Duplicolor bedliner kit $40
4 3/4" shackles $52
Gas tank $100
Misc. Exhaust bends&
pipe $30

Drivetrain:

Flywheel $58
11" clutch $91
NP205 seal kit $30
9" rebuild kit $90
4.10 R&P for 9" $130
31sp 9" shaft from JY $30
297x u-joints for front
axle $30
1330 u-joint for rear
axle $15


Cab/Frame/Suspension/Fabbed parts:

'78 F-150 Parts donor truck
(for the cab, etc) $80
Floor pans and cab
corner $110
3 sticks of 1.5" sch 40. $192
7x7' sheet of 1/8 plate $180
2"x.125 channel,
one stick $30
2x3x.25" Angle, 15' $40
6"x3/16" channel,
one stick $65
Cab mounts $50
4" Skyjacker lift coils $130
2" rear add-a-leafs $65
u-bolts $15
C-wedge & Radius arm
bushings $30
Spring bushings $20

Grand Total: $5857 :eek:
'79 F-150
'49 CJ-3A
User avatar
TerryD
Posts: 1905
Joined: Mon Sep 04, 2006 7:57 pm
Location: Covington, Va
Contact:

Post by TerryD »

:eek: is fkn right dude!!!! but, still cheaper than buying a new one, and also a hell of a lot more fun
Terry
Offroading: The hobby of turning perfectly good vehicles into scrap metal. :cool:
User avatar
Yoda
Posts: 497
Joined: Mon Aug 28, 2006 10:23 pm
Location: Charlottesville

Post by Yoda »

yea you spent alot but you've completely turned an old farm truck that had seen better days into a fully capable drive shaft twister pretty freakin sweet if you ask me.
DD: 2003 GC Limited, 4.7L
Trail Rig: hmmm
User avatar
BlueDodgeRam
Posts: 1398
Joined: Sat Aug 26, 2006 8:52 pm
Location: Riner, VA

Post by BlueDodgeRam »

Yoda wrote:yea you spent alot but you've completely turned an old farm truck that had seen better days into a fully capable drive shaft twister pretty freakin sweet if you ask me.
x2 :beer: now admire my avatar
Treehugger v2.0

'16 GMC Sierra Denali HD 3500SRW, Duramax

'07 WRF450F Supermoto
User avatar
MILLER
Posts: 514
Joined: Sat Apr 01, 2006 12:29 pm
Location: NOVA

Post by MILLER »

BlueDodgeRam wrote:
x2 :beer: now admire my avatar[/quote]

Fawkin A, we need a :lol2: with DA on the hammer for dumb ass. No avatars that move
92 Toyota pickup, 5VZFE, SAS, 30 splines, football cover, spooled and welded, 4.10s, SOS prototype rear disc brake conversion, soon to be Maryland inspected
User avatar
VerticalTRX
Club President
Posts: 758
Joined: Wed Oct 26, 2005 12:51 pm
Location: Southwest VA
Contact:

Post by VerticalTRX »

Time for some more tech :flipoff2:

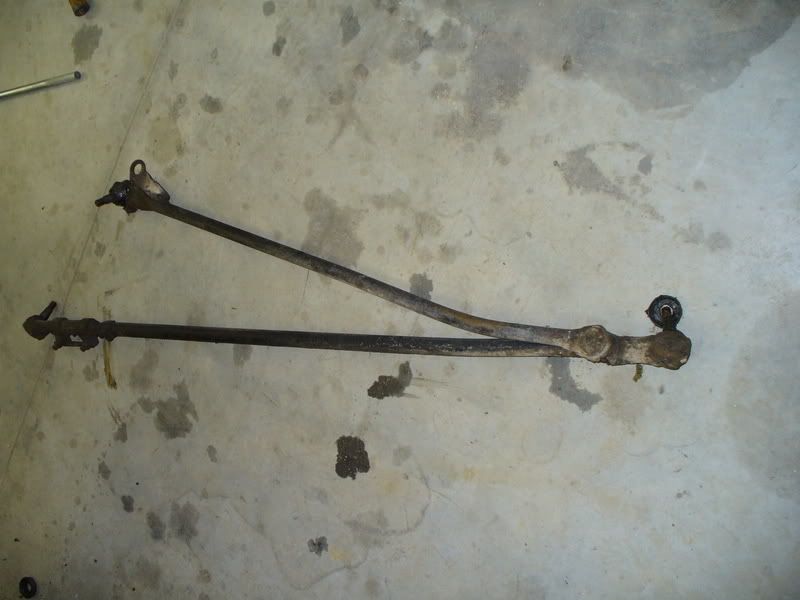
The last trip to Uwharrie I finished off my tie-rod and drag link on that damn stump above Kodack Rock:
Image

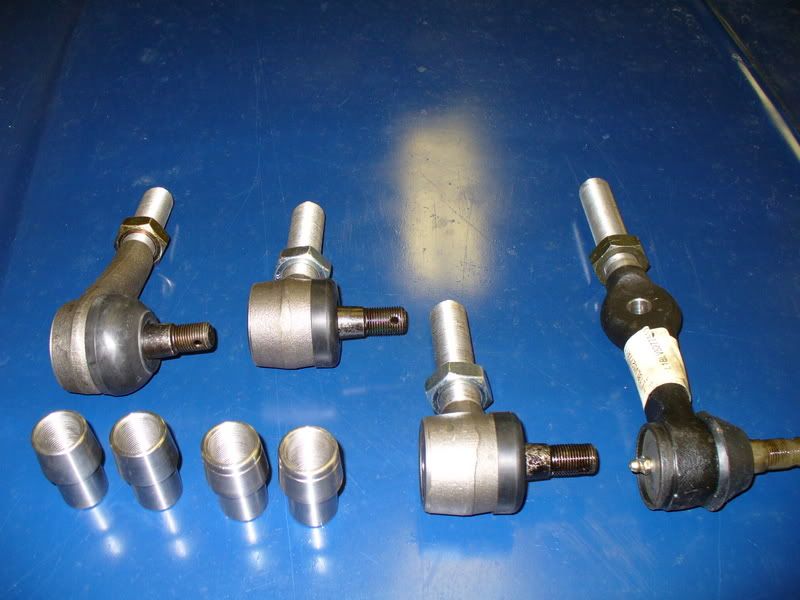
So I decided it was time to build a new assembly with a little more beef this time (not to mention the 28 yr old TRE's that had about a 1/2" of play each.) I ordered up some threaded tube adapters from polyperformance and purchased the GM 1-ton TRE's from Advance, TRW brand with a lifetime warranty.
Image

Also got some super stout 1.5"x.250 wall DOM
Image

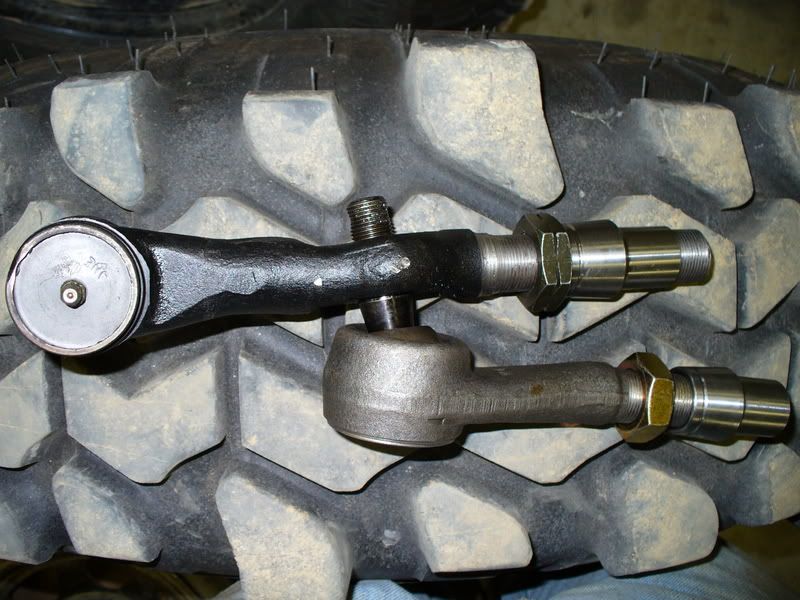
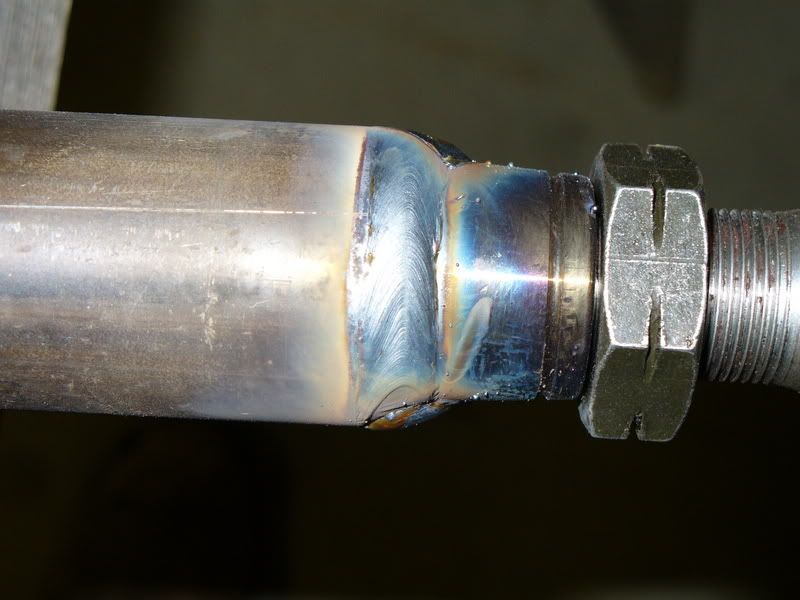
Here's the pass. side TRE reamed out to accept the drag link end (note, I originally had planned to use a standard RH thread TRE here, but went with this high angle unit for tube clearance and to eliminate any possible binding.)
Image

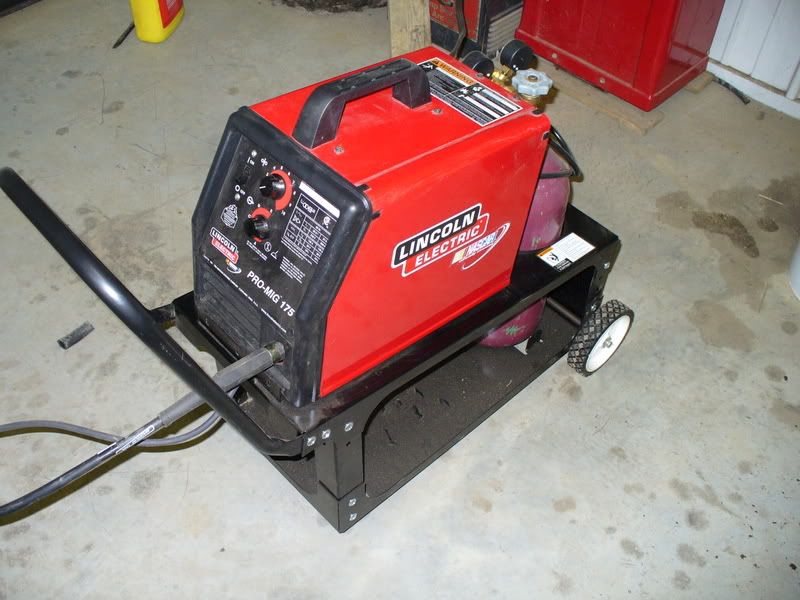
This past month I went ahead and spent a little coin on some tools, one of which was a nice MIG welder, I wish I'd have gotten this BEFORE I started building the rig instead of after, (OK Benny, you were right.)
Image

The results are much nicer welds than AC Stick:
Image

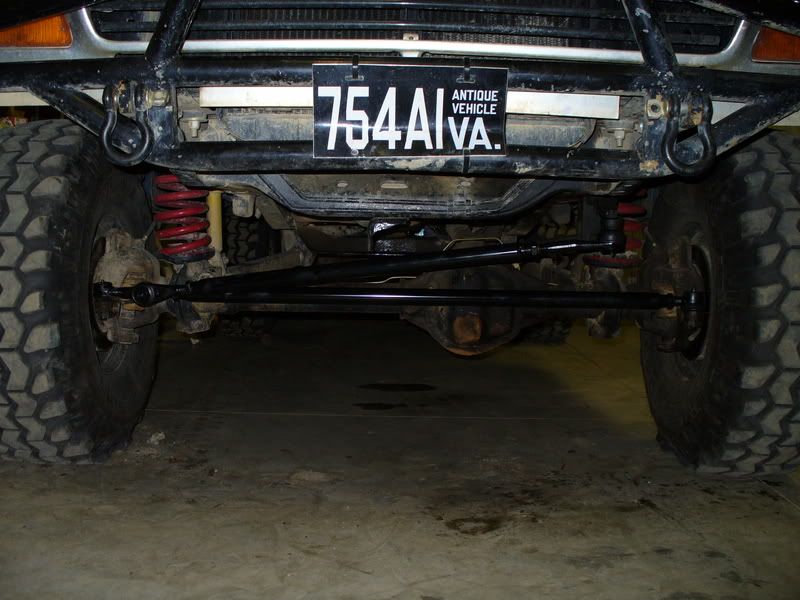
Here's the completed assembly, the pitman arm wasn't too hard to ream but those knuckles were some Hard SOBs.
Image

Unfortunately now with tight TRE's is made evident how bad the track bar bushings are (front axle moves about 1" side to side when I steer), so I'm off to get some new bushings this afternoon.
'79 F-150
'49 CJ-3A
User avatar
Steinberg
Posts: 2182
Joined: Tue Dec 14, 2004 9:52 pm

Post by Steinberg »

I have not been able to keep rubber tracbar bushings intact (w/out death wobble) for more than 4-6 months at a time. I suggest going poly. for a little while I was considering buying a block of nyloil (oil impregnated nylon) and machining a bushing for mine, but that project fell to the wayside.
The Rescue Ranger: in pieces and scattered about the yard.
User avatar
TerryD
Posts: 1905
Joined: Mon Sep 04, 2006 7:57 pm
Location: Covington, Va
Contact:

Post by TerryD »

SWEET MAN!!! drive any better now??? did that fan work for you, or did you have time to work w/ it???
Terry
Offroading: The hobby of turning perfectly good vehicles into scrap metal. :cool:
User avatar
VerticalTRX
Club President
Posts: 758
Joined: Wed Oct 26, 2005 12:51 pm
Location: Southwest VA
Contact:

Post by VerticalTRX »

Piney wrote:I have not been able to keep rubber tracbar bushings intact (w/out death wobble) for more than 4-6 months at a time. I suggest going poly. for a little while I was considering buying a block of nyloil (oil impregnated nylon) and machining a bushing for mine, but that project fell to the wayside.
Yeah, I can imagine that. Advance auto has some TRW bushings for $19 which I think are poly (they are bright ass blue, so I would assume they aren't rubber)
TerryD wrote:SWEET MAN!!! drive any better now??? did that fan work for you, or did you have time to work w/ it???
Haha, actually it drives worse. Steering is twitchy and there's a very minor death wobble every now and then. I'm getting it aligned this afternoon, and will be stopping by advance for some new track bar bushings, hopefully those things will fix it up. The fan worked awesome though, I should have put it on from the beginning. There's a very noticeable increase in power and it will easily pull to almost 5K now, the fan that was on there was some 8 blade aftermarket monster, prolly was killing 20hp. Not sure on the MPG increase, its running like shit around 2,000 rpms so it wouldn't have been a good test.
'79 F-150
'49 CJ-3A
User avatar
Steinberg
Posts: 2182
Joined: Tue Dec 14, 2004 9:52 pm

Post by Steinberg »

grease the poly bushings. for about as many accounts of rubber ones falling apart, I've also heard that the poly ones wearing out the hole in the middle from friction.

you have better luck at the parts stores than I. I went to all the major ones and nobody had poly items short of a FULL bushing kit. not surprised they were full of shit.
The Rescue Ranger: in pieces and scattered about the yard.
Post Reply